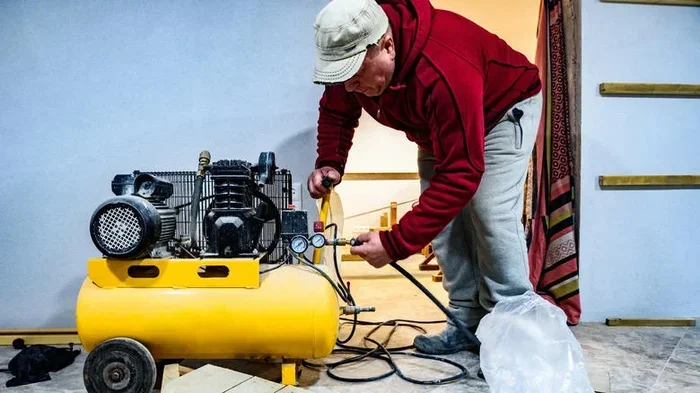
How to Get Water Out of Your Air Compressor for Good
Water in your air compressor can cause rust, damage tools, and ruin your compressed air system. This guide shows you exactly how to get water out of air compressor tanks, drains, and lines with simple tools and proven methods. You will learn why moisture builds up, the supplies you need, a step-by-step removal process, and how to prevent water from coming back. Follow these tips to keep your compressor running strong for years.
If you own an air compressor, you have probably opened the drain valve and seen a pool of nasty water sitting at the bottom. It is a common problem that every compressor owner faces. But did you know that letting water sit in your tank can cause serious damage?
Water inside your compressor leads to rust, corroded pipes, and ruined pneumatic tools. It can even lower your air pressure and make your tools run poorly. The good news is that removing water is simple, and preventing it from coming back is even easier once you know how.
This guide walks you through everything you need to know about how to get water out of air compressor systems. We will cover why water builds up, the tools you need, a step-by-step removal process, and the best ways to stop moisture from returning. Whether you use a small shop compressor or a large industrial unit, these tips will help you keep your system running clean and dry.
Key Takeaways
- Condensation is the main culprit: Warm air cooling inside your compressor tank creates water that needs regular removal.
- Drain valves are your first line of defense: Knowing how to use and maintain your tank drain valve prevents most moisture problems.
- Automatic drain valves save time: Upgrading to an auto-drain option means less manual work and consistent moisture removal.
- Prevention beats cure: Using a moisture trap, air dryer, or desiccant filter keeps water from entering your system in the first place.
- Regular maintenance matters: A simple weekly drain routine extends the life of your compressor and protects your pneumatic tools.
- Know when to call a pro: Rust inside the tank or persistent moisture may need professional attention to avoid costly repairs.
📑 Table of Contents
- Why Water Builds Up Inside Your Air Compressor
- Tools and Supplies You Will Need
- Step-by-Step Guide to Getting Water Out of Your Compressor
- Preventing Moisture Buildup Going Forward
- When to Call a Professional
- Common Mistakes to Avoid When Draining Your Compressor
- How Often Should You Drain Your Air Compressor?
- Quick Tips for Keeping Your Compressor Dry
- Final Thoughts
Why Water Builds Up Inside Your Air Compressor
Understanding why water appears is the first step to solving the problem. Air contains moisture in the form of invisible water vapor. When your compressor squeezes that air, the temperature rises. But once the compressed air cools down, that vapor turns into liquid water. This process is called condensation.
Think of it like a cold glass of water on a hot day. The moisture in the air collects on the outside of the glass. The same thing happens inside your compressor tank. Every time you run your compressor, you are creating condensation.
How Condensation Forms in the Tank
Here is what happens step by step:
- The compressor pulls in warm, humid air from the room.
- The pump pressurizes the air, which heats it up.
- The hot air enters the tank and starts to cool.
- As the air cools, water vapor turns into liquid droplets.
- Those droplets collect at the bottom of the tank.
Over time, this water builds up. If you do not remove it regularly, the tank interior starts to rust. Rust flakes can clog your regulator valve, damage your air hose, and ruin the tools you power with compressed air. This is why air compressor maintenance should always include draining the tank.
Factors That Increase Moisture Buildup
Not all compressors collect water at the same rate. Several factors speed up moisture buildup:
- High humidity in your workspace: Wet environments mean more water vapor enters the compressor.
- Longer run times: The longer your compressor runs, the more air cycles through and the more condensation forms.
- Larger tank size: Bigger tanks hold more air, which means more surface area for condensation to form.
- Lower ambient temperatures: Cooler rooms cause air to condense faster.
- No moisture trap installed: Without a separator or filter, water travels freely through your system.
Knowing these factors helps you adjust your compressor maintenance schedule and take preventive steps before water becomes a big problem.
Tools and Supplies You Will Need
Before you start draining water, gather the right tools. The good news is that you do not need anything fancy. Most of what you need is probably already in your toolbox.
Basic Supplies for Water Removal
- A wrench or pliers (for opening the drain valve)
- A container or bucket to catch the water
- Rags or towels for wiping up spills
- Teflon tape (for sealing threaded connections)
- Safety glasses (to protect your eyes from debris)
- Gloves (the water may be cold or contain oil)
Upgrades That Prevent Future Moisture
If you want to take your moisture removal to the next level, consider these upgrades:
- Automatic drain valve: This device opens at set intervals and drains water without you lifting a finger.
- Moisture trap or separator: Installed in the air line, it catches water before it reaches your tools.
- Desiccant air dryer: This removes moisture from the air using a drying material, keeping your lines completely dry.
- In-line air filter: A quality filter traps water droplets and oil mist before they reach your pneumatic tools.
Think of it this way. Just like you would properly size a generator for your home’s power needs, you should match your moisture removal tools to your compressor’s output. A small shop compressor needs a basic trap, while a heavy-duty system may need a full desiccant dryer.
Step-by-Step Guide to Getting Water Out of Your Compressor
Now let us get into the hands-on part. Follow these steps each time you drain your compressor, and you will keep your system running at peak performance.
Step 1: Turn Off the Compressor and Release Pressure
Safety first. Start by turning off the compressor and unplugging it from the power source. Then, slowly open the drain valve to release all remaining air pressure. You should hear the hissing sound get quieter as pressure drops. Never attempt to drain a pressurized tank. This is one of the most important air compressor troubleshooting safety rules.
Step 2: Position a Container Under the Drain Valve
Place your bucket or pan directly under the drain valve. Depending on your compressor, the valve may be at the bottom of the tank or on the side. Make sure the container is large enough to hold all the water that will come out.
Step 3: Open the Drain Valve
Using your wrench or pliers, slowly turn the drain valve counterclockwise. Water will flow out along with some compressed air. Let it drain completely. You may hear a gurgling sound as the last of the water exits. This is normal.
Tip: If your valve is hard to turn, do not force it. Spray some penetrating oil on the threads and wait a few minutes. Forcing a stuck valve can crack the tank or damage the fitting.
Step 4: Close the Drain Valve Tightly
Once water stops flowing, close the valve by turning it clockwise. Make sure it is snug but do not over-tighten. If the valve threads are bare metal, wrap a few layers of Teflon tape around the threads before tightening. This creates a seal and prevents leaks.
Step 5: Wipe Down the Exterior
Use a dry rag to wipe up any spilled water around the tank and valve area. This prevents surface rust on the outside of your compressor. It also keeps your workspace clean and safe.
Step 6: Check the Moisture Trap and Filter
While you are at it, inspect your moisture trap or in-line filter. If it is full of water, empty it. If the filter element looks dirty or clogged, replace it. A clean filter does a much better job at moisture removal than a dirty one.
Doing this routine after every use, or at least once a week, makes a huge difference. It is similar to how you would maintain a portable generator for continuous run times — regular care prevents bigger problems down the road.
Preventing Moisture Buildup Going Forward
Draining your tank is important, but prevention is even better. Here are the best strategies to keep water from building up in the first place.
Install an Automatic Drain Valve
An automatic drain valve removes water at set intervals without any manual effort. You set the timer, and the valve opens and drains water on its own. These are especially useful if you run your compressor for long hours or use it in a humid environment.
Automatic drain valves come in different styles. Some use a timer, while others use a float mechanism that opens when water reaches a certain level. Both options work well and are easy to install on most compressor tanks.
Use a Moisture Separator on the Output Line
A moisture separator sits between your compressor and your air hose. It uses centrifugal force to spin water droplets out of the air stream. The separated water collects in a bottom chamber that you can drain manually.
This is one of the most effective ways to protect your pneumatic tools from moisture damage. Water in your air lines can cause rust inside your tools, leading to expensive repairs or replacements.
Consider a Desiccant or Refrigerated Air Dryer
For serious applications, an air dryer is the gold standard for moisture removal. There are two main types:
- Refrigerated dryers: These cool the compressed air to condense water, which then drains away. They are affordable and work well for most shop applications.
- Desiccant dryers: These use a drying material that absorbs moisture from the air. They produce extremely dry air and are ideal for sensitive applications like painting or medical equipment.
If you are running a large compressed air system in a workshop or factory, a good air dryer pays for itself quickly by extending the life of your tools and equipment.
Control the Environment Around Your Compressor
Simple environmental changes can reduce moisture buildup significantly:
- Run your compressor in a climate-controlled space when possible.
- Keep the area well-ventilated to reduce humidity.
- Use an air intake filter to keep dust and moisture out of the intake.
- Insulate air hoses in cold environments to prevent condensation inside the lines.
These steps are easy to take and make a real difference. Think of it like maintaining any power equipment — whether you are learning how to hook a generator to your house or setting up your compressor, proper setup prevents problems later.
Follow a Regular Maintenance Schedule
Consistency is key. Create a simple maintenance checklist and stick to it:
- Drain the tank after every use or at least twice a week.
- Check and clean the moisture trap weekly.
- Inspect air hoses for leaks or water buildup monthly.
- Replace filter elements every three to six months.
- Have a professional inspect the tank for rust annually.
Following this schedule keeps your compressor healthy and your tools running smoothly. It also saves you money by preventing expensive repairs caused by water damage.
When to Call a Professional
Most water removal tasks are DIY-friendly. But there are times when you should call in a pro. Here are the warning signs that your compressor needs professional attention:
- Rust inside the tank: If you see rust flakes when you drain the tank, the interior may be corroded. A professional can assess whether the tank needs repair or replacement.
- Persistent moisture despite regular draining: If water keeps building up even after you follow a strict maintenance routine, there may be a deeper issue with your compressor pump or sealing system.
- Water in the oil: If you notice water mixing with your compressor oil, this is a serious problem that needs immediate attention. It can damage the compressor pump and reduce efficiency.
- Cracked or damaged tank: Any visible cracks or bulges in the tank are dangerous. Do not use the compressor. Have it inspected by a qualified technician.
Dealing with these issues early prevents bigger and more expensive problems. Just like understanding how much a generator costs helps you budget for equipment, knowing when to invest in professional compressor repair saves you from unexpected breakdowns.
Common Mistakes to Avoid When Draining Your Compressor
Even experienced users make mistakes. Here are the most common ones and how to avoid them:
- Forgetting to release pressure first: Always depressurize the tank before opening the drain valve. Opening a pressurized valve can cause injury or damage.
- Draining only partially: Make sure you let all the water flow out. Stopping early leaves water at the bottom, which continues to cause rust.
- Ignoring the moisture trap: The drain valve removes tank water, but the moisture trap protects your tools. Both need regular attention.
- Using the wrong container: Use a sturdy container that can handle hot water and pressurized air. A flimsy plastic bowl can crack or tip over.
- Skipping maintenance during winter: Cold weather actually increases condensation. Do not skip your drain routine in the winter months.
- Not replacing worn parts: A worn drain valve or cracked hose defeats the purpose of regular draining. Inspect and replace parts as needed.
Avoiding these mistakes keeps your compressor running efficiently and extends its lifespan. A well-maintained compressor can last 10 to 15 years or more with proper care.
How Often Should You Drain Your Air Compressor?
The short answer is after every use. But let us break it down further:
- Light use (occasional DIY projects): Drain after each use and do a thorough inspection monthly.
- Moderate use (regular workshop use): Drain daily and check moisture traps weekly.
- Heavy use (industrial or continuous operation): Drain after every shift and consider an automatic drain valve.
The more you use your compressor, the more often you need to drain it. Think of it like maintaining any piece of power equipment. Just as you would follow guidance on how much generator you need for your power requirements, you should match your maintenance frequency to your usage level.
Quick Tips for Keeping Your Compressor Dry
Here are some fast, easy tips that make a big difference:
- Keep a dedicated rag next to your compressor for quick wipe-downs after draining.
- Label your drain valve so others in your shop know how to use it.
- Use a clear moisture trap so you can see water buildup without opening anything.
- Store your compressor in a dry, temperature-controlled area when not in use.
- Add a quick-connect fitting to your drain valve for faster, easier access.
- Keep a log of your drain dates to stay consistent with your maintenance routine.
These small habits add up over time. They protect your investment and keep your pneumatic tools running at their best.
Final Thoughts
Knowing how to get water out of your air compressor is one of the simplest yet most important maintenance tasks you can do. It takes just a few minutes, requires minimal tools, and prevents costly damage to your tank, hoses, and tools.
Remember to drain your tank regularly, use a moisture trap or separator, and consider upgrading to an automatic drain valve for convenience. Keep an eye on your environment and adjust your maintenance routine based on humidity and usage levels. And when in doubt, do not hesitate to call a professional.
Your compressor is a valuable investment. Treat it well with proper air compressor maintenance, and it will serve you reliably for many years to come. Start your drain routine today, and you will notice the difference in your air pressure, tool performance, and overall system health.
Frequently Asked Questions
Can water in my air compressor damage my pneumatic tools?
Yes, absolutely. Water in your compressed air lines can cause rust and corrosion inside pneumatic tools. It can also wash away lubrication, leading to premature wear and eventual tool failure. Always use a moisture trap to protect your tools from water damage.
How do I know if my air compressor tank has rust inside?
When you drain the tank, look for rust-colored flakes or particles in the water. You may also notice a rough texture on the inside of the drain valve. If you see significant rust, have a professional inspect the tank to determine if it needs repair or replacement.
Is an automatic drain valve worth the investment?
For most users, yes. An automatic drain valve removes water on a set schedule so you do not have to remember to drain manually. It is especially useful for heavy users or anyone who runs their compressor in a humid environment. The small cost pays for itself in time saved and better moisture control.
Can I use my air compressor in cold weather without moisture problems?
Cold weather actually increases condensation inside your compressor. You should drain your tank more frequently during winter months. Also, keep your compressor in a heated space when possible, and insulate your air hoses to reduce moisture buildup in cold conditions.
What is the difference between a moisture trap and an air dryer?
A moisture trap uses centrifugal force to separate water droplets from the air stream. It is a simple, affordable solution for most shop applications. An air dryer actively removes moisture from the air using cooling or desiccant materials. Air dryers produce much drier air and are better suited for sensitive applications like painting or medical use.
How long does a compressor tank last with proper maintenance?
With regular draining, moisture control, and proper care, a quality compressor tank can last 10 to 15 years or more. Neglecting maintenance, especially moisture removal, significantly shortens that lifespan due to internal rust and corrosion.
=== CONCLUSION ===
How to get water out of your air compressor is a straightforward process that every compressor owner should master. Regular draining, proper moisture traps, and preventive maintenance keep your system running clean and efficient. The few minutes you spend on this task each week save you hours of trouble and potentially hundreds of dollars in repairs. Start today, build a routine, and enjoy a dry, well-functioning compressor for years to come.