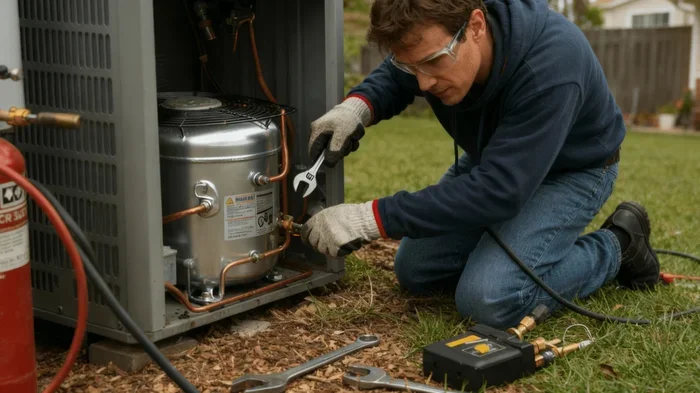
How to Replace a Compressor Without Breaking the Bank
Replacing a compressor doesn’t have to drain your wallet. This guide walks you through every step of how to replace a compressor safely and affordably, from spotting warning signs to choosing the right replacement parts. You’ll learn budget-friendly tricks, common mistakes to avoid, and when to call a pro.
Your compressor just died. Maybe it made a scary grinding noise, or maybe it simply stopped pushing air one morning. Either way, your first thought is probably the same: how much is this going to cost?
Here’s the good news. How to replace a compressor doesn’t have to be an expensive nightmare. With the right know-how and a bit of elbow grease, you can handle this job yourself and keep your hard-earned money where it belongs. This guide breaks down everything you need to know, from identifying the problem to firing up your new compressor for the first time.
We’ll cover the signs that mean your compressor is on its way out, the parts you’ll need, step-by-step replacement instructions, and smart ways to cut costs. Whether you’re dealing with a small portable unit or a larger stationary compressor, the principles stay the same. Let’s get into it.
Key Takeaways
- Spot the warning signs early: Unusual noises, low pressure, and oil leaks signal it’s time to act.
- DIY replacement can save hundreds: Doing the work yourself cuts labor costs significantly.
- Choose the right replacement parts: Matching specs ensures your new compressor runs smoothly and lasts longer.
- Budget for hidden costs: Factor in parts, tools, and potential downtime when planning your spend.
- Maintenance extends lifespan: Regular upkeep after replacement keeps your compressor running for years.
- Know when to call a pro: Complex jobs like electrical wiring or refrigerant handling need a licensed technician.
📑 Table of Contents
- Why Compressors Fail in the First Place
- Signs Your Compressor Needs Replacement
- Gathering Your Tools and Replacement Parts
- Step-by-Step Compressor Replacement Guide
- How Much Does It Really Cost to Replace a Compressor?
- Tips to Save Money on Your Compressor Replacement
- Common Mistakes to Avoid When Replacing a Compressor
- When to Call a Professional Instead
- Maintaining Your New Compressor for Long Life
- Final Thoughts
Why Compressors Fail in the First Place
Understanding why compressors break down helps you prevent future problems. Most failures aren’t random. They come from wear, neglect, or a single event that pushed the machine past its limits.
Common Causes of Compressor Failure
- Lack of lubrication: Running low on oil causes friction and heat. Over time, this destroys internal parts.
- Dirty air filters: Clogged filters force the compressor to work harder, wearing out the motor faster.
- Moisture buildup: Water inside the tank causes rust and corrosion from the inside out.
- Overuse: Running a compressor beyond its duty cycle leads to overheating and premature failure.
- Electrical issues: Power surges or faulty wiring can burn out the motor windings.
Most compressors last between 10 and 15 years with proper care. But if you skip regular maintenance, that lifespan drops fast. The good news is that knowing how to replace a compressor means you won’t be stuck waiting for a repair tech when downtime costs you money.
Signs Your Compressor Needs Replacement
Not every compressor problem means you need a full replacement. Sometimes it’s a simple fix. But certain symptoms point to deeper issues that a repair can’t solve.
Unusual Noises
Grinding, knocking, or squealing sounds are red flags. These noises usually mean internal parts are worn or damaged. A rattling sound might indicate loose components, while a high-pitched whine often signals bearing failure.
Loss of Pressure
If your compressor takes forever to build pressure or can’t reach its target PSI, the internal seals or valves are likely failing. Check for air leaks around fittings first. If everything looks tight but pressure still drops, the compressor itself is the problem.
Oil Leaks
Oil pooling under the compressor is never a good sign. Small drips might just need a new gasket, but major leaks often mean the pump or housing is cracked. At that point, replacement makes more sense than repair.
Tripping Breakers
If your compressor keeps tripping the circuit breaker, the motor is drawing too much current. This could be a failing capacitor, worn windings, or a seized piston. Any of these issues may warrant a full compressor swap.
Gathering Your Tools and Replacement Parts
Before you start tearing things apart, make sure you have everything you need. Showing up halfway through a job because you’re missing a part is frustrating and wastes time.
Essential Tools
- Wrench set (both standard and metric)
- Screwdrivers (flathead and Phillips)
- Pliers and needle-nose pliers
- Pressure gauge
- Socket set
- Safety glasses and gloves
- Pipe wrench
- Teflon tape
- Shop vacuum or compressed air for cleaning
Replacement Parts to Look For
Your replacement needs depend on what’s broken. Common parts include the pump assembly, motor, pressure switch, unloader valve, and tank fittings. Always match the new parts to your compressor’s model number. Using the wrong specs can cause further damage or void any remaining warranty.
Pro tip: Take photos before you disassemble anything. When it’s time to reassemble, those pictures will save you a lot of guesswork. Also, check online forums for your specific model. Other DIYers often share disassembly guides and part numbers that make how to replace a compressor much easier.
Step-by-Step Compressor Replacement Guide
Now for the part you’ve been waiting for. Here’s how to actually pull off the replacement. Follow these steps in order, and you’ll have a smooth process from start to finish.
Step 1: Disconnect Power
Safety first. Unplug the compressor from the wall or disconnect the power supply at the breaker box. If you’re working on a gas-powered unit, close the fuel valve and disconnect the spark plug wire. You do not want this thing starting up while your hands are inside it.
Step 2: Drain the Tank
Open the drain valve at the bottom of the tank and let all the air and oil escape. Place a catch pan underneath. Even if the tank looks empty, give it a few minutes to fully release pressure. The last thing you want is a pressurized tank fighting you while you work.
Step 3: Remove the Old Compressor
Start by disconnecting the air lines. Use your wrench to loosen the fittings and cap them off so no debris enters the system. Next, remove the mounting bolts that secure the compressor to its base or frame. Carefully lift the old unit out and set it aside.
If you’re replacing just the pump or motor, you’ll only need to disconnect the specific components. But for a full unit swap, you’re essentially removing everything and installing the new one in its place.
Step 4: Install the New Compressor
Position the new compressor in the same spot. Secure it with mounting bolts and make sure it sits level and stable. Reconnect the air lines using fresh Teflon tape on the threads to prevent leaks. Tighten all fittings firmly but don’t overdo it — you can strip threads easily.
Step 5: Refill and Test
Close the drain valve, refill the tank with oil if needed, and reconnect the power supply. Turn on the compressor and listen carefully. Does it build pressure smoothly? Are there any new noises? Check every fitting for leaks by brushing soapy water on the connections. Bubbles mean you need to tighten that fitting.
Let the compressor run for at least 15 minutes under load. Watch the pressure gauge and listen for anything unusual. A successful replacement should feel quiet, steady, and powerful.
How Much Does It Really Cost to Replace a Compressor?
The cost of replacing a compressor varies a lot depending on the type and size of the unit. Small portable compressors might cost $200 to $500 for a full replacement. Larger stationary units can run $1,000 or more for parts alone.
Labor costs add another layer. Hiring a professional to do the swap can add $300 to $800 depending on your location and the complexity of the job. That’s why many people choose the DIY route. Knowing how to replace a compressor yourself eliminates the labor markup entirely.
Here’s a rough cost breakdown to help you plan:
- Replacement pump only: $100 – $300
- Replacement motor only: $150 – $400
- Full portable compressor replacement: $200 – $500
- Full stationary compressor replacement: $800 – $2,500+
- Professional labor (if hiring): $300 – $800
Keep in mind that these are estimates. Your actual costs depend on the brand, model, and where you buy parts. Shopping around online can save you a surprising amount compared to buying from a local dealer.
Some people wonder how the cost of replacing a compressor compares to other equipment costs. For example, the price of a whole-home backup power unit like a whole-home generator can run significantly higher, which puts compressor replacement in a more affordable perspective. Similarly, understanding equipment costs in general helps you budget wisely for any machinery purchase.
Tips to Save Money on Your Compressor Replacement
Nobody wants to overspend on a repair job. Here are some practical ways to keep your costs down while still getting quality results.
Buy Parts Online
Online retailers often offer better prices than local stores. Compare prices across multiple websites and look for combo deals that include the parts you need. Just make sure you’re buying from reputable sellers with good return policies.
Reuse What You Can
Not everything needs to be brand new. If the tank is still in good shape and the fittings are clean, reuse them. Only replace what’s actually broken or worn. This alone can cut your costs by 30% or more.
Do the Labor Yourself
This is the biggest money-saver of all. If you’re comfortable with basic tools and following instructions, there’s no reason to pay someone else to do the work. The steps we outlined above are straightforward enough for most DIYers.
Buy Refurbished Units
If you’re replacing the entire compressor, consider a refurbished unit. Many refurbished compressors come with warranties and have been tested to work like new. You get the same performance at a fraction of the price.
Plan Around Sales and Seasonal Deals
Hardware stores often run sales in the spring and fall when compressor demand is high. If you can wait, timing your purchase can save you real money. Keep an eye on clearance sections and online coupons too.
Common Mistakes to Avoid When Replacing a Compressor
Even experienced DIYers make mistakes. Knowing what to watch out for keeps you from wasting time, money, and energy.
Skipping the Manual
Your compressor’s owner manual has specific instructions for disassembly and reassembly. Skipping it can lead to improper installation. Every model is slightly different, and the manual knows best.
Forgetting to Drain the Tank
Opening a pressurized tank is dangerous. Always drain the tank fully and verify zero pressure before you start working. This is non-negotiable.
Using the Wrong Parts
Generic parts might seem like a bargain, but they often don’t fit or perform as well as OEM replacements. Stick with parts that match your model number exactly.
Over-Tightening Fittings
Crushing a fitting or stripping a thread can turn a simple repair into a bigger problem. Hand-tighten first, then give it a quarter turn with a wrench. That’s usually enough.
Ignoring the Break-In Period
New compressors need a break-in period to seat properly. Run the unit at low pressure for the first 30 minutes and check for leaks before putting it to full use.
When to Call a Professional Instead
DIY is great, but some jobs are better left to the experts. If you’re uncomfortable working with electrical connections, refrigerant systems, or high-pressure air lines, hire a professional. Safety should always come first.
Also, if your compressor is still under warranty, opening it up yourself might void the coverage. Check your warranty terms before you start any work. In some cases, paying for professional service protects you from bigger headaches down the road.
Think of it this way. Just like you’d trust a licensed electrician for wiring a generator transfer switch, you should trust a certified technician for complex compressor installations involving refrigerant or industrial-grade electrical systems.
On the other hand, if your compressor is a simple portable or shop unit, the replacement process is well within the abilities of most homeowners. Trust your gut. If something feels beyond your skill level, it probably is. There’s no shame in calling a pro for part of the job.
Maintaining Your New Compressor for Long Life
You just replaced your compressor. Congratulations. Now the real work is making sure it lasts. Regular maintenance after replacement is the best way to protect your investment and avoid an early repeat of the whole process.
Start by checking the oil level every time you use the machine. Change the oil according to the manufacturer’s schedule, usually every 500 to 1,000 hours of operation. Clean or replace the air filter monthly if you use the compressor frequently.
Drain the tank after every use to prevent moisture buildup. Inspect all fittings and connections for leaks every few weeks, especially during the first few months with the new unit. Keep the area around the compressor clean and well-ventilated to prevent overheating.
These habits take just a few minutes each time, but they pay off big. A well-maintained compressor can easily last 15 years or more, which means your how to replace a compressor effort today protects you from future headaches and expenses.
Think about it this way. Maintaining your compressor is similar to maintaining any powered equipment. Just as you’d check the fuel consumption and oil levels on a generator — like the kind covered in this guide on generator fuel usage — regular attention to your compressor’s fluid levels and filter conditions keeps everything running efficiently.
Final Thoughts
Replacing a compressor doesn’t have to be scary or expensive. You now know the warning signs, the parts you need, the step-by-step process, and the smart ways to save money. The key is to take it one step at a time, stay safe, and don’t rush through the job.
How to replace a compressor is a skill that pays for itself the first time you do it. You’ll save on labor costs, gain confidence in your DIY abilities, and keep your equipment running without the downtime that comes from waiting on a repair technician.
Start with the small stuff. Drain the tank, check the oil, and replace worn parts before they become emergency failures. Your future self will thank you. And if you ever feel stuck, remember that every expert was once a beginner. You’ve got this.
Frequently Asked Questions
Can I replace just the pump instead of the whole compressor?
Yes, in many cases you can replace just the pump if the motor and tank are still in good condition. This is often the most cost-effective option. Make sure the replacement pump matches your compressor’s model and specifications exactly.
How long does a compressor replacement take?
A straightforward replacement usually takes 2 to 4 hours for a DIYer with basic tools. More complex installations involving electrical or refrigerant work can take longer. Having all your parts and tools ready before you start helps keep the timeline short.
Is it cheaper to replace or repair a compressor?
It depends on the damage. Minor repairs like replacing a gasket or pressure switch are usually cheaper. But if the pump or motor is severely damaged, a full replacement often makes more financial sense. Compare the repair cost against a new unit before deciding.
What size compressor do I need for home use?
For most home projects like inflating tires or running light pneumatic tools, a 1 to 2 horsepower compressor with a 6-gallon tank works well. If you plan to use heavier tools, you’ll need a larger unit. Always check the CFM and PSI requirements of your tools before choosing a size.
How often should I replace my compressor?
A well-maintained compressor typically lasts 10 to 15 years. However, heavy use or poor maintenance can shorten that significantly. Watch for signs of failure like pressure loss, unusual noises, and oil leaks, and plan your replacement before a complete breakdown leaves you stranded.
Do I need special certification to replace a compressor?
For most home and shop compressors, no special certification is needed. However, compressors that handle refrigerant or industrial-grade electrical systems do require licensed professionals. Always check local regulations and your warranty terms before starting any replacement work.