How to Install an Air Compressor with These Easy Steps
Installing an air compressor is easier than most homeowners think. This guide walks you through every step, from choosing the right unit to making safe electrical connections. You will learn how to set up your compressor correctly, avoid common mistakes, and keep it running smoothly for years.
Setting up a new air compressor in your garage or workshop feels like a big project. But honestly, it is one of the most rewarding DIY tasks you can tackle. Once your compressor is in place, you unlock a world of pneumatic tools and powerful finishing jobs. Whether you are a weekend hobbyist or a serious woodworker, a properly installed compressor makes everything smoother.
This guide covers every step you need to follow. We will walk through planning, setup, electrical connections, and ongoing care. You do not need to be a licensed electrician to get this right. A little patience and the right approach go a long way. Let us get your compressor up and running the correct way.
Key Takeaways
- Pick the right compressor: Match your unit to your power needs and workspace size before you start.
- Gather tools first: Having everything ready saves time and prevents mid-project frustration.
- Electrical safety comes first: Always follow local codes and use proper circuits and grounding.
- Level and stable placement matters: A shaky compressor wears out faster and runs less efficiently.
- Regular maintenance keeps it running: Simple habits like draining the tank extend compressor life significantly.
- Avoid these common mistakes: Skipping the pressure regulator and ignoring ventilation are top errors.
📑 Table of Contents
- What You Need Before Starting
- Step-by-Step Air Compressor Installation
- Electrical Setup and Power Considerations
- Safety Tips for Compressor Installation
- Common Installation Mistakes to Avoid
- Maintaining Your Air Compressor After Installation
- How Much Does Compressor Installation Cost?
- Final Thoughts on Installing Your Air Compressor
What You Need Before Starting
Choose the Right Compressor for Your Space
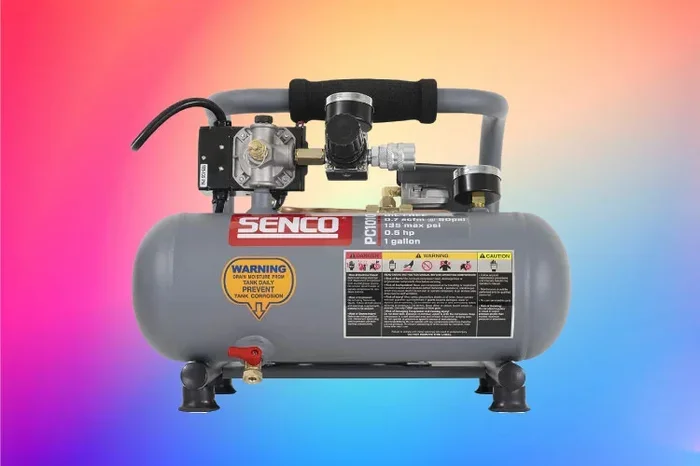
Not all compressors are the same. A portable air compressor works great for light tasks like inflating tires or powering a nail gun. A larger stationary unit handles sandblasting, spray painting, and running multiple tools at once. Think about what you will use it for most often. That decision shapes everything else.
Here are the main types you will encounter:
- Portable compressors: Lightweight, easy to move, and perfect for occasional jobs.
- Stationary compressors: Bigger tanks, more power, and built for continuous use.
- Oil-free compressors: Lower maintenance and ideal for indoor workshops.
- Oil-lubricated compressors: Quieter and longer-lasting, but they need regular oil changes.
Gather Your Tools and Materials
Before you unpack the compressor, make sure you have what you need. Running out of parts halfway through is annoying and delays the whole process. Here is a practical checklist:
- Adjustable wrenches
- Screwdriver set (Phillips and flathead)
- Power drill with bits
- Level (torpedo level works great)
- Teflon tape for threaded connections
- Safety glasses and work gloves
- Air hose and quick-connect fittings
- Pressure regulator
- Circuit tester or multimeter
Having these items on hand keeps the process moving. It also means you can focus on doing the job right instead of running to the hardware store.
Step-by-Step Air Compressor Installation
Step 1: Pick the Right Location
Where you place your compressor matters more than most people realize. The spot you choose affects performance, safety, and how long the unit lasts. Avoid damp areas with poor airflow. Moisture and heat build-up cause rust and strain the motor.
Look for a flat, solid surface. Concrete floors work best. Avoid placing the unit on uneven ground or soft surfaces. A compressor that vibrates on a wobbly table develops loose fittings over time. That leads to air leaks and frustrating downtime.
Also, leave space around the unit. Compressors need ventilation to cool down. Keep at least 12 inches of clearance on all sides. If you are working in a tight garage, consider a dedicated compressor stand or cart.
Step 2: Unbox and Inspect the Unit
Carefully unpack your compressor and inspect every part. Look for shipping damage. Check the tank, fittings, hoses, and electrical cord. If anything looks damaged, contact the manufacturer before you proceed. Running a damaged unit is a safety risk.
Read the owner manual thoroughly. Each model has specific setup requirements. The manual also tells you the recommended compressor oil type and capacity. Fill the crankcase if your model uses oil before first use.
Step 3: Attach the Air Hose and Fittings
Now it is time to connect the air hose. Start by wrapping the threads with Teflon tape. This creates a tight seal and prevents air leaks. Hand-tighten the fitting first, then snug it with a wrench. Do not over-tighten. You can strip threads or crack fittings that way.
Attach the pressure regulator to the output line. This device lets you control the air pressure going to your tools. Different tools need different pressure levels. Without a regulator, you risk damaging sensitive equipment or getting inconsistent results.
Step 4: Set Up the Power Supply
This is the most important part of the entire installation. Your compressor needs a dedicated electrical circuit. Most home compressors run on standard 120-volt outlets, but larger units require 240-volt service. Check the nameplate on the compressor to confirm the voltage and amperage requirements.
Never plug a compressor into an extension cord. The cord drops voltage and causes the motor to overheat. If your outlet is far from the compressor location, hire an electrician to install a dedicated outlet closer to the unit. This small investment pays off in safety and performance.
Some homeowners use a backup generator to power their compressor during outages. If you plan to do this, make sure you know how to plug a generator into house wiring safely. Improper generator connections can damage both the compressor and your home electrical system.
Step 5: Test the System
Before you connect any tools, run a full test cycle. Turn on the compressor and let the tank fill to the cut-off pressure. Listen for unusual sounds. Check every fitting and connection for air leaks. You can use soapy water on joints to spot leaks easily. Bubbles mean air is escaping.
Let the compressor run for a few minutes. Watch the pressure gauge. It should hold steady once the tank is full. If the pressure drops quickly, you have a leak somewhere. Tighten fittings or replace worn seals. A properly sealed system runs more efficiently and wastes less energy.
Electrical Setup and Power Considerations
Understanding Your Compressor Electrical Requirements
The electrical setup for your compressor depends on its size and power draw. Small portable units draw around 15 amps and work fine on a standard household circuit. Larger compressors draw 30 to 50 amps and need a dedicated 240-volt line.
Here is a simple breakdown of common electrical needs:
- Under 2 HP: Standard 120V, 15-20 amp circuit
- 2 to 5 HP: 120V or 240V, 20-30 amp circuit
- 5 HP and above: 240V, 30-50 amp dedicated circuit
Always use a circuit breaker sized for the compressor. If your garage has old wiring, have an electrician inspect it before powering up a new unit. Outdated electrical systems can overheat and cause fires.
Using a Generator as a Backup Power Source
Many workshop owners keep a generator on hand for backup power. If you want to run your compressor off a generator, you need to match the generator size to the compressor. Undersizing the generator causes voltage drops and can damage the motor.
To choose the right generator, you need to properly size your generator based on the compressor’s starting and running wattage. A compressor motor draws extra power during startup, sometimes three times its normal running wattage. A generator that is too small will trip or fail to start the compressor.
Safety Tips for Compressor Installation
Pressure Relief Valve
Every compressor has a pressure relief valve. This safety device releases excess pressure if the regulator or tank fails. Never block or disable this valve. Test it periodically by lifting the test lever. Air should release freely. If it does not, replace the valve immediately.
Proper Grounding
Grounding protects you from electrical shock. Make sure your compressor is plugged into a grounded outlet. If your outlets have only two prongs, do not use a Cheater plug to make it work. Instead, have a qualified electrician update the outlet to a proper three-prong grounded version.
Ventilation and Heat Management
Compressors generate heat during operation. Placing a unit in a closed, unventilated closet is dangerous. Overheating causes the motor to shut down or, in worst cases, creates a fire hazard. Keep the area open and allow air to flow freely around the unit.
Common Installation Mistakes to Avoid
Even experienced DIYers make mistakes during compressor setup. Here are the most common errors and how to avoid them:
- Skipping the pressure regulator: Running tools at full tank pressure damages delicate equipment. Always use a regulator.
- Ignoring moisture buildup: Condensation inside the tank causes rust. Drain the tank after every use.
- Using the wrong electrical circuit: Sharing a circuit with other tools causes tripped breakers. Give your compressor its own dedicated line.
- Placing the compressor too close to flammable materials: Keep gasoline, solvents, and rags away from the unit.
- Forgetting to check for leaks: Even small leaks waste energy and reduce performance. Test all connections before regular use.
Maintaining Your Air Compressor After Installation
Daily and Weekly Maintenance
Good maintenance habits keep your compressor running strong. After each use, drain the moisture from the tank. Open the drain valve at the bottom and let the water out. This simple habit prevents corrosion inside the tank.
Once a week, check the air hose for cracks or wear. A damaged hose wastes compressed air and reduces tool performance. Replace any hose that shows signs of damage right away.
Monthly and Seasonal Care
Check the oil level monthly if your compressor uses oil. Low oil causes increased friction and premature wear. Change the oil according to the manufacturer’s schedule, typically every 500 hours of use or at least once a year.
Inspect the air filter monthly. A clogged filter forces the motor to work harder. Clean or replace it when it looks dirty. This small task improves efficiency and extends the life of the motor.
During seasonal storage, clean the entire unit thoroughly. Store it in a dry, covered area. Disconnect the hose and drain any remaining moisture from the tank and lines.
How Much Does Compressor Installation Cost?
Most homeowners spend between $100 and $500 on compressor setup. The cost depends on the unit size, electrical requirements, and any additional materials needed. A portable compressor that plugs into a standard outlet costs very little to install. Larger stationary units may require a dedicated circuit, which adds to the cost.
If you need an electrician to install a 240-volt outlet, expect to pay $150 to $300 for the electrical work. The compressor unit itself ranges from $200 for a basic portable model to $1,500 or more for a large stationary unit. When you compare this to the cost of hiring a professional, DIY installation saves you significant money.
Keep in mind that equipment costs vary widely. If you are curious about power equipment pricing, the cost of a generator depends on similar factors like size, power capacity, and brand reputation.
Final Thoughts on Installing Your Air Compressor
Installing an air compressor is a satisfying project that anyone can complete with basic tools and a little patience. The key is to take it step by step. Do not rush the electrical connections. Do not skip the leak test. And do not neglect regular maintenance once the compressor is in place.
A properly installed compressor becomes a reliable workhorse in your garage or workshop. It powers your tools efficiently and safely for years to come. Follow this guide, trust the process, and enjoy the freedom of having compressed air whenever you need it.
Start your installation today. You will be glad you did. The confidence that comes from completing a solid DIY project is worth every minute of effort.
Frequently Asked Questions
How long does it take to install an air compressor?
Most homeowners complete the setup in one to two hours. The time depends on the compressor size and whether you need a new electrical outlet. Simple portable units take less than an hour. Larger stationary compressors with dedicated circuits may take longer.
Do I need a professional electrician to install an air compressor?
Not always. Small portable compressors run on standard 120-volt outlets and need no electrical work. However, larger units that require 240-volt service should be installed by a licensed electrician. They ensure the circuit is properly sized and grounded for safe operation.
Can I run my air compressor outdoors?
Yes, you can run a compressor outdoors. Place it on a flat, stable surface away from rain and direct sunlight. Outdoor use works well for construction sites and remote workshops. Just make sure the electrical connection is protected from moisture and the area has good ventilation.
How often should I drain my compressor tank?
Drain the tank after every use. Moisture from compressed air collects at the bottom of the tank. Left unchecked, it causes rust and reduces tank life. A quick drain takes only a few seconds and adds years to your compressor’s lifespan.
What size air compressor do I need for home use?
For most home projects, a 2 to 6 gallon portable compressor works well. It handles nail guns, air drills, and inflating tires easily. If you plan to spray paint or run multiple tools at once, consider a larger tank with a higher CFM rating. Think about your most common tasks and choose accordingly.
Why does my compressor keep shutting off?
A compressor that shuts off frequently may have a clogged air filter, low oil, or an overheating motor. Check the filter first, as a dirty filter restricts airflow and causes the unit to overheat. Also verify that the pressure switch is set correctly. If the problem persists, consult the owner manual or contact the manufacturer.