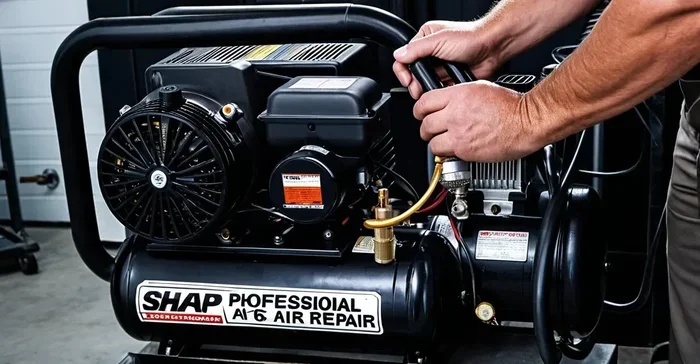
How to Change Your Air Compressor the Right Way Today
Changing your air compressor doesn’t have to be scary. This guide walks you through every step of the air compressor replacement process with simple, clear instructions. You’ll learn how to spot warning signs, pick the right unit, and install it like a pro. Whether you own a portable air compressor or a heavy-duty electric air compressor, this guide has you covered. Save money, avoid common mistakes, and get your compressor running right.
Key Takeaways
- Know the Signs: Learn the top warning signals that your compressor needs replacing before it fails completely.
- Gather Everything First: Having the right tools and parts ready saves time and frustration during the swap.
- Follow Each Step Carefully: Safety and proper sequence matter when disconnecting, removing, and installing a new unit.
- Avoid Costly Mistakes: Common errors like skipping the pressure release can cause serious injury or damage.
- Maintain Your New Unit: Regular upkeep extends the lifespan of your replacement compressor significantly.
- Match the Right Size: Choosing the correct compressor size for your needs prevents future problems and wasted money.
- Consider Professional Help: Some installations are best left to licensed technicians for safety and warranty reasons.
📑 Table of Contents
Why You Might Need to Change Your Air Compressor
Air compressors are workhorses. They power nail guns, spray paint equipment, tire inflators, and so much more. But like any machine, they don’t last forever. At some point, every owner faces the reality of air compressor replacement.
Maybe your compressor is making strange noises. Perhaps it won’t hold pressure anymore. Or maybe you simply need more power for new tools. Whatever the reason, knowing how to change your air compressor properly makes all the difference.
This guide covers everything from recognizing failure signs to completing the full swap. We’ll keep things simple and practical. No jargon. No fluff. Just clear steps you can follow with confidence.
By the end, you’ll understand exactly what to do. You’ll know when to DIY and when to call in the pros. Let’s get into it.
Understanding Your Current Compressor
Before you start, take a moment to understand what you have. Most homeowners use either a portable air compressor or a stationary one. Portable units are smaller and easier to move. Stationary models are bigger and more powerful.
Check your owner’s manual. Note the model number, tank size, and horsepower. These details matter when shopping for a replacement. You want a new unit that matches or exceeds your current setup.
Also, identify your compressor type. Oil-lubricated models need regular oil changes. Oil-free models require less maintenance but may wear out faster. Knowing your type helps you choose the right air compressor replacement.
Signs It’s Time for an Air Compressor Replacement
Don’t wait until your compressor dies completely. Watch for these warning signs. Catching problems early saves money and prevents downtime.
1. Unusual Noises
Grinding, squealing, or knocking sounds are never good. They often mean internal parts are wearing out. The motor bearings or pump components may be failing.
2. Loss of Pressure
If your compressor struggles to reach the right PSI, something is wrong. Worn seals, leaking valves, or a failing pump could be the culprit. Sometimes a simple repair fixes this. But often, it signals deeper problems.
3. Constant Running
A healthy compressor cycles on and off. If yours runs nonstop, the motor is overworking. This leads to overheating and eventually complete failure.
4. Visible Damage
Rust, dents, or oil leaks around the tank are serious concerns. A damaged air tank can be dangerous. It may crack under pressure and cause injury.
5. Age of the Unit
Most compressors last 10 to 15 years with proper care. If yours is older, frequent repairs add up fast. At some point, air compressor replacement becomes the smarter choice.
6. Rising Energy Bills
An aging compressor works harder to do the same job. This drives up electricity costs. A new, efficient model can actually save you money over time.
When Repair Isn’t Worth It
Sometimes repair makes sense. A new air compressor valve or pressure switch costs little and fixes the problem. But if repair costs exceed 50% of a new unit’s price, replacement wins.
Think about it this way. Would you keep pouring money into a car that needs a new engine? Probably not. The same logic applies here. Factor in downtime, energy waste, and repeated repairs. The math usually points to replacing the unit.
Tools and Materials You’ll Need
Gather everything before you start. Running back and forth for missing tools slows you down and kills momentum. Here’s what you’ll need for most air compressor replacement jobs.
Essential Tools
- Wrench set – For disconnecting fittings and bolts
- Screwdrivers – Flathead and Phillips head
- Pliers – For hose clamps and small connections
- Teflon tape – For sealing threaded connections
- Safety glasses – Always wear eye protection
- Work gloves – Protects your hands from sharp edges
- Pressure gauge – To verify proper operation
Materials for Installation
- New air compressor – Sized correctly for your needs
- New hoses and fittings – Don’t reuse old, cracked hoses
- Compressor oil – If your new unit requires it
- Air filter – Often included but check before buying
- Mounting bolts – If the new unit needs a different setup
Pro Tip: Check Your Electrical Setup
Before buying a new compressor, verify your electrical capacity. A larger unit may need a dedicated 240-volt circuit. If your current setup doesn’t support it, you’ll need an electrician. This is a great time to learn how to size a generator if you plan to use backup power for your compressor.
Step-by-Step Guide to Changing Your Air Compressor
Now for the main event. Follow these steps carefully. Take your time. Rushing through an air compressor replacement leads to mistakes and potential injuries.
Step 1: Turn Off and Unplug the Unit
Safety first. Switch off the compressor and unplug it from the wall. If it’s a gas-powered unit, turn off the fuel valve. Never work on a compressor that’s connected to a power source.
Let the machine cool down completely. Compressors generate heat during operation. Give it at least 30 minutes before you touch anything.
Step 2: Release All Pressure
This step is critical. Open the drain valve on the tank. You’ll hear air rushing out. Wait until the pressure gauge reads zero.
Never skip this step. Residual pressure in the lines can cause serious injury. It can also make fittings harder to remove, which leads to stripped threads and more problems.
Quick Tip: If your pressure switch is faulty, the gauge might not read accurately. Use a separate pressure gauge to double-check before opening any fitting.
Step 3: Drain the Tank
Open the drain valve at the bottom of the tank. Let any remaining moisture and oil drain out. Place a tray or bucket underneath to catch the mess.
Moisture buildup is a common problem with compressors. It causes rust inside the tank and shortens its lifespan. Draining the tank regularly prevents this issue. If you’re replacing the tank entirely, draining it first makes removal safer and cleaner.
Step 4: Disconnect the Power Supply
If you haven’t already at the plug, now is the time to disconnect the wiring at the circuit breaker. Label the wires before disconnecting them. This makes installation of the new unit much easier.
Take a photo of the wiring setup with your phone. You’ll thank yourself later when you’re trying to remember which wire goes where. This simple habit saves hours of confusion.
Step 5: Disconnect the Air Lines
Using your wrench, disconnect the air hoses from the compressor. Place a bucket underneath in case there’s residual moisture or oil in the lines.
Remove the pressure regulator if it’s connected directly to the unit. Set aside any fittings you plan to reuse. Wrap exposed threads with Teflon tape to prevent air leaks when you reconnect everything.
Step 6: Remove the Old Compressor
Now it’s time to physically remove the old unit. Most compressors are mounted on a pad or bolted to a surface. Remove the mounting bolts carefully.
Get help if the unit is heavy. Compressor tanks are bulky and awkward to carry. A buddy makes the job safer and faster. Lift with your legs, not your back.
Once free, move the old unit out of the way. You can dispose of it at a local recycling center or scrap metal facility. Many shops also accept old compressors for proper recycling.
Step 7: Prepare the Installation Area
Clean the area where the new compressor will sit. Remove dust, debris, and old mounting hardware. Check the floor for levelness. A compressor that sits unevenly vibrates excessively and wears out faster.
If you’re installing a larger stationary unit, make sure the floor can support the weight. These machines are heavy when filled with water and oil. A reinforced concrete pad is ideal for permanent installations.
Step 8: Install the New Compressor
Place the new unit in position. Secure it with mounting bolts. Tighten firmly but don’t over-torque. You want it stable without stressing the frame.
Connect the air lines using new hoses and fittings. Apply Teflon tape to all threaded connections. Hand-tighten first, then snug with a wrench. Over-tightening can crack fittings and cause leaks.
Reconnect the electrical wiring according to your photo reference. Double-check every connection before moving on.
Step 9: Fill the Tank with Oil (If Required)
Check your new compressor’s manual. Oil-lubricated models need oil in the pump before first use. Use the manufacturer-recommended oil type. Adding the wrong oil voids the warranty and can damage the pump.
Oil-free compressors skip this step entirely. But even they benefit from a quick inspection of the pump housing before first use.
Step 10: Test the New Compressor
Plug in the unit and turn it on. Listen for unusual sounds. Watch the pressure gauge as it builds up. The compressor should cycle on at the low-pressure setting and off at the high-pressure setting.
Check every connection for air leaks. Apply soapy water to joints. Bubbles mean a leak. Tighten the fitting or add more Teflon tape and test again.
Let the compressor run for 10 to 15 minutes. Monitor the temperature. It should feel warm but not hot to the touch. If it overheats, shut it off and check for issues.
Expert Insight: When sizing your new compressor, consider all the tools you’ll run simultaneously. Much like how much generator do I need, choosing the right compressor size prevents overload and ensures reliable performance.
Common Mistakes to Avoid When Changing an Air Compressor
Even experienced DIYers make mistakes during compressor swaps. Here are the most common errors and how to avoid them.
Skipping Pressure Release
This is the #1 mistake people make. Opening a fitting with pressure still in the tank is dangerous. Air blasts out forcefully and can cause injury. Always verify zero pressure before disconnecting anything.
Reusing Old Hoses and Fittings
Old hoses crack and leak. Old fittings strip easily. Invest in new hoses and fittings for your air compressor replacement. It costs a little more but prevents frustrating leaks down the road.
Ignoring Electrical Requirements
A bigger compressor needs more power. Plugging a 240-volt unit into a 120-volt outlet trips breakers constantly and can damage the motor. Check your electrical setup before purchasing the new unit.
Wrong Compressor Size
Too small and the compressor can’t keep up with your tools. Too large and you waste energy and money. Use our sizing guide to find the right fit for your needs.
Forgetting to Drain the Tank
Moisture in the tank causes rust and reduces efficiency. Make draining the tank part of your regular maintenance routine. After every use, open the drain valve and let the moisture escape.
Not Reading the Manual
It sounds obvious, but many people skip the manual. Each compressor has specific requirements for oil type, pressure settings, and maintenance schedules. Reading the manual takes 10 minutes and saves hours of guesswork.
Maintaining Your New Air Compressor
You just invested in a new compressor. Protect that investment with proper maintenance. A well-maintained compressor lasts 15 years or more. Neglected units often fail within 5 to 7 years.
Regular Maintenance Checklist
- Drain the tank after every use to remove moisture
- Check oil levels monthly for oil-lubricated models
- Replace the air filter every 3 to 6 months
- Inspect hoses for cracks or wear monthly
- Tighten fittings periodically to prevent leaks
- Clean the intake vents to prevent overheating
- Schedule annual professional inspections for stationary units
How Often to Replace Key Parts
Even with great maintenance, some parts wear out over time. Here’s a general timeline for common air compressor replacement parts:
- Air filter: Every 3 to 6 months with regular use
- Compressor oil: Every 500 hours of operation or annually
- Hoses: Every 2 to 3 years or when visible wear appears
- Pressure switch: Every 5 to 7 years
- Drive belt (if applicable): Every 1 to 2 years
- Valves: Every 3 to 5 years depending on use
Staying on top of these replacements keeps your compressor running smoothly. It also prevents small problems from becoming expensive repairs. Think of it as preventive healthcare for your equipment.
When to Call a Professional
Not every compressor task belongs to the DIYer. Electrical work beyond simple plug-in connections should be handled by a licensed electrician. Gas-powered compressor installations require certified technicians in many areas.
Also, if you’re uncomfortable with any step in the process, don’t hesitate to call a pro. A professional installation typically costs between $200 and $500. That’s a small price for peace of mind and a warranty that stays valid. Compare that to the cost of a botched DIY job that damages the unit or your home.
Similarly, if you’re considering a whole-home backup system, understanding how much a whole home generator costs can help you plan your power needs alongside your compressor setup.
Conclusion
Changing your air compressor doesn’t have to be overwhelming. With the right tools, proper preparation, and this step-by-step guide, you can handle the job confidently. Remember to prioritize safety at every step. Release all pressure before disconnecting anything. Match your new unit to your actual needs. And maintain it properly to get the longest possible life from your investment.
Whether you’re replacing an old portable air compressor or upgrading to a larger stationary model, the process follows the same basic principles. Take it one step at a time. Don’t rush. And don’t be afraid to call a professional when a job is beyond your comfort zone.
The right air compressor replacement gives you reliable power for years to come. Your tools will perform better. Your projects will go smoother. And you’ll have the confidence of knowing the job was done right.
Now you have everything you need to change your air compressor the right way. Get started today and enjoy the difference a properly installed compressor makes.
Frequently Asked Questions
How long does it take to change an air compressor?
Most DIYers complete the swap in 2 to 4 hours. The time depends on the compressor size, accessibility of the installation area, and your experience level. First-timers should budget extra time for reading instructions and taking precautions.
Can I install an air compressor myself or do I need a professional?
For most portable and small stationary units, a DIY installation works well. However, larger 240-volt units or gas-powered compressors may require professional help. Always check local codes and manufacturer guidelines before starting the installation.
How do I know what size air compressor I need?
Add up the CFM (cubic feet per minute) requirements of all the tools you run simultaneously. Choose a compressor that delivers at least 1.5 times that total CFM. This provides a safety margin and prevents the compressor from running constantly.
What’s the average cost of replacing an air compressor?
A new home air compressor typically costs between $300 and $1,500 depending on size and type. Professional installation adds $200 to $500 to the total. The exact cost depends on your compressor type and local labor rates.
How often should I drain my air compressor tank?
Drain the tank after every use. Moisture buildup causes rust and reduces tank life. If you use your compressor daily, make draining part of your shutdown routine. It only takes 30 seconds and significantly extends equipment life.
Can I reuse my old air hoses when changing the compressor?
It’s best to install new hoses. Old hoses develop micro-cracks that cause air leaks and reduce efficiency. New hoses are inexpensive and ensure a safe, leak-free connection. If you must reuse old hoses, inspect them thoroughly for wear before installation.
=== META DATA ===
SEO Title: How to Change Your Air Compressor the Right Way Today
Meta Title: How to Change Your Air Compressor the Right Way
Meta Description: Learn how to change your air compressor safely with our step-by-step guide. Discover tips for air compressor replacement and maintenance today!
URL Slug: how-to-change-air-compressor
=== INTERNAL LINKS USED ===
- how much does a generator cost
- how to size a generator
- how long does a generator last
- how much generator do I need
- how much is a whole home generator
=== LSI KEYWORDS USED ===
LSI Keywords (20): air compressor replacement, air compressor maintenance, air compressor repair, compressor pump replacement, air tank replacement, air compressor motor, air compressor pressure switch, air compressor regulator, air compressor valve, air compressor hose, compressor oil change, air compressor filter, air compressor troubleshooting, air compressor upgrade, air compressor installation, portable air compressor, electric air compressor, air compressor lifespan, replace air compressor parts, air compressor buying guide


