How to Replace AC Compressor in Car Without a Mechanic
Replacing your car AC compressor yourself is easier than you think. With the right tools, a little patience, and this detailed guide, you can save hundreds of dollars on AC compressor replacement costs. We walk you through every step, from diagnosing the problem to testing the new unit.
This is a comprehensive guide about how to replace ac compressor in car.
Key Takeaways
- Save Money: DIY AC compressor replacement can cut costs by 50% or more compared to a mechanic.
- Right Tools Matter: Having the correct hand tools and AC-specific equipment makes the job much smoother.
- Safety First: Always handle refrigerant properly and follow safety precautions to avoid injury or damage.
- Know the Signs: Recognizing early AC compressor failure signs helps you act before the problem gets worse.
- Test Before You Drive: Properly testing the new compressor ensures your car AC works right away.
- Timing Is Key: Replacing the compressor when the system is cool prevents burns and injuries.
[FEATURED_IMAGE_PLACEHOLDER]
How to Replace AC Compressor in Car Without a Mechanic
Your car AC stopped blowing cold air, and the mechanic quoted you a fortune. What if you could do the job yourself? Replacing an AC compressor in car is a challenging but doable DIY project. You do not need years of experience or a fancy garage. You just need the right knowledge, the correct tools, and a bit of confidence.
This guide breaks down the entire process into simple, easy-to-follow steps. We cover everything from spotting the warning signs to testing your new compressor. By the end, you will feel ready to tackle the job and enjoy ice-cold air all summer long.
Let us be honest. Working on your car AC system involves handling refrigerant, which requires care and proper equipment. But thousands of DIYers complete this job every year. With the right preparation, you can be one of them. Let us get started.
Understanding Your Car AC Compressor
Before you grab any tools, it helps to understand what the AC compressor does. Think of it as the heart of your car air conditioning system. It pumps refrigerant through the lines, compressing it into a high-pressure gas that cools your cabin.
When the compressor fails, the entire AC system stops working. You might notice warm air from the vents, strange noises under the hood, or a clutch that will not engage. These are common AC compressor failure signs that should not be ignored.
The compressor is driven by the serpentine belt. When you turn on the AC, the clutch engages and spins the compressor. If the internal parts wear out or leak refrigerant, the unit cannot do its job. Replacing it restores the full cooling power of your car cooling system.
Common Causes of AC Compressor Failure
Several things can cause an AC compressor to wear out prematurely:
- Low refrigerant levels: Leaks reduce the amount of coolant, forcing the compressor to work harder.
- Contaminated refrigerant: Dirt or moisture in the system damages internal components.
- Worn serpentine belt: A slipping or frayed belt puts extra strain on the compressor clutch.
- Electrical problems: Faulty wiring or a bad relay can prevent the clutch from engaging.
- Lack of maintenance: Skipping regular AC service shortens the compressor lifespan.
Knowing the root cause helps you avoid the same problem with your new compressor. Always fix any leaks or electrical issues before installing the replacement unit.
Tools and Materials You Will Need
Gathering everything before you start saves time and frustration. Here is a complete list of what you need for DIY auto repair of an AC compressor.
Essential Hand Tools
- Socket set (metric and standard sizes)
- Ratchet and extension bars
- Wrench set
- Screwdrivers (flathead and Phillips)
- Pliers and hose clamps
- Torque wrench
- Jack and jack stands or ramps
AC-Specific Equipment
- AC refrigerant recovery machine (or access to a shop that recovers refrigerant)
- AC manifold gauge set for pressure testing
- Vacuum pump for evacuating the system
- Refrigerant recharge kit (R134a for most older cars, R1234yf for newer models)
- Refrigerant oil (PAG oil or POE oil, depending on your system)
- New O-rings and seals for all connections
- AC leak detector
- Safety glasses and gloves
Pro tip: You cannot legally release refrigerant into the air in most areas. You must recover it using a proper machine. Many auto parts stores offer recovery services for a small fee. This is an important part of automotive maintenance and environmental responsibility.
Step-by-Step AC Compressor Replacement Guide
Now for the main event. Follow these steps carefully, and you will have a new compressor installed in no time. Take your time and do not rush any step.
Step 1: Recover the Old Refrigerant
First, you need to remove the old refrigerant from the system. Connect your AC refrigerant recovery machine to the service ports on the compressor. Follow the machine instructions to safely extract all refrigerant into the recovery tank.
Never attempt to release refrigerant into the atmosphere. It is illegal in most states and harmful to the ozone layer. Work in a well-ventilated area and wear safety gloves and glasses throughout the process.
Step 2: Disconnect the Electrical Connections
Locate the electrical connector on the compressor clutch. Press the locking tab and carefully unplug it. Use your camera phone to take a photo before disconnecting anything. This makes reassembly much easier later.
Also disconnect any AC pressure switch wires or sensors attached to the compressor. Keep track of where each wire goes. A simple label or photo will save you headaches during reassembly.
Step 3: Remove the Serpentine Belt
Release the tension on the serpentine belt using the tensioner tool. Slide the belt off the compressor pulley. Set the belt aside safely. You will need it later if the old belt is still in good condition.
Check the belt for cracks or wear while you have it off. If the belt looks damaged, now is a great time to replace it. A new serpentine belt ensures smooth operation of your car cooling system and all other accessories.
Step 4: Remove the Old Compressor
Unbolt the compressor mounting bracket. Most compressors have two or three bolts holding them in place. Use the correct socket size and keep track of every bolt.
Carefully lower the old compressor out of the engine bay. It can be heavy, so ask a friend for help if needed. Place the old unit on a towel or box to catch any remaining refrigerant residue.
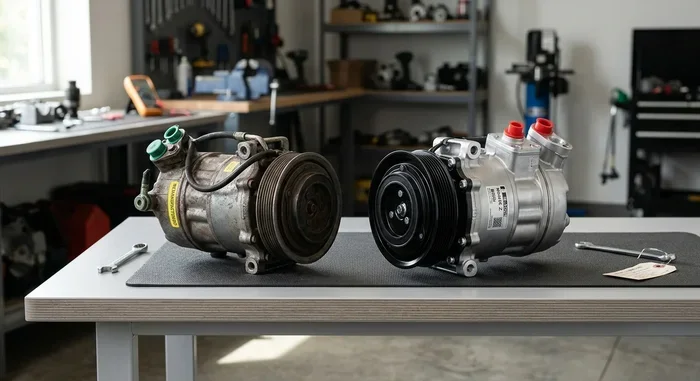
Before you install the new unit, compare the old and new compressors. Make sure they are the same model and size. Check the mounting bolt pattern and the number of lines on the compressor. This is how you choose the right compressor for your specific vehicle.
Step 5: Prepare the New Compressor
Before installing the new unit, add the correct amount of refrigerant oil to the compressor. The oil lubricates the internal moving parts and ensures smooth operation. Check your vehicle manual for the exact oil type and amount.
Also, lightly rotate the new compressor clutch by hand. It should spin freely with no grinding or resistance. If it does not, the unit may be defective, and you should return it before installing it.
Install new O-rings on all connection points. Apply a thin layer of clean refrigerant oil to each O-ring before seating it. This creates a proper seal and prevents leaks in your AC system evacuation process.
Step 6: Install the New Compressor
Position the new compressor in the engine bay and align it with the mounting bracket. Insert the bolts and hand-tighten them first. Then use your torque wrench to tighten each bolt to the manufacturer specification.
Reconnect the serpentine belt around the compressor pulley. Release the tensioner to lock the belt in place. Give the belt a spin by hand to make sure it sits correctly on all pulleys.
Reconnect all electrical connectors. Make sure each one clicks into place securely. Double-check your photos from earlier to confirm you have everything connected correctly.
Step 7: Evacuate the AC System
Attach your AC manifold gauge set to the service ports. Connect the vacuum pump to the low-side port. Turn on the vacuum pump and let it run for at least 30 minutes.
The vacuum pump removes all air and moisture from the system. Air and moisture can cause ice crystals to form and damage the new compressor. Watch the gauge closely. If the needle drops and holds steady, the system is ready for refrigerant.
If the needle slowly rises back up, you have a leak. Check all connections and O-rings. Fix any leaks before proceeding to the next step.
Step 8: Recharge the System with Refrigerant
Now it is time to add fresh refrigerant. Connect your recharge kit to the low-side port. Follow the kit instructions carefully. Typically, you will need to turn the can upside down and add refrigerant slowly.
Monitor the pressure gauges as you add refrigerant. You want the pressure to reach the factory specification for your vehicle. Overcharging or undercharging can damage the new compressor and reduce cooling performance.
Once the system reaches the correct pressure, disconnect the recharge hose. Start the engine and turn the AC to maximum cold. Listen for the compressor clutch to engage. You should hear a distinct click, and the compressor should start running.
Step 9: Test the System
Let the engine idle for 10 to 15 minutes with the AC on max. Check the temperature at the center vent. It should feel noticeably cold within a few minutes.
Use your AC pressure test tools to verify both high-side and low-side pressures are in the normal range. Normal readings vary by vehicle, so check your service manual.
Take a short test drive. Pay attention to any unusual noises from the compressor or the AC vents. If everything feels and sounds normal, you have successfully completed the job.
Common Mistakes to Avoid
Even experienced DIYers make mistakes. Here are the most common errors people make when replacing an AC compressor in car:
- Skipping the vacuum step: Air and moisture in the system cause ice blockages and compressor damage. Always evacuate for at least 30 minutes.
- Using the wrong refrigerant oil: Different compressors require different oil types. Using the wrong oil can destroy the new unit quickly.
- Overfilling or underfilling refrigerant: Both conditions reduce cooling performance and can cause mechanical damage.
- Forgetting new O-rings: Reusing old O-rings often leads to leaks. Always install fresh O-rings on every connection.
- Not checking the condenser and expansion valve: If these parts are also failing, your new compressor could be damaged again soon.
- Rushing the process: AC work requires patience. Rushing leads to mistakes, leaks, and potential injury.
Avoiding these mistakes saves you time, money, and the frustration of having to redo the job. Take your time and follow each step carefully.
How Much Does AC Compressor Replacement Cost?
One of the biggest reasons people attempt DIY replacement is the cost savings. Professional mechanics typically charge between $500 and $1,500 for an AC compressor replacement, depending on the vehicle. The compressor part itself costs anywhere from $150 to $500.
When you do it yourself, your main expenses are the new compressor, refrigerant, oil, and O-rings. The total cost for parts usually ranges from $200 to $600. You also need to factor in the cost of renting or buying a vacuum pump and recovery machine if you do not already own them.
Keep in mind that the cost of AC compressor replacement can vary based on your vehicle model, the type of refrigerant used, and local labor rates. But even with tool rental costs, most DIYers save at least $300 to $500 compared to a shop visit.
It is worth noting that some of the tools needed for this job overlap with those used for other car repairs. For example, many of the same tools used for how to install a generator transfer switch or general automotive work apply here. If you already have a basic tool set, the additional cost is minimal.
When Should You Call a Professional?
DIY replacement is rewarding, but it is not the right choice for everyone. Here are situations where you should consider calling a professional:
- You do not have access to a refrigerant recovery machine.
- The AC system has multiple failed components beyond just the compressor.
- You feel uncomfortable handling refrigerant or working under the car.
- Your vehicle has a complex AC system with electronic controls that require specialized diagnostic tools.
- You have tried the repair and the system still does not cool properly.
There is no shame in calling a professional. A trained mechanic has the experience and equipment to diagnose and fix complex AC problems quickly. Sometimes the cost of professional service is worth the peace of mind.
Maintaining Your New AC Compressor
You invested time and money into replacing your compressor. Now protect that investment with proper maintenance. Regular care extends the life of your new compressor and keeps your car air conditioning repair costs low.
Simple Maintenance Tips
- Run your AC for at least 10 minutes every week, even in winter. This keeps the seals lubricated and prevents them from drying out.
- Check refrigerant levels annually. Low refrigerant is the number one cause of compressor failure.
- Replace the cabin air filter regularly. A clogged filter reduces airflow and strains the entire system.
- Inspect the serpentine belt for wear every few months. A damaged belt can damage the compressor clutch.
- Have a professional perform an AC pressure test at least once a year to catch small leaks early.
These simple habits keep your AC system running strong for years. A well-maintained compressor can last 10 to 15 years or more, depending on your driving conditions and climate.
Frequently Asked Questions
How long does it take to replace an AC compressor?
Most DIYers complete the job in 3 to 5 hours, depending on their experience level and vehicle model. First-timers should budget extra time for learning the process and troubleshooting any unexpected issues.
Can I drive my car with a bad AC compressor?
Yes, you can drive safely with a failed AC compressor as long as the serpentine belt is not slipping or causing other problems. However, your AC will not work, and in some cases, a seized compressor can damage the belt or other engine accessories.
Do I need to replace the condenser too?
Not always. If the condenser is also leaking or damaged, you should replace it at the same time. Replacing both at once saves labor costs and prevents future problems. Ask your mechanic or check for leaks using an AC leak detector before deciding.
What happens if I do not evacuate the AC system properly?
Improper evacuation leaves air and moisture in the system. This causes ice blockages, reduces cooling performance, and can damage the new compressor. Always use a vacuum pump and evacuate for at least 30 minutes before recharging.
Is it legal to recharge AC refrigerant yourself?
In most areas, yes. You can purchase R134a refrigerant for DIY use. However, you must follow local regulations for handling and disposing of refrigerant. Always use a proper recovery machine to remove old refrigerant before recharging.
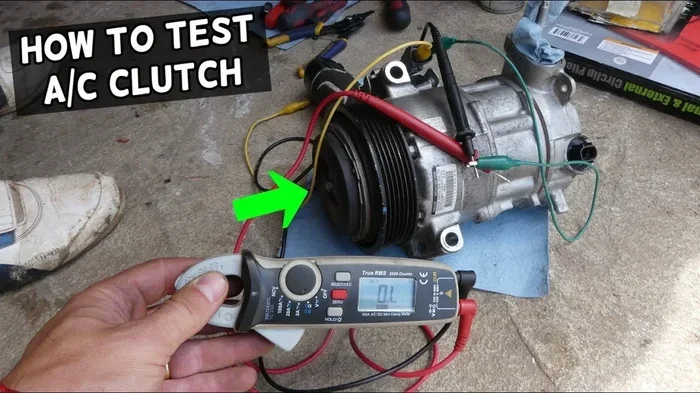
How can I tell if my AC compressor clutch is bad?
Signs of a bad clutch include the AC blowing warm air, a clicking noise from under the hood, or the clutch not engaging when you turn on the AC. You can also check if the clutch spins freely when the AC is off but engages (or fails to engage) when turned on.
Final Thoughts
Replacing an AC compressor in your car without a mechanic is one of the most satisfying DIY automotive projects you can tackle. It requires the right tools, some patience, and a willingness to learn. But the payoff is huge. You save money, gain valuable car repair skills, and enjoy cold air all summer long.
Remember to take it one step at a time. Do not skip the evacuation or recharge steps. Use the correct refrigerant and oil for your vehicle. And always prioritize safety when working with refrigerant and automotive systems.
With this guide, you have everything you need to succeed. Gather your tools, roll up your sleeves, and get to work. Your car AC system will thank you for it.
Frequently Asked Questions
What is how to replace ac compressor in car?
how to replace ac compressor in car is an important topic with many practical applications.




3 Comments