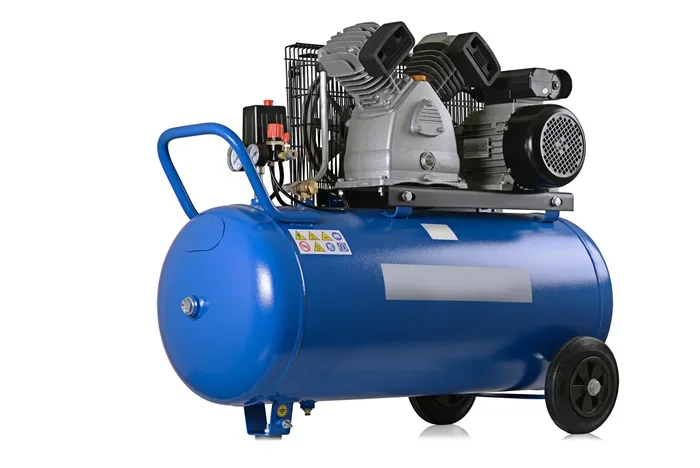
Campbell Hausfeld Air Compressor Parts Diagram Guide
Our Campbell Hausfeld air compressor parts diagram guide breaks down every key component with clear visuals and practical advice. You will learn how to identify, locate, and replace compressor parts with confidence. Whether you own a portable or stationary model, this guide covers everything from the pump assembly to the pressure switch and beyond.
If you own a Campbell Hausfeld air compressor, you know how reliable these machines can be. But even the best compressor needs maintenance eventually. And when something breaks, finding the right part can feel like a puzzle.
This is where a Campbell Hausfeld air compressor parts diagram becomes your best friend. A clear diagram shows you exactly what goes where. It helps you identify every piece, from the pump assembly to the smallest fitting. Whether you are a weekend DIYer or a seasoned mechanic, understanding your compressor layout saves time, money, and frustration.
In this guide, we walk you through everything you need to know about Campbell Hausfeld compressor parts. We will break down the major components, explain how to read a diagram, and give you practical tips for repairs and maintenance. By the end, you will feel confident tackling any compressor issue on your own.
Key Takeaways
- Visual Reference: A parts diagram helps you identify every component of your Campbell Hausfeld compressor quickly and accurately.
- Easy Repairs: Knowing your parts diagram makes troubleshooting and DIY repairs faster and more affordable.
- Model-Specific Guidance: Different Campbell Hausfeld models use different parts, so matching the right diagram is essential.
- Preventive Maintenance: Understanding the diagram helps you spot wear and tear before it becomes a serious problem.
- Cost Savings: Ordering the correct replacement parts saves money and avoids downtime.
- Safety First: Familiarity with compressor components ensures safe operation and proper handling.
📑 Table of Contents
- Why a Parts Diagram Matters for Your Campbell Hausfeld Compressor
- Major Components of a Campbell Hausfeld Air Compressor
- How to Read and Use Your Campbell Hausfeld Parts Diagram
- Common Campbell Hausfeld Compressor Problems and Their Parts
- Maintenance Tips to Keep Your Compressor Running Smoothly
- Where to Find Authentic Campbell Hausfeld Parts
- Quick Tips for Using Your Parts Diagram
- Common Mistakes to Avoid When Using a Parts Diagram
- Expert Insights on Campbell Hausfeld Compressor Maintenance
- Conclusion
Why a Parts Diagram Matters for Your Campbell Hausfeld Compressor
A Campbell Hausfeld air compressor parts diagram is more than just a picture. It is a roadmap that shows you the complete layout of your machine. Without one, you are guessing. And guessing can lead to buying the wrong parts or making mistakes during repairs.
Understand Your Compressor at a Glance
Every compressor has dozens of components working together. The pump, motor, tank, pressure switch, and regulator all play specific roles. A diagram helps you see how they connect. When you can visualize the whole system, repairs become much simpler.
Match Parts to Your Specific Model
Campbell Hausfeld makes many compressor models. Each model uses slightly different parts. A model-specific diagram ensures you order the correct compressor replacement parts. This saves you from costly returns and shipping delays.
Save Money on Repairs
Professional compressor repair can be expensive. When you understand your parts diagram, you can do many repairs yourself. A simple gasket replacement or check valve fix might only cost a few dollars in parts. Plus, you learn valuable skills that help you maintain your compressor for years.
Major Components of a Campbell Hausfeld Air Compressor
Let us dive into the key parts of a Campbell Hausfeld compressor. Each component plays an important role in delivering clean, pressurized air. Understanding what each part does makes the diagram much easier to follow.
The Pump Assembly
The pump is the heart of any air compressor. It draws in ambient air and compresses it into the tank. Campbell Hausfeld pumps come in oil-lubricated and oil-free designs. The pump assembly includes pistons, cylinders, and connecting rods. Over time, these parts wear down and may need replacement.
When looking at your air compressor diagram, the pump is usually the largest component. It sits between the motor and the tank. If you notice excessive noise or reduced pressure, the pump may be the culprit.
The Tank
The compressor tank stores pressurized air until you need it. Tank sizes vary by model. Some Campbell Hausfeld units use small portable tanks, while others have large stationary tanks. The tank holds significant pressure, so it must be kept in good condition.
Rust and corrosion are the biggest enemies of compressor tanks. Regular inspection helps you catch issues early. If you see cracks or deep rust spots, replace the tank immediately for safety.
The Pressure Switch
The pressure switch controls when the compressor turns on and off. It monitors the air pressure inside the tank. When pressure drops below a set level, the switch signals the motor to start. When the tank reaches the desired pressure, the switch shuts the motor off.
A faulty pressure switch is one of the most common compressor troubleshooting issues. If your compressor runs constantly or never kicks on, the pressure switch may need adjustment or replacement.
The Regulator Valve
The regulator valve controls the air pressure delivered to your tools. Not all tools need the same pressure. The regulator lets you set the right output for each application. It sits near the outlet hose and is easy to adjust.
If your tools are running at the wrong pressure, check the regulator first. A simple adjustment often solves the problem without any part replacement.
The Unloader Valve
The unloader valve releases trapped air from the pump when the compressor shuts off. This reduces the load on the motor during startup. Without a working unloader valve, the motor struggles to start, which can cause overheating and premature failure.
If you hear a loud bang when the compressor stops, the unloader valve may be sticking. Cleaning or replacing this small part is usually a quick fix.
The Check Valve
The check valve prevents compressed air from flowing back into the pump when the motor stops. It sits between the pump and the tank. A damaged check valve causes air leaks and prevents the tank from holding pressure.
Signs of a failing check valve include air leaking from the pressure relief valve and the pump running continuously. Replacing a check valve is one of the most common and affordable repairs you can do.
How to Read and Use Your Campbell Hausfeld Parts Diagram
Reading a Campbell Hausfeld air compressor parts diagram is easier than it looks. Once you understand the basic symbols and labels, you can navigate any diagram with confidence.
Start with the Legend
Every diagram includes a legend or key. The legend explains what each symbol means. Lines, arrows, and shaded areas all convey specific information. Spend a few minutes studying the legend before you start identifying parts.
Follow the Airflow Path
The best way to read a compressor diagram is to follow the path of air. Air enters through the intake filter, moves into the pump, gets compressed, and flows into the tank. From there, it passes through the check valve, regulator, and out to the hose. Following this path helps you understand how each part connects to the next.
Match Part Numbers to Your Model
Each part on the diagram has a unique part number. Write down the numbers for the parts you need. You can then use these numbers to order the correct Campbell Hausfeld replacement parts. Always double-check that the part number matches your specific model number.
Use the Diagram Alongside Your Manual
Your compressor manual contains valuable information about each component. Use the diagram and manual together for the best results. The manual often includes torque specifications, maintenance schedules, and safety warnings that complement the diagram perfectly.
Common Campbell Hausfeld Compressor Problems and Their Parts
Even well-maintained compressors develop issues over time. Knowing which parts to check for common problems makes repairs much easier.
Compressor Won’t Start
If your compressor does not turn on, check these parts first:
- Pressure switch — may need adjustment or replacement
- Unloader valve
- Motor capacitor — a failed capacitor prevents startup
- Power cord and plug — check for damage or loose connections
Compressor Runs but Does Not Build Pressure
This is a common issue with several possible causes:
- Check valve — a stuck or damaged check valve lets air leak back
- Piston rings — worn rings reduce compression efficiency
- Intake filter — a clogged filter restricts airflow
- Tank gasket — a leaking gasket at the tank connection
Excessive Noise or Vibration
Unusual sounds often point to worn mechanical parts:
- Pump assembly — low oil levels or worn bearings cause noise
- Motor mounts — loose mounts let the motor vibrate excessively
- Fan blade — a damaged fan blade creates imbalance
- Loose fittings — check all connections for tightness
Air Leaks
If you notice air escaping, inspect these components:
- Hose fittings — loose or damaged connectors cause leaks
- Tank valve — the drain valve may not seal properly
- Pressure gauge — a faulty gauge can give false readings
- Gaskets and seals — worn seals are a frequent source of leaks
Maintenance Tips to Keep Your Compressor Running Smoothly
Regular maintenance extends the life of your Campbell Hausfeld compressor and prevents unexpected breakdowns. A well-maintained machine also runs more efficiently, which saves energy and reduces operating costs.
Check the Oil Level Regularly
For oil-lubricated models, check the oil level before each use. Change the oil according to the manufacturer’s schedule. Clean oil keeps the pump running smoothly and reduces wear on internal components.
Drain the Tank After Every Use
Moisture collects inside the tank during operation. Open the drain valve after each use to release this moisture. Built-up moisture causes rust and can eventually weaken the tank. This simple habit adds years to your compressor’s life.
Inspect Hoses and Fittings
Check all hoses and fittings for cracks, leaks, or loose connections. Replace damaged hoses immediately. Even a small leak wastes energy and reduces the compressor’s performance.
Clean the Intake Filter
A dirty intake filter restricts airflow and forces the pump to work harder. Clean or replace the filter regularly, especially if you use your compressor in a dusty environment. This is one of the easiest and most impactful maintenance tasks.
Inspect the Pressure Switch and Safety Valve
Test the pressure switch and safety valve periodically. The safety valve releases excess pressure to prevent tank rupture. If the safety valve fails, it creates a serious hazard. Replace any valve that does not function properly.
Where to Find Authentic Campbell Hausfeld Parts
Using genuine Campbell Hausfeld replacement parts ensures the best fit and performance. Aftermarket parts may seem cheaper, but they often lack the quality and durability of OEM components.
Official Campbell Hausfeld Website
The official Campbell Hausfeld website offers a comprehensive parts catalog. You can search by model number to find the exact air compressor parts diagram for your unit. The site also provides exploded view diagrams that show every part in detail.
Authorized Dealers and Distributors
Many authorized dealers carry genuine Campbell Hausfeld parts. These dealers can help you identify the correct parts using your model number. Buying from authorized sources guarantees authenticity and often includes warranty coverage.
Online Marketplaces
Major online marketplaces also sell Campbell Hausfeld parts. When shopping online, always verify the seller’s reputation. Check part numbers carefully against your diagram before placing an order.
Local Hardware and Industrial Supply Stores
Some local stores carry a selection of Campbell Hausfeld parts. Visiting a store lets you see the parts in person and get advice from knowledgeable staff. This can be especially helpful for fittings, hoses, and seals.
Quick Tips for Using Your Parts Diagram
Here are some practical tips to get the most out of your Campbell Hausfeld air compressor parts diagram:
- Print your diagram. Keep a physical copy in your workshop. It is faster to reference than pulling up a digital version.
- Laminate it. If your shop gets dusty or damp, a laminated diagram will last much longer.
- Highlight worn parts. Use colored markers to mark parts that need attention or replacement.
- Take photos during disassembly. Photos help you remember how parts were positioned before you started the repair.
- Keep a parts log. Record every part you order and replace. This makes future repairs faster and easier.
- Update your diagram. If you add aftermarket parts, update your diagram to reflect the changes.
Common Mistakes to Avoid When Using a Parts Diagram
Even experienced DIYers make mistakes. Here are some common errors to watch out for:
Using the Wrong Diagram
Every Campbell Hausfeld model has a unique parts layout. Using a diagram from a different model leads to ordering the wrong parts. Always confirm that the diagram matches your specific model number before you start.
Ignoring Part Numbers
Part numbers are the key to getting the correct replacement. Do not rely on visual matching alone. Two parts may look similar but have different specifications. Always order by part number.
Skipping Safety Steps
Never work on a compressor while it is pressurized. Always disconnect power and release all air pressure before starting any repair. Safety should always come first when working with compressed air equipment.
Forgetting Small Components
It is easy to overlook small parts like o-rings, washers, and screws. These small components are critical to proper operation. Check every part on your diagram, including the small ones, during any repair.
Expert Insights on Campbell Hausfeld Compressor Maintenance
Experienced technicians agree that regular maintenance is the single best way to avoid major compressor repairs. Here are some insights from the field:
“The most common mistake we see is neglecting the intake filter,” says a veteran compressor technician. “A clogged filter forces the pump to work harder, which accelerates wear on internal components. A clean filter costs almost nothing and can prevent expensive pump repairs.”
Another expert emphasizes the importance of moisture management. “Water is the enemy of every compressor system,” he explains. “Draining the tank, using an air dryer, and checking for condensation in the lines all help prevent rust and corrosion that can destroy your compressor from the inside out.”
These insights reinforce why understanding your Campbell Hausfeld air compressor parts diagram matters so much. When you know every component, you can spot early warning signs and take action before small issues become big problems.
Conclusion
A Campbell Hausfeld air compressor parts diagram is an invaluable tool for anyone who owns or works on these compressors. It gives you the knowledge to identify parts, troubleshoot problems, and perform repairs with confidence. From the pump assembly to the smallest fitting, every component plays a role in keeping your compressor running smoothly.
By following the tips and guidance in this guide, you can save money on repairs, extend the life of your compressor, and avoid common mistakes. Take the time to study your diagram, keep your parts organized, and stay on top of maintenance. Your Campbell Hausfeld compressor will reward you with reliable performance for years to come.
Now that you understand how to read and use your parts diagram, you are ready to tackle any compressor issue. Keep this guide handy in your workshop, and you will always have the information you need right at your fingertips.
Frequently Asked Questions
Where can I find a Campbell Hausfeld air compressor parts diagram for my model?
You can find the diagram on the official Campbell Hausfeld website by entering your model number. Many authorized dealers also provide model-specific diagrams. You can also check the manual that came with your compressor, as it often includes a detailed parts breakdown.
How often should I replace parts on my Campbell Hausfeld compressor?
Replacement frequency depends on how often you use the compressor and the operating conditions. Check valves, gaskets, and intake filters may need replacement every 6 to 12 months with regular use. Always refer to your owner’s manual for the recommended maintenance schedule specific to your model.
Can I use aftermarket parts instead of genuine Campbell Hausfeld components?
While aftermarket parts may fit, genuine Campbell Hausfeld parts are designed specifically for your compressor. They offer better compatibility, durability, and often come with warranty coverage. Using OEM parts reduces the risk of compatibility issues and helps maintain your compressor’s performance.
What should I do if my Campbell Hausfeld compressor loses pressure quickly?
Quick pressure loss usually points to a leak or a worn component. Check the check valve, tank gasket, and hose fittings first. Also inspect the pump piston rings and seals. If you cannot locate the leak, refer to your parts diagram to systematically check each component.
Is it safe to perform repairs on my Campbell Hausfeld compressor myself?
Many routine repairs are safe for DIYers with basic tools and mechanical knowledge. Always disconnect power and release all tank pressure before starting any work. If the repair involves the motor or high-pressure components, consider consulting a professional technician for safety.
How do I know which Campbell Hausfeld compressor model I have?
Your model number is usually printed on a metal plate or sticker on the compressor tank or frame. You can also find it in the owner’s manual. Once you have the model number, you can access the correct parts diagram and order the right replacement components.
=== CONCLUSION ===
Understanding your Campbell Hausfeld air compressor parts diagram empowers you to take control of your compressor’s maintenance and repairs. With the right knowledge and a clear diagram, you can identify problems quickly, order the correct parts, and complete repairs confidently. Keep this guide as a reference, stay proactive with maintenance, and your compressor will continue to deliver reliable performance for every project.