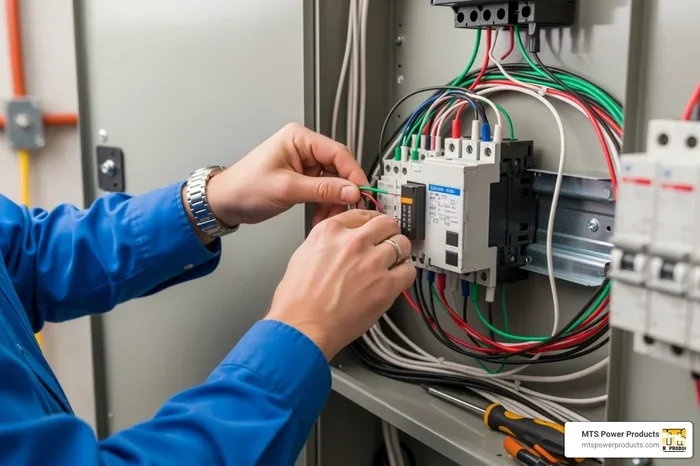
How to Install a Generator Transfer Switch Like a Pro
Installing a generator transfer switch is the smartest move you can make for backup power at home. This guide walks you through every step, from choosing the right type to wiring it into your electrical panel. You will learn the tools you need, the safety rules you must follow, and the mistakes most homeowners make. By the end, you will feel confident tackling this project yourself.
A generator transfer switch is the device that connects your generator to your home’s electrical system safely. Without one, you risk backfeeding power into the grid, which is extremely dangerous for utility workers. It also protects your appliances from damage caused by unstable power flow.
Many homeowners invest in a portable or standby generator but skip the transfer switch entirely. This is a big mistake. A backup power system is only as reliable as the way you connect it to your house. A proper generator connection through a transfer switch ensures clean, stable power flows exactly where you need it.
In this guide, we will walk you through every step of how to install a generator transfer switch. We will cover the different types available, the tools you need, the wiring process, and the safety rules you must follow. Whether you have a small portable generator or a whole-house standby unit, this article has you covered.
Key Takeaways
- Choose the right switch type: Manual vs. automatic transfer switches serve different needs and budgets.
- Gather your tools first: Having everything ready prevents delays and keeps the job safe.
- Follow the wiring diagram carefully: Proper wiring prevents backfeeding and protects your home.
- Get an electrical permit: Most local codes require a permit for this kind of installation.
- Avoid common mistakes: Skipping the grounding bond and ignoring load calculations are costly errors.
- Safety always comes first: Turn off the main breaker and verify power is dead before touching any wires.
- Call a pro if unsure: Some steps are best left to licensed electricians, especially panel work.
📑 Table of Contents
Understanding What a Generator Transfer Switch Does
Before you pick up a single tool, it helps to understand what this device actually does. A transfer switch sits between your generator and your home’s electrical panel. It acts as a gatekeeper that controls which power source feeds your circuits at any given time.
When the power goes out, you start your generator. The transfer switch lets you switch your home’s power source from the utility grid to the generator. Once grid power returns, the switch transfers back automatically or manually, depending on the type you installed.
Why You Cannot Skip This Device
Some people try to power their home by plugging a generator directly into a wall outlet. This is called backfeeding, and it is incredibly dangerous. Backfeeding sends electricity backward through your wiring and into the utility lines. A line worker touching a downed power line could be electrocuted because of your setup.
A transfer switch prevents this entirely. It isolates your home from the grid when the generator is running. This keeps everyone safe and keeps you compliant with the National Electrical Code. Most insurance companies and local governments require a proper generator connection method like this.
How the Switch Protects Your Appliances
Your home’s electrical system needs a stable power source. When you connect a generator without a transfer switch, the voltage can fluctuate. These fluctuations can damage sensitive electronics like computers, TVs, and medical equipment.
A good transfer switch wiring setup ensures a clean handoff between power sources. Your appliances get steady power whether it comes from the grid or the generator. This alone is a strong reason to invest in a proper switch.
Types of Transfer Switches You Should Know
Not all transfer switches are the same. Choosing the right type depends on your generator, your budget, and how much automation you want. Let us break down the main options.
Manual Transfer Switch
A manual transfer switch requires you to physically flip a lever or throw a switch to change the power source. You start the generator, let it warm up, and then manually switch your home over to generator power.
These switches are more affordable and simpler to install. They work great with portable generators. The downside is that you have to be home to make the switch. If a storm hits while you are away, you will come home to a powerless house unless someone else started the generator for you.
Automatic Transfer Switch
An automatic transfer switch (ATS) does the work for you. It monitors the utility power continuously. When it detects an outage, it signals the generator to start. Once the generator is running and stable, the switch transfers your home’s load automatically.
When grid power returns, the ATS switches you back and tells the generator to shut down. This is ideal for standby generators and for homeowners who travel frequently. The trade-off is a higher price tag and a more complex installation.
Circuit Interlock Kit
A circuit interlock kit is a budget-friendly alternative. It is not a full transfer switch but it serves a similar purpose. The kit uses a special bracket and locking mechanism to prevent you from turning on the main breaker and the generator breaker at the same time.
This option works well for homeowners on a tight budget. However, it offers less flexibility than a full transfer switch. You can only power a limited number of circuits, and the setup is less convenient.
| Type | Automation Level | Cost Range | Best For |
|---|---|---|---|
| Manual Transfer Switch | None | $300-$800 | Portable generators, budget setups |
| Automatic Transfer Switch | Full | $800-$2,000+ | Standby generators, whole-house backup |
| Circuit Interlock Kit | Partial | $150-$400 | Small budgets, limited circuits |
Tools and Materials You Will Need
Gathering everything before you start is one of the best things you can do. It keeps the job moving and reduces the risk of mistakes. Here is a complete list of what you will need.
Essential Tools
- Screwdrivers: Both flathead and Phillips head, in multiple sizes.
- Wire strippers: For preparing copper wire ends before connecting them.
- Voltage tester: A non-contact voltage tester is essential for safety.
- Drill and bits: You will need to drill holes for the conduit and the generator inlet box.
- Pliers and wrench set: For tightening connections and bending conduit.
- Fish tape: Helps pull wire through walls and conduit.
- Level and tape measure: For accurate placement of the inlet box and switch.
Materials Checklist
- Generator transfer switch: Match the amperage to your generator and panel.
- Generator inlet box: This is the box outside your home where you plug in the generator cord.
- Electrical conduit: PVC or EMT conduit to protect the wiring between the inlet box and the panel.
- Wire: Use the gauge recommended by the transfer switch manufacturer.
- Electrical tape and wire nuts: For insulating connections.
- Mounting hardware: Screws, brackets, and conduit straps.
Pro Tip: Check Your Local Codes
Before purchasing anything, check with your local building department. Many areas require an electrical permit for this type of installation. Some jurisdictions have specific rules about conduit type, wire gauge, and mounting height. Getting this information early saves you from redoing work later.
Step-by-Step Installation Guide
Now we get into the hands-on part. This is the core of the process on how to install a generator transfer switch. Follow each step carefully and never skip a safety precaution.
Step One: Choose the Installation Location
Start by deciding where the transfer switch will live. It should be mounted near your main electrical panel. The location needs to be easily accessible but protected from the weather if it is outdoors.
For the inlet box, pick a spot on the exterior wall closest to your generator storage area. This keeps the power cord as short as possible. A shorter cord means less voltage drop and better performance.
Step Two: Turn Off All Power
This is the most important safety step. Go to your main electrical panel and switch off the main breaker. Use your voltage tester to confirm that no power is flowing to the panel. Test multiple breakers to be thorough.
Never work on a live electrical panel. Even with the main breaker off, some wires may still carry residual charge. Treat every wire as if it is live until you have verified otherwise.
Step Three: Mount the Transfer Switch
Use the mounting bracket that came with your switch. Hold it in place next to your electrical panel and mark the screw holes with a pencil. Drill the holes and secure the bracket with screws.
Make sure the switch is level and firmly attached. A loose mount can cause wire connections to shift over time, which creates a fire hazard.
Step Four: Install the Generator Inlet Box
Drill a hole through the exterior wall for the conduit. Mount the inlet box on the outside wall at a height that is easy to access. Most codes require the box to be at least 18 inches above ground level.
Run the conduit from the inlet box to the transfer switch location inside. Secure the conduit with straps every four feet and within 12 inches of each box. Use weatherproof fittings where the conduit passes through the wall.
Step Five: Run the Wiring
Pull the wires through the conduit using fish tape. Strip the wire ends carefully with your wire strippers. Follow the wiring diagram that came with your transfer switch. Every manufacturer provides a specific diagram for their model.
Connect the wires from the inlet box to the input terminals on the transfer switch. Then connect wires from the switch output to the load side of your electrical panel. Each connection should be tight and secure. Use wire nuts and wrap with electrical tape for extra protection.
Step Six: Connect the Grounding Wire
This step is critical and often overlooked. The transfer switch must share a common grounding bond with your electrical panel. Connect the grounding wire from the inlet box to the grounding bar in your panel.
Check the neutral grounding requirements for your specific switch. Some switches require the neutral to be bonded at the panel, while others require it to be isolated. Refer to the manufacturer’s instructions carefully.
Step Seven: Test the System
Once all wiring is complete, turn the main breaker back on. Use your voltage tester to verify that each circuit is getting power from the utility grid normally.
Now start your generator and plug it into the inlet box. Flip the transfer switch to the generator position. Test each circuit one at a time. Check that lights turn on, outlets work, and appliances run smoothly.
After testing, switch back to utility power and let the generator cool down. This test cycle confirms everything works before you actually need it during an outage.
Quick Tips for a Smooth Installation
- Label every wire before you disconnect anything. Taking a photo of the original wiring helps a lot.
- Work with a partner. Having someone hold the conduit or hand you tools makes the job faster and safer.
- Do not rush the connections. Loose wires cause heat buildup and potential fires.
- Keep a fire extinguisher nearby when working inside the electrical panel.
Common Mistakes Homeowners Make
Even experienced DIYers make errors during this installation. Knowing what to avoid saves you time, money, and potential danger.
Skipping the Electrical Permit
Some homeowners skip getting a permit to save time and money. This is a risky shortcut. Without a permit, your installation may not be up to code. If your home is ever inspected, you could be forced to tear out the work and redo it properly.
Additionally, unpermitted electrical work can void your homeowner’s insurance. If a fire starts due to improper wiring, your insurance company may refuse to cover the damage.
Ignoring Load Calculations
Every transfer switch has a maximum amperage rating. If you connect more circuits than the switch can handle, you will overload the system. This can trip breakers, damage the switch, or start a fire.
Before the installation, make a list of the circuits you want to power during an outage. Add up their wattage and compare it to the switch rating. Always leave some room for surge loads like refrigerators and air conditioners.
Using the Wrong Wire Gauge
Thin wires carry less current safely. If you use wire that is too thin for the amperage, it will overheat. This is a leading cause of electrical fires in residential settings.
Always use the wire gauge specified by the transfer switch manufacturer. When in doubt, go one size thicker. The extra cost is minimal compared to the safety benefit.
Forgetting to Bond the Ground
A missing or loose grounding connection is a serious hazard. Without proper grounding, a fault in the system can energize metal surfaces in your home. This creates a shock risk for anyone who touches appliances, faucets, or metal fixtures.
Double-check your grounding bond before you close up any walls or conduit. Use a multimeter to verify continuity between the grounding wire and the panel’s grounding bar.
Safety Tips and Expert Advice
Installing a generator transfer switch involves working with high-voltage electricity. Safety should always be your number one priority. Here are the rules you must follow.
Know When to Call a Professional
There is no shame in calling a licensed electrician. If you are uncomfortable working inside the electrical panel, hire a pro. The cost of professional installation is small compared to the risk of electrical shock or fire.
Even if you plan to do the work yourself, consider having an electrician inspect your setup before you rely on it during an emergency. A second set of eyes can catch mistakes you might have missed.
Always Follow the Manufacturer’s Instructions
Every transfer switch model has specific installation requirements. The general steps in this guide apply broadly, but your particular unit may have unique wiring or mounting instructions.
Read the entire manual before you start. Keep it handy during the installation for reference. If anything in the manual contradicts what you read here, always follow the manufacturer’s guidance.
Never Backfeed Your Generator
This cannot be stated enough. Backfeeding through a dryer outlet or any other household socket is illegal in most areas and extremely dangerous. A generator transfer switch is the only safe and legal way to connect a portable generator to your home.
If you have been backfeeding in the past, stop immediately and install a proper switch. The risk to you, your family, and utility workers is simply not worth it.
Maintain Your System After Installation
Once the installation is complete, do not forget about it. Test the system every few months by running your generator and switching the load over. This keeps everything in working order and familiarizes you with the process.
Replace any worn wires, tighten loose connections, and keep the inlet box clean and free of debris. A well-maintained backup power system will serve you reliably for years.
Final Thoughts on Installing a Generator Transfer Switch
Installing a generator transfer switch is one of the most valuable home improvement projects you can tackle. It gives you reliable backup power during outages and protects your home and family from electrical hazards.
The process requires careful planning, the right tools, and strict attention to safety. But with the steps laid out in this guide, a motivated homeowner can absolutely get it done. Take your time, follow the wiring diagram closely, and never skip the safety checks.
Remember that a proper generator connection through a transfer switch is the difference between a safe backup system and a dangerous gamble. Invest the time to do it right, and you will have peace of mind every time the power goes out.
Start with the right switch for your setup, gather your tools, and follow each step methodically. Whether you choose a manual transfer switch for your portable generator or invest in an automatic setup for a standby unit, you are making a smart decision for your home’s resilience.
Share this guide with friends and neighbors who are also considering a backup power setup. The more homeowners who install transfer switches properly, the safer our communities become during storm season and power outages.
Frequently Asked Questions
Can I install a generator transfer switch by myself?
Yes, many homeowners successfully install a transfer switch themselves if they have basic electrical knowledge and the right tools. However, if you are uncomfortable working inside the electrical panel, it is wise to hire a licensed electrician. Local codes may also require a professional to pull the electrical permit.
What size transfer switch do I need for my generator?
The transfer switch amperage should match or exceed your generator’s output rating. For example, a 7,500-watt generator running at 240 volts needs at least a 30-amp transfer switch. Check your generator’s manual for its rated amperage and choose a switch that meets or exceeds that number.
Is a manual or automatic transfer switch better?
It depends on your needs and budget. A manual switch is more affordable and works well with portable generators. An automatic switch is more convenient and ideal for standby generators or households that travel often. Consider how often you expect to use the switch and how much automation you want.
Do I need an electrical permit to install a transfer switch?
In most areas, yes. An electrical permit ensures the installation meets local building codes and the National Electrical Code. Skipping the permit can lead to fines, insurance issues, and failed home inspections. Always check with your local building department before starting the project.
Can I power my entire house with a transfer switch and a portable generator?
It is possible but depends on your generator’s capacity and the number of circuits you connect. A portable generator typically has limited wattage, so you may only be able to power essential circuits like the refrigerator, lights, and a few outlets. A load calculation before installation helps you plan which circuits to include.
How often should I test my generator transfer switch?
You should test the system at least every three to six months. Run your generator, switch to generator power, and verify that all connected circuits work properly. Regular testing keeps the system in good shape and helps you catch any issues before a real power outage strikes.
=== CONCLUSION ===
Installing a generator transfer switch is a practical and rewarding project that adds real value to your home. You now know the different switch types, the tools you need, the wiring steps, and the common pitfalls to avoid. The key to a successful installation is patience, preparation, and a commitment to safety at every step.
Start by choosing the right switch for your generator and your household needs. Follow the installation steps carefully, get the proper permits, and test the system thoroughly before you rely on it. If anything feels uncertain, bring in a professional. There is no substitute for a safe, code-compliant installation.
With the right generator connection in place, you will never have to worry about power outages ruining your comfort or damaging your appliances. Take action today, and enjoy the peace of mind that comes with a reliable backup power system in your home.