Why Your Compressor Not Kicking On And How to Fix It
A compressor not kicking on is one of the most frustrating HVAC problems homeowners face. Whether it is a faulty capacitor, bad contactor, or low refrigerant, the root cause is often simpler than you think. This guide walks you through every common reason your compressor won’t start and gives you clear, step-by-step fixes you can try yourself. We also cover when to call a professional and how to prevent the problem from coming back.
You walk up to your air conditioning unit, expecting cool air to flow through your vents any moment. But instead, you hear silence. Your compressor not kicking on means your entire cooling system is dead in the water. It is a situation that can turn a hot summer day into a miserable one fast.
The good news is that a compressor failing to start is a very common problem. In most cases, the fix is straightforward and affordable. Whether you are a DIY homeowner or just want to understand what the repair guy is talking about, this guide has you covered. We will break down every reason your compressor might not be starting and show you exactly what to do about it.
Understanding your air conditioning compressor helps you tackle problems with confidence. The compressor is the heart of your cooling system. It pumps refrigerant through the coils, removes heat from your home, and keeps your indoor temperature comfortable. When it stops working, everything else grinds to a halt. Let us dive into the most common reasons this happens and how you can fix it.
Key Takeaways
- Capacitor failure is the #1 reason a compressor not kicking on: The start capacitor provides the initial jolt of energy needed to get the motor running.
- A bad contactor can block power entirely: This relay switches high voltage to the compressor, and when it fails, nothing happens.
- Low refrigerant causes compressors to shut down: The system detects low pressure and refuses to start to protect itself from damage.
- Electrical issues are sneaky but common: Loose wiring, tripped breakers, and faulty pressure switches can all stop a compressor from kicking on.
- Thermal overload protects your compressor: When the motor overheats, a built-in safety switch shuts it down until it cools.
- A hard start kit can solve aging compressor problems: This affordable upgrade gives old compressors the boost they need to start reliably.
- Regular maintenance prevents most compressor failures: Cleaning coils, checking refrigerant, and inspecting electrical connections keeps your system running smoothly.
📑 Table of Contents
What Does It Mean When Your Compressor Not Kicking On
When we say a compressor is not kicking on, we mean the motor inside the compressor unit fails to start when your thermostat calls for cooling. The fan might still blow air, but the compressor itself stays completely silent. No humming, no clicking, no rumbling. Just dead silence from the outdoor unit.
This is different from a compressor that starts and then shuts off immediately. That is a different problem with its own set of causes. When a compressor not kicking on at all, the issue usually lies in the electrical supply, the starting components, or a safety mechanism that has locked the system out.
Think of your compressor like a car engine. You turn the key, and the starter motor should engage. If the starter is bad, the engine won’t turn over. The same principle applies here. Something is preventing the compressor motor from getting the signal or the energy it needs to start.
Why the Compressor Is So Important
The compressor is the most critical part of your HVAC system. Without it running, refrigerant cannot circulate. Without refrigerant circulation, your home cannot cool down. Even if the indoor fan keeps blowing air, that air will be warm because no heat is being removed from it.
When your compressor not kicking on, you lose all cooling capacity. This is why people panic when they notice the problem. But panic does not help. A systematic approach to diagnosis will get you to the root cause faster.
Common Reasons Your Compressor Not Kicking On
Several things can prevent a compressor from starting. Let us go through each one in detail so you know what to look for.
Failed Start Capacitor
The start capacitor is a small cylindrical component that stores electrical energy and releases it in a burst to kick the compressor motor into action. Without a working capacitor, the compressor simply cannot overcome the inertia of the stationary motor.
This is the single most common cause of a compressor not kicking on. Capacitors wear out over time, especially in hot climates where they work harder. They can also fail suddenly during a power surge or electrical storm.
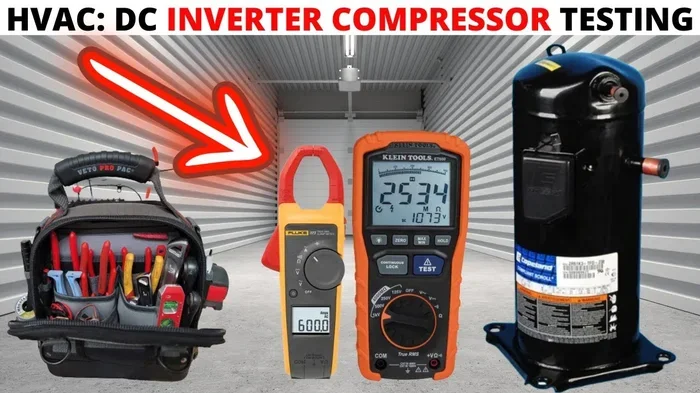
You can test a capacitor with a multimeter. If the reading shows zero or very low capacitance, the capacitor is dead and needs replacement. Capacitors are inexpensive parts, usually under 30 dollars. However, working with them requires caution because they hold a charge even when the power is off.
Bad Run Capacitor
While the start capacitor gets the motor turning, the run capacitor keeps it running smoothly. A failing run capacitor can cause the compressor to struggle to start or to hum without actually turning on. In some cases, the compressor never reaches full speed and a thermal overload shuts it down.
Run capacitor failure often shows up as a compressor that clicks once and then stops. If you hear that pattern, the run capacitor should be your first suspect.
Faulty Contactor
The contactor is an electrical relay that sends power to the compressor when your thermostat calls for cooling. It acts like a switch. When the thermostat signals a need for cooling, the contactor closes and allows electricity to flow to the compressor motor.
A bad contactor is another frequent reason a compressor not kicking on. The contactor coils can burn out, the contacts can pit and corrode, or the mechanism can simply stick in the open position. When this happens, power never reaches the compressor, and it stays silent.
You can often hear a healthy contactor click when your thermostat calls for cooling. If you hear nothing, or if you hear a buzzing sound but the compressor does not start, the contactor might be the culprit. Testing it requires checking for voltage at the coil and continuity across the contacts.
Low Refrigerant Levels
Your HVAC system is a sealed loop. It should never lose refrigerant unless there is a leak. When refrigerant levels drop too low, the system detects the pressure drop and activates a safety mechanism that prevents the compressor from starting.
This protection is built into the system for a good reason. Running a compressor with low refrigerant can cause severe damage. The compressor relies on refrigerant to cool its internal components. Without enough refrigerant, the motor overheats and can burn out.
If low refrigerant is the cause, you need to find and repair the leak before recharging the system. Simply adding refrigerant without fixing the leak is a temporary fix at best and a waste of money at worst.
Electrical Supply Problems
Sometimes the problem is not inside the unit at all. A tripped breaker, a blown fuse, or a loose connection at the disconnect box can prevent power from reaching the compressor.
Before you dig into complex repairs, always check the basics first. Look at your electrical panel and see if any breakers have tripped. Check the disconnect box near your outdoor unit and make sure it is fully switched on. Inspect the wiring connections for signs of burning, corrosion, or looseness.
Loose connections are particularly dangerous because they can arc and create heat buildup. This can damage the compressor control board and even start a fire. If you see any scorched wires or melted insulation, call a licensed professional immediately.
Thermal Overload Trigger
Every compressor has a thermal overload protector built into the motor. This safety device monitors the temperature of the compressor windings. If the motor gets too hot, the overload trips and cuts power to prevent a fire or permanent motor damage.
A thermal overload can trip for several reasons. The compressor might be overheating because of dirty coils, poor airflow, or high ambient temperatures. It can also trip if the capacitor is weak and the motor draws too much current trying to start.
The good news is that thermal overloads are designed to reset once the motor cools down. After a cooling period of 20 to 30 minutes, the compressor should be able to start again. If it trips again immediately, you have an underlying problem that needs to be addressed.
Pressure Switch Issues
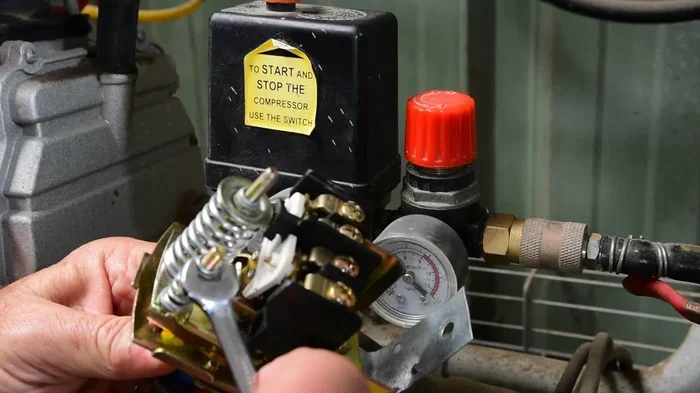
Many compressors have a pressure switch that monitors the refrigerant pressure on both the high and low sides of the system. If the pressure is outside the safe operating range, the pressure switch will prevent the compressor from starting.
A faulty pressure switch can give false readings and lock the system out even when the actual pressure is normal. Debris, moisture, or corrosion inside the pressure switch can cause it to malfunction. Replacing a pressure switch is usually a relatively simple repair for a trained technician.
How to Diagnose a Compressor That Won’t Start
Diagnosing a compressor not kicking on requires a systematic approach. You want to rule out the simple causes before moving on to more complex ones. Here is a step-by-step process you can follow.
Step 1: Check the Power Supply
Start at the electrical panel. Look for tripped breakers or blown fuses. Reset a tripped breaker and see if the compressor starts. If it trips again immediately, you have a short circuit or a grounded motor winding that needs professional attention.
Next, go to the disconnect box near your outdoor unit. Make sure it is fully on. Check the voltage at the contactor terminals using a multimeter. You should see the full line voltage present when the thermostat is calling for cooling.
Step 2: Listen for Clicking Sounds
When your thermostat calls for cooling, listen carefully at the outdoor unit. Do you hear the contactor click? A click means the control signal is reaching the contactor. No click means the problem is upstream, possibly in the thermostat, wiring, or control board.
If you do hear the contactor click but the compressor does not start, the problem is likely in the compressor itself or its starting components. If you hear nothing at all, the contactor is the likely culprit.
Step 3: Test the Capacitors
Capacitor testing is one of the most valuable diagnostic skills you can have. Disconnect power, discharge the capacitors safely, and use a multimeter to check capacitance. Compare your readings to the rated value on the capacitor label.
A capacitor that reads significantly below its rated value needs replacement. A capacitor that reads zero is completely dead. Always discharge capacitors before handling them. They store dangerous levels of electrical energy even when the power is off.
Step 4: Check the Refrigerant Pressure
Connecting pressure gauges to the service ports will tell you if your refrigerant charge is adequate. Low pressure on both the high and low sides suggests a refrigerant leak. High pressure on the low side with low pressure on the high side might indicate a restriction in the system.
If the pressures are both in the normal range, the compressor should be able to start. If the pressures are abnormal, the compressor safety controls are doing their job by preventing startup.
Step 5: Inspect the Contactors and Relays
Remove the contactor and inspect the contacts closely. Pitted, burned, or corroded contacts will not pass electricity reliably. Even if the contactor clicks, bad contacts can prevent enough current from reaching the compressor to get it started.
Clean contacts with contact cleaner if the damage is minor. Replace the contactor if the pitting is severe or if the coil shows signs of burning. A new contactor is a relatively inexpensive part that can restore your cooling system quickly.
How to Fix a Compressor Not Kicking On
Once you have identified the cause, fixing the problem is usually straightforward. Here are the most common repairs and how to approach them.
Replacing the Start Capacitor
Capacitor replacement is one of the easiest and most affordable repairs you can do. Make sure you purchase the correct replacement capacitor with matching voltage and capacitance ratings. Disconnect power, discharge the old capacitor, disconnect the wires, and connect the new one in the same configuration.
Take a photo of the wiring before you disconnect anything. This makes reconnection much easier and helps you avoid mistakes. After installing the new capacitor, restore power and see if the compressor starts.
Replacing the Contactor
A new contactor is a plug-and-play replacement in most cases. Match the voltage rating and amperage rating to your original contactor. Disconnect the wires, remove the mounting screws, swap in the new unit, and reconnect everything.
Contactors are available at most hardware stores and HVAC supply shops. They typically cost between 20 and 50 dollars. This is one of the most common and least expensive repairs that can solve a compressor not kicking on problem.
Recharging Refrigerant
If low refrigerant is the cause, you will need to find and repair the leak before recharging. This typically requires professional equipment and expertise. A licensed HVAC technician can use leak detection methods to find the source of the leak and repair it properly.
After the leak is fixed, the technician will evacuate the system, pull a vacuum, and recharge it with the correct amount of refrigerant. This is not a DIY job for most homeowners because it requires specialized tools and EPA certification to handle refrigerants legally.
Installing a Hard Start Kit
A hard start kit is a small device that includes a start capacitor and a potential relay. It gives your compressor an extra boost during startup. This is especially helpful for older compressors that have weakened windings and struggle to start on their own.
Hard start kits cost between 30 and 80 dollars and can extend the life of an aging compressor significantly. They are easy to install and are one of the most cost-effective upgrades you can make to an older HVAC system.
When to Call a Professional
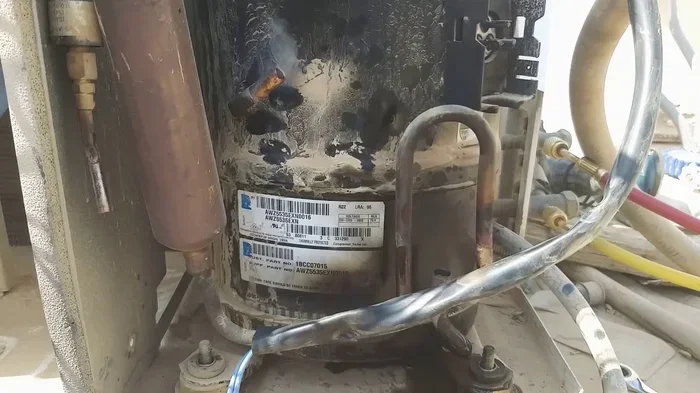
Not all compressor problems are suitable for DIY repair. If the compressor motor has burned out, you are looking at a very expensive repair or full unit replacement. If you are not comfortable working with high voltage electrical components, it is always better to call a licensed professional.
Also, if you have checked the basic components and the compressor still will not start, the problem might be deeper in the control board or the compressor windings themselves. A professional technician has the diagnostic tools and expertise to pinpoint these issues accurately.
Preventing Future Compressor Starting Problems
The best way to deal with a compressor not kicking on is to prevent it from happening in the first place. Regular maintenance goes a long way toward keeping your compressor healthy and reliable.
Schedule annual professional maintenance for your HVAC system. During a tune-up, a technician will check refrigerant levels, clean the coils, inspect electrical connections, and test capacitors. Catching small problems early prevents them from turning into compressor failures.
Keep your outdoor unit clean and free of debris. Trim vegetation back at least two feet from the unit to ensure proper airflow. Dirty coils force the compressor to work harder and run hotter, which shortens its lifespan.
Consider installing a surge protector for your HVAC system. Power surges are one of the leading causes of capacitor and contactor failure. A good surge protector can save you hundreds of dollars in repair costs over the life of your system.
Key Takeaways
- Capacitor failure is the #1 reason a compressor not kicking on: The start capacitor provides the initial jolt of energy needed to get the motor running.
- A bad contactor can block power entirely: This relay switches high voltage to the compressor, and when it fails, nothing happens.
- Low refrigerant causes compressors to shut down: The system detects low pressure and refuses to start to protect itself from damage.
- Electrical issues are sneaky but common: Loose wiring, tripped breakers, and faulty pressure switches can all stop a compressor from kicking on.
- Thermal overload protects your compressor: When the motor overheats, a built-in safety switch shuts it down until it cools.
- A hard start kit can solve aging compressor problems: This affordable upgrade gives old compressors the boost they need to start reliably.
- Regular maintenance prevents most compressor failures: Cleaning coils, checking refrigerant, and inspecting electrical connections keeps your system running smoothly.
Conclusion
Dealing with a compressor not kicking on is stressful, but it is rarely the end of the world for your HVAC system. In most cases, the cause is a simple component failure that is easy to diagnose and affordable to fix. Whether it is a dead capacitor, a worn contactor, or low refrigerant, the fix is almost always within reach.
The key is to approach the problem systematically. Start with the basics, work your way through the common causes, and know when to call in a professional. Regular maintenance is your best defense against compressor problems. A little prevention today saves you from a costly breakdown tomorrow.
Take the time to understand your system. When you know how your compressor works and what can go wrong, you are empowered to take action quickly and confidently. Your cooling system will thank you with years of reliable service.
Frequently Asked Questions
Why does my compressor click but not start?
A clicking sound usually means the contactor is engaging, but the compressor motor is not turning. This is often caused by a failed start capacitor or a seized compressor motor. The capacitor provides the initial torque to get the motor spinning, and without it, the compressor just clicks and stalls.
Can low refrigerant cause a compressor not to kick on?
Yes, absolutely. Low refrigerant triggers a pressure switch that prevents the compressor from starting. This is a safety feature designed to protect the compressor from running without enough refrigerant to cool its internal components. You will need to find and repair the leak before recharging the system.
How much does it cost to fix a compressor not kicking on?
Costs vary widely depending on the cause. A capacitor replacement typically costs 150 to 300 dollars including parts and labor. A contactor replacement is usually 100 to 250 dollars. A compressor motor replacement can run 1,000 to 3,000 dollars or more. The cheapest fix is always the one you catch early.
Is it safe to replace a capacitor myself?
Capacitor replacement is one of the safer DIY repairs if you take proper precautions. Always disconnect power at the breaker and the disconnect box. Discharge the capacitor using an insulated screwdriver before handling it. If you are not comfortable working with electrical components, hire a professional.
How do I know if my compressor is locked up?
A locked compressor will not turn even if you try to spin the motor by hand. You can test this by turning off the power and trying to rotate the compressor shaft with a wrench. If it does not move at all, the compressor is likely locked up and needs replacement. A locked compressor usually means internal mechanical failure.
Can a dirty condenser coil cause a compressor not to kick on?
Yes, dirty coils reduce airflow and cause the system to overheat. When the compressor gets too hot, the thermal overload trips and shuts it down. In severe cases, the compressor may not start at all until it cools off. Regular coil cleaning is an easy way to prevent this problem and extend compressor life.