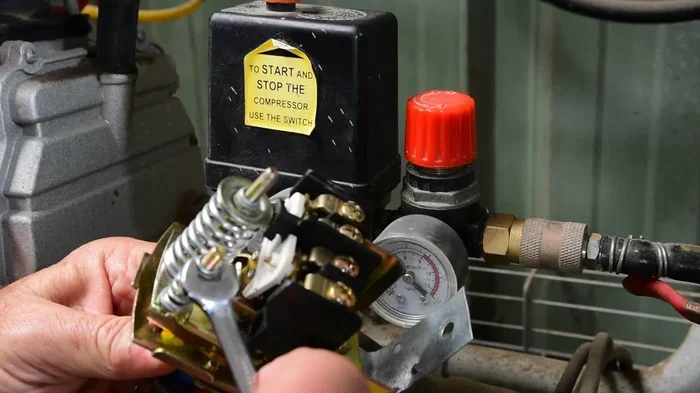
Air Compressor Unloader Valve Leaking Troubleshooting
An air compressor unloader valve leaking is a common problem that wastes energy, drops pressure, and can damage your compressor over time. This guide walks you through the top causes, symptoms, and fixes so you can get your system running smoothly again. Whether you are a DIYer or a professional, these troubleshooting steps will save you time and money.
This is a comprehensive guide about air compressor unloader valve leaking.
Key Takeaways
- Unloader Valve Function: The unloader valve releases trapped pressure when the compressor shuts off, making restart easier and protecting the motor.
- Common Leak Causes: Worn seals, debris buildup, electrical failure, and spring fatigue are the main culprits behind a leaking unloader valve.
- Easy DIY Fixes: Many leaks can be solved with simple cleaning, part replacement, or adjustment — no professional help needed.
- Preventive Maintenance: Regular draining, inspection, and part replacement extend valve life and prevent costly breakdowns.
- When to Call a Pro: Persistent leaks, electrical issues, or compressor damage warrant professional diagnosis and repair.
[FEATURED_IMAGE_PLACEHOLDER]
Air Compressor Unloader Valve Leaking Troubleshooting
You are here because your air compressor is leaking from the unloader valve. That hissing sound, the pressure drop, or the constant cycling — it is frustrating and can waste a lot of energy. The good news is that most unloader valve leaks are fixable with basic tools and a little know-how. In this guide, we will cover everything from what the unloader valve does to the exact steps you can take to stop the leak. Let us get into it.
The air compressor unloader valve leaking problem is one of the most frequent issues owners face. It happens when the valve fails to seal properly after the compressor stops running. This lets air escape from the tank, which puts extra strain on the motor and increases your electricity bill. Left unchecked, a small leak can turn into a big repair bill. But the sooner you catch it, the easier and cheaper the fix will be.
This troubleshooting guide is packed with practical steps, clear explanations, and real-world tips. You do not need to be a mechanic to follow along. We will break down the causes, walk you through the diagnosis, and give you actionable fixes. By the end, you will know exactly what to do and why it works.
What Does an Air Compressor Unloader Valve Do?
The unloader valve is a small but mighty component in your compressor system. Its main job is to release trapped air from the pump head when the motor stops. This makes it much easier for the motor to start the next cycle. Without it, the motor would have to fight against built-up pressure every time it kicks on.
Here is how it works in simple terms:
- The compressor fills the tank with air until it reaches the cut-out pressure.
- The pressure switch tells the motor to stop.
- The unloader valve opens and releases the air trapped above the piston.
- The motor can now start again with very little resistance.
When this valve works correctly, you barely notice it. But when it starts leaking, you will hear it — and you will feel the effects in the form of pressure loss and higher energy costs. Understanding this basic function helps you see why even a small leak matters so much.
Why Is Your Unloader Valve Leaking?
There are several reasons an unloader valve starts to leak. Each cause has its own set of symptoms and fixes. Let us look at the most common ones so you can narrow down the problem.
Worn or Damaged Seals
Over time, the rubber seals and O-rings inside the unloader valve wear out. Heat, moisture, and constant use all take a toll. When these seals degrade, air escapes through the gaps. This is the number one cause of a leaking unloader valve. You might notice hissing sounds even when the compressor is off.
Debris and Contamination
Dirt, rust particles, and moisture can get inside the valve and prevent it from closing fully. Think of it like a door that cannot latch because something is blocking it. The valve stays partially open, and air keeps leaking out. Compressors that run in dusty or humid environments are especially prone to this issue.
Spring Fatigue or Failure
The unloader valve relies on a small spring to push the valve closed after each cycle. If that spring weakens or breaks, the valve cannot seal properly. You may notice the leak gets worse over time or happens intermittently. Spring failure is common in older compressors that have seen a lot of use.
Electrical or Pressure Switch Issues
Sometimes the problem is not the valve itself but the signal that controls it. A faulty pressure switch may not send the right signal to open or close the unloader valve. This can leave the valve stuck in a half-open position. If you have checked the valve and it looks fine, the pressure switch is the next place to look.
For more on why your compressor keeps running, check out our guide on why does my air compressor keep running — it covers related pressure switch and cycling problems.
Improper Valve Installation
If the valve was not installed correctly after a previous repair, it may not seat properly. Even a slight misalignment can cause a persistent leak. This is a common issue after DIY replacements. Always make sure the valve is tightened to the manufacturer’s specifications and that all gaskets are in place.
How to Diagnose a Leaking Unloader Valve
Before you jump into repairs, you need to confirm that the unloader valve is actually the source of the leak. Here is a simple step-by-step diagnostic process you can follow right now.
Step 1: Listen and Look
Turn off the compressor and let it sit for a few minutes. Listen carefully for any hissing or escaping air sounds near the valve area. Look for visible air jets or moisture around the valve body. A small flashlight can help you see into tight spaces.
Step 2: Check the Pressure Gauge
Watch the tank pressure gauge after the compressor shuts off. If the pressure drops steadily, you have a leak somewhere. To narrow it down, close the drain valve and the outlet hose. If the pressure still drops, the unloader valve is likely the culprit.
If you are dealing with a compressor that won’t build pressure at all, our article on why won’t my air compressor build pressure covers additional diagnostic steps that can help you pinpoint the issue.
Step 3: Test the Valve Operation
Turn the compressor on and let it reach full pressure. Then turn it off. You should hear the unloader valve click open briefly when the motor stops. If you do not hear that click, the valve may be stuck. If it clicks but you still hear air leaking, the valve is not sealing properly.
Step 4: Inspect the Pressure Switch
The pressure switch controls the unloader valve. If the switch is faulty, the valve may not open or close at the right times. Check the switch for any visible damage, corrosion, or loose wiring. A multimeter can help you test the switch’s electrical continuity.
For a deeper dive into testing electrical components, see our how to test compressor windings guide.
How to Fix a Leaking Unloader Valve
Now that you have confirmed the leak is coming from the unloader valve, it is time to fix it. The repair method depends on the cause. Here are the most effective solutions.
Fix 1: Clean the Valve
If debris is causing the leak, a thorough cleaning might be all you need. Start by turning off the power and releasing all tank pressure. Remove the unloader valve from the compressor head. Use a small brush and compressed air to clean out any dirt, rust, or moisture. Pay special attention to the valve seat and the small passages inside. Once clean, reassemble and test.
Quick Tip: A can of compressed air works great for blowing out stubborn particles. Just be careful not to damage any delicate surfaces inside the valve.
Fix 2: Replace the Seals and O-Rings
If cleaning does not solve the problem, worn seals are likely the issue. Most unloader valve repair kits include O-rings, gaskets, and seals specific to your model. Here is how to replace them:
- Turn off the power and fully depressurize the tank.
- Remove the unloader valve from the compressor head.
- Take out the old seals, O-rings, and gaskets.
- Clean the valve body thoroughly to remove any residue.
- Install the new seals, making sure they are seated correctly.
- Reassemble the valve and tighten to the manufacturer’s torque spec.
- Turn on the compressor and test for leaks.
Replacement kits are inexpensive and widely available. This fix solves the problem in the majority of cases and takes less than 30 minutes.
Fix 3: Replace the Spring
If the spring is weak or broken, it will not push the valve closed with enough force. A replacement spring is usually included in the repair kit. Simply swap out the old spring for the new one, making sure it is positioned correctly. Test the valve after installation to confirm the leak is gone.
Fix 4: Replace the Entire Unloader Valve
In some cases, the valve body itself is damaged or corroded. If the valve is cracked, pitted, or severely worn, replacement is the best option. Unloader valves are relatively affordable parts, and replacing the entire unit is straightforward. Just match the part number to your compressor model, and you are good to go.
Fix 5: Address the Pressure Switch
If the pressure switch is not signaling the valve correctly, replacing the switch may be necessary. A faulty pressure switch can cause all kinds of problems beyond just a leaking valve. If you suspect this is the issue, it is worth replacing the switch and seeing if the leak stops.
Sometimes a leaking valve is a symptom of a bigger problem, like a failing ac compressor in a refrigeration system. If you work with AC units, check out our article on how to fix ac compressor on car for additional guidance.
How to Prevent Future Unloader Valve Leaks
Prevention is always better than repair. A few simple habits can keep your unloader valve in great shape for years. Here are the best practices every compressor owner should follow.
- Drain the tank regularly: Moisture is the enemy of valve seals. Drain your tank after every few uses to prevent corrosion and buildup.
- Inspect the valve periodically: Every few months, check the unloader valve for signs of wear, corrosion, or minor leaks. Catching a small problem early saves you from a big repair later.
- Keep the compressor clean: Wipe down the exterior and keep the area around the compressor free of dust and debris. This prevents contamination from entering the valve system.
- Use the right oil: If your compressor is oil-lubricated, always use the recommended oil type. Wrong oil can break down seals and cause leaks. Learn more in our guide on what type of oil goes in an air compressor.
- Replace parts on schedule: Seals and O-rings are wear items. Replacing them every 1 to 2 years, even if they look fine, prevents unexpected leaks.
- Do not exceed the duty cycle: Running your compressor beyond its designed duty cycle puts extra stress on all components, including the unloader valve.
These habits take just a few minutes but pay off big time. A well-maintained compressor runs more efficiently, lasts longer, and costs less to operate.
Common Mistakes to Avoid
When dealing with a leaking unloader valve, people often make mistakes that make the problem worse. Here are the ones to watch out for.
- Ignoring the leak: A small leak might seem harmless, but it puts continuous strain on the motor and increases your energy bill. Over time, it can lead to more serious compressor damage.
- Using the wrong replacement parts: Not all unloader valves are the same. Using a generic or mismatched part can cause the same leak to return quickly. Always match the part to your specific compressor model.
- Over-tightening the valve: It is tempting to crank down the valve to stop a leak, but over-tightening can crack the housing or damage the seals. Use a torque wrench and follow the manufacturer’s specs.
- Skipping pressure release before repairs: Always depressurize the tank fully before working on the valve. A sudden release of stored pressure can cause serious injury.
- Not checking the pressure switch: If you replace the valve and the leak persists, the pressure switch may be the real problem. Always test the switch before assuming the valve is at fault.
Avoiding these mistakes keeps you safe and ensures your repairs actually hold. It is amazing how often a simple oversight turns a 10-minute fix into a recurring headache.
When Should You Call a Professional?
Most unloader valve leaks are straightforward DIY repairs. But there are situations where calling in a pro makes sense. If you have tried the fixes above and the leak persists, there may be a deeper issue in the compressor system. Electrical problems, internal pump damage, or complex pressure switch faults are best left to experienced technicians.
Also, if your compressor is under warranty, attempting DIY repairs could void the coverage. Check your warranty terms before you start working on the unit. A professional technician can diagnose the problem quickly and often has access to factory parts that are hard to find on your own.
For those dealing with compressor issues in automotive applications, our guide on how much to fix air compressor in car gives you a good sense of what professional repairs might cost.
Key Takeaways
- Unloader Valve Function: The unloader valve releases trapped pressure when the compressor shuts off, making restart easier and protecting the motor.
- Common Leak Causes: Worn seals, debris buildup, spring fatigue, and pressure switch faults are the top reasons for a leaking valve.
- Easy DIY Fixes: Cleaning, seal replacement, and spring swaps are simple repairs that most owners can do at home.
- Preventive Maintenance: Regular draining, inspection, and scheduled part replacement keep the valve working reliably.
- Know When to Call a Pro: Persistent leaks, electrical issues, or warranty concerns are good reasons to seek professional help.
Conclusion
An air compressor unloader valve leaking is a problem you can fix. Most of the time, it comes down to worn seals, debris, or a weak spring. With the right tools and a little patience, you can get your compressor back in top shape. The key is to catch the problem early and not ignore it. Even a small leak wastes energy, strains the motor, and can lead to bigger repairs down the road.
Follow the troubleshooting steps in this guide. Diagnose the cause, apply the right fix, and take steps to prevent the problem from coming back. Your compressor will run more efficiently, last longer, and save you money on energy costs. Keep this guide bookmarked for future reference, and do not hesitate to call a professional if the problem goes beyond a simple valve repair.
Take action today. Your compressor will thank you tomorrow.
Frequently Asked Questions
What causes an air compressor unloader valve to leak?
The most common causes are worn seals and O-rings, debris buildup inside the valve, spring fatigue, and pressure switch malfunctions. Moisture and corrosion also play a big role over time.
Can I still use my compressor if the unloader valve is leaking?
You can, but it is not recommended. A leaking valve wastes energy, increases electricity costs, and puts extra strain on the motor. It can also lead to pressure loss that affects your tools and work quality.
How much does it cost to replace an unloader valve?
The valve itself typically costs between $20 and $60, depending on the compressor model. If you hire a professional, labor charges may add $50 to $150. DIY replacement keeps costs low and is straightforward for most owners.
How do I know if the unloader valve or the pressure switch is causing the leak?
Listen for the unloader valve clicking open when the compressor stops. If it does not click or you hear continuous air leaking, check the valve seals first. If the valve looks fine, the pressure switch is likely the problem.
How often should I replace the unloader valve seals?
As a general rule, inspect and replace seals every 12 to 24 months. Compressors that run frequently or in harsh environments may need more frequent replacement. Regular inspection helps you catch wear before it becomes a leak.
What happens if I ignore a leaking unloader valve?
Ignoring the leak leads to increased energy bills, motor strain, and potential compressor failure. Over time, moisture from the leak can also cause internal corrosion, which creates even more expensive repairs.