The Easiest Way to Install Xcode Command Line Tools
The easiest way to install Xcode command line tools is through Terminal or the Apple Developer website. This guide walks you through every method, including the quick install command, manual download, and using Homebrew. You will learn common mistakes to avoid, expert tips for troubleshooting, and how to verify your installation. Whether you are a beginner or an experienced developer, this guide makes the process simple and fast.
Are you trying to install Xcode command line tools on your Mac? You are not alone. Thousands of developers search for this every day. The good news is that it is much easier than you think. You do not need to download the entire Xcode app. In fact, you can have everything running in just a few minutes.
This guide will show you the simplest ways to get started. We will cover the Terminal method, manual downloads, and even how to use Homebrew. By the end, you will know exactly which method works best for you. Let us dive right in.
Key Takeaways
- Fastest Method: Use the xcode-select command in Terminal for a one-step install.
- No Xcode Needed: You can install command line tools without downloading the full Xcode app.
- Multiple Options: Choose from Terminal, Apple Developer website, or Homebrew.
- Verify Easily: Run a simple command to confirm everything is working.
- Common Issues: Learn how to fix stuck downloads and permission errors.
- Keep Updated: Regular updates ensure your developer tools stay current.
📑 Table of Contents
- What Are Xcode Command Line Tools?
- Why Install Xcode Command Line Tools?
- The Easiest Way to Install Xcode Command Line Tools
- Comparison of Installation Methods
- How to Verify Your Installation
- Common Mistakes When Installing Xcode Command Line Tools
- Quick Tips for a Smooth Installation
- Troubleshooting Common Installation Problems
- How to Update Xcode Command Line Tools
- What to Do After Installation
- Frequently Asked Questions
- Conclusion
What Are Xcode Command Line Tools?
Before we get into the how, let us talk about the what. Xcode command line tools are a set of developer utilities from Apple. They include compilers, build tools, and Git. You do not need the full Xcode application to use them.
These tools are essential for software development on macOS. They let you write, compile, and run code right from the Terminal. Many popular tools depend on them too. For example, Homebrew requires these tools to work properly.
What Is Included in the Tools?
The command line tools package contains several important components. Here is what you get when you install them:
- gcc and clang compilers: These compile C and C++ code.
- make: A build automation tool used by developers worldwide.
- Git: The version control system for tracking code changes.
- Apple SDKs: Software development kits for macOS and iOS.
- Swift compiler: For building apps in Apple’s Swift programming language.
- Terminal utilities: Common Unix tools like ls, grep, and sed.
All of these tools work together to create a powerful development environment. And the best part is that they are free. You do not need an Apple Developer account either.
Why Install Xcode Command Line Tools?
You might wonder why you need these tools at all. The answer is simple. Many development tasks require them. Even if you are not building Apple apps, you will likely need them.
Here are some common reasons developers install these tools:
- Running build scripts: Many open source projects need them to compile code.
- Using package managers: Homebrew and other tools depend on them.
- Version control: Git comes bundled with the tools.
- Programming languages: Python, Ruby, and Node.js often need them.
- CI/CD pipelines: Continuous integration systems use them for automated builds.
- Learning to code: They are a great starting point for new developers.
Without these tools, many development workflows simply will not work. That is why installing them is often the very first step. Think of them as the foundation of your macOS developer toolkit.
The Easiest Way to Install Xcode Command Line Tools
Now let us get to the main event. There are three main ways to install the tools. Each has its own advantages. Let us walk through them one by one.
Method 1: Using the xcode-select Command
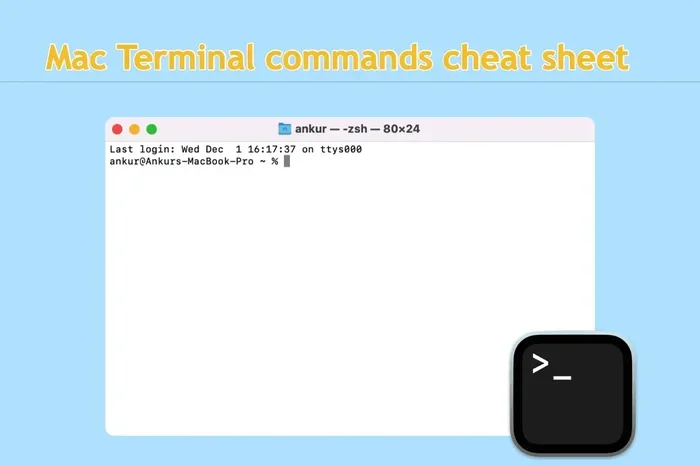
This is the fastest and most popular method. It takes just one command. Open your Terminal app and type the following:
xcode-select --install
That is it. A popup window will appear asking if you want to install the tools. Click “Install” and wait for the download to finish. The entire process usually takes less than five minutes.
Here are some tips for this method:
- Make sure your Mac is connected to the internet.
- You may need to enter your Mac password.
- The download size is typically around 150 MB.
- Do not close Terminal during the installation.
This method works on all recent versions of macOS. It is the recommended approach for most users. If it works for you, there is no need to try the other methods.
Method 2: Downloading from the Apple Developer Website
Sometimes the Terminal method does not work. Maybe you are behind a firewall. Or perhaps you need a specific version. In those cases, downloading directly from Apple is a great option.
Here is how to do it:
- Visit the Apple Developer Downloads page.
- Search for “Command Line Tools.”
- Select the version that matches your macOS.
- Click Download and wait for the file to finish.
- Open the downloaded package and follow the installer.
This method gives you more control. You can choose which version to install. It is also useful if you need to install tools on multiple machines. The downside is that it takes a few extra steps.
Method 3: Using Homebrew
Homebrew is the most popular package manager for macOS. Many developers already have it installed. If you are one of them, you might already have the command line tools.
Homebrew automatically installs the tools if they are missing. When you run your first brew command, it will prompt you to install them. This is a convenient approach if you are already using Homebrew for other projects.
To check if you already have the tools, run this command:
brew --version
If Homebrew works without errors, you are good to go. If not, it will guide you through the installation process.
Comparison of Installation Methods
Not sure which method to choose? Here is a quick comparison to help you decide.
| Feature | Terminal Command | Developer Website | Homebrew |
|---|---|---|---|
| Speed | Fastest | Moderate | Automatic |
| Difficulty | Very Easy | Easy | Easy |
| Version Control | No | Yes | No |
| Internet Required | Yes | Yes | Yes |
| Best For | Most users | Advanced users | Homebrew users |
| Apple Account Needed | No | No | No |
For most people, the Terminal command is the clear winner. It is fast, simple, and reliable. The other methods are great backups when the first approach does not work.
How to Verify Your Installation
After you finish installing, you should verify that everything works. This is an important step that many people skip. Verification takes just a few seconds and saves a lot of headaches later.
Open your Terminal and run these commands one by one:
xcode-select -p— This shows the tools path if they are installed.gcc --version— This checks if the C compiler is working.git --version— This confirms Git is available.make --version— This verifies the build tool is ready.
If all of these commands return version numbers, your installation was successful. You are now ready to start developing. If any command returns an error, do not worry. We will cover troubleshooting next.
Expert Insight
Professional developers always verify their tools after installation. This simple habit prevents countless problems down the road. It takes less than 30 seconds and can save hours of debugging later.
Common Mistakes When Installing Xcode Command Line Tools
Even with a simple process, mistakes can happen. Here are the most common ones and how to avoid them.
Mistake 1: Ignoring the “Already Installed” Message
Sometimes Terminal tells you the tools are already installed. This can be confusing. But it is actually good news! It means you are ready to go. Do not try to reinstall them. You will only waste time.
Mistake 2: Downloading the Full Xcode Instead
Many people confuse command line tools with the full Xcode app. The full app is much larger. It can be several gigabytes. Unless you are building iOS apps with a graphical interface, you do not need it. Stick with the command line tools for most development work.
Mistake 3: Not Updating After Installation
Apple releases updates to the tools regularly. These updates fix bugs and add new features. Always keep your tools up to date. You can check for updates through System Preferences or by running the install command again.
Mistake 4: Skipping the Path Configuration
In some cases, the tools install but the path is not set correctly. This can cause confusing errors. If you run into issues, try resetting the path with this command:
xcode-select --reset
This simple command often fixes path-related problems. It is worth trying before any deeper troubleshooting.
Quick Tips for a Smooth Installation
Here are some practical tips to make your experience even better:
- Restart your Mac first: A fresh restart clears up many potential issues.
- Check your macOS version: Make sure your operating system is up to date before installing.
- Use a stable internet connection: The download can fail on weak connections.
- Clear your Terminal history: If you have had issues before, start fresh with a new Terminal session.
- Read error messages carefully: They often contain the exact solution you need.
- Keep your Apple ID handy: You may need it for certain downloads.
These small steps can make a big difference. They help ensure your installation goes smoothly from start to finish.
Troubleshooting Common Installation Problems
Even with the easiest method, problems can occasionally occur. Here is how to handle the most common issues.
Problem: Download Stuck at Percentage
If your download seems stuck, try cancelling and running the command again. Sometimes the download server is slow. A fresh attempt often resolves this. You can also try switching from Wi-Fi to a wired connection.
Problem: “Package Download Failed” Error
This error usually means your internet connection dropped. Check your connection and try again. If it persists, download the tools manually from the Apple Developer website. This bypasses the Terminal download mechanism entirely.
Problem: “Command Line Tools Are Already Installed” But They Do Not Work
This is a tricky situation. The tools appear installed but something is broken. Try running the reset command we mentioned earlier:
xcode-select --reset
If that does not work, you may need to reinstall. Remove the existing tools first, then install them fresh. This is rare but it does happen occasionally.
Problem: Permission Denied Errors
Permission issues often occur when Terminal does not have the right access. Make sure you have administrator privileges on your Mac. You may need to prepend sudo to your commands. However, use sudo carefully and only when necessary.
How to Update Xcode Command Line Tools
Keeping your tools up to date is important. Updates bring new features and security fixes. Here is how to check for updates.
The simplest way is to run the install command again:
xcode-select --install
If an update is available, macOS will prompt you to install it. If everything is current, you will see a message saying the tools are already up to date.
You can also check for updates through the Software Update section in System Preferences. Apple bundles command line tool updates with regular macOS updates. Keeping your system updated is the easiest maintenance strategy.
What to Do After Installation
Once your tools are installed and verified, what comes next? Here are some great next steps for new developers:
- Learn Git basics: Start tracking your code with version control.
- Set up Homebrew: Install additional tools and packages easily.
- Try a programming language: Python and JavaScript are great starting points.
- Explore build tools: Learn how make and CMake work.
- Join a community: Connect with other developers online for support.
The command line tools open up a world of possibilities. They are your gateway to professional software development on macOS. Take some time to explore what you can build with them.
Expert Insight
Many successful developers recommend learning the Terminal early in your journey. It might feel intimidating at first, but it becomes second nature quickly. The command line tools are your first step into this powerful world.
Frequently Asked Questions
Do I need an Apple Developer account to install Xcode command line tools?
No, you do not need an Apple Developer account. The command line tools are free for everyone. You can download and install them without any registration. This makes them accessible to all macOS users who want to start developing.
How long does the installation take?
The installation typically takes between two and five minutes. The download size is around 150 MB on most connections. Faster internet speeds will complete the process even quicker. Just make sure you do not interrupt the download while it is in progress.
Can I install Xcode command line tools on an older version of macOS?
Yes, Apple supports command line tools on older macOS versions. However, very old versions may not have the latest tool versions available. Always check the Apple Developer website for compatibility information. Keeping your macOS updated is the best way to ensure smooth installations.
What is the difference between Xcode and Xcode command line tools?
The full Xcode app is a large integrated development environment with a graphical interface. It includes storyboard editors, simulators, and design tools. The command line tools are a much smaller package with just the compilers and utilities. For most development tasks, the command line tools are all you need.
Can I uninstall Xcode command line tools if I no longer need them?
Yes, you can remove them. Run the command xcode-select –uninstall in Terminal. This will remove the tools and free up disk space. If you ever need them again, you can simply reinstall them using the same process we covered in this guide.
Why do I need Xcode command line tools for Homebrew?
Homebrew is a package manager that compiles software from source code. To do this, it needs compilers and build tools. Xcode command line tools provide exactly these components. Without them, Homebrew cannot build or install most packages. They are a fundamental dependency for the Homebrew ecosystem.
Conclusion
Installing Xcode command line tools does not have to be complicated. As we have covered, there are multiple simple methods available. The Terminal command is the fastest and easiest approach for most users. You can have everything running in just a few minutes.
Remember to verify your installation after completing the process. Avoid the common mistakes we discussed. And keep your tools updated for the best experience. The command line tools are the foundation of macOS development. They unlock a world of possibilities for building software, managing code, and automating tasks.
Now that you know how to install Xcode command line tools, you are ready to take the next step. Open your Terminal, run that command, and start building something amazing. Happy coding!