How to Test Car AC Compressor Clutch the Right Way
Testing your car AC compressor clutch is easier than most people think, and it can save you hundreds of dollars in mechanic bills. This guide walks you through every step, from visual inspection to multimeter testing, so you can diagnose clutch problems with confidence. You will learn what tools to use, what warning signs to watch for, and when it is time to replace the clutch instead of repairing it.
Your car’s air conditioning system works hard to keep you cool on hot days. At the heart of that system sits the AC compressor, and the clutch is what brings it to life. When the clutch fails, your AC blows warm air, and your comfort goes right out the window.
Testing the compressor clutch might sound intimidating, but it really is not that complicated. With a few basic tools and some patience, you can diagnose the problem yourself. This guide shows you exactly how to do it, step by step, so you know what is going wrong and what to do about it.
We will cover everything from the tools you need to the actual testing process. You will also learn about common warning signs, expert tips, and mistakes to avoid. By the end, you will feel confident tackling this repair on your own.
Key Takeaways
- Visual inspection is the first and most important step in testing your AC compressor clutch.
- A multimeter lets you check clutch coil resistance and electrical continuity quickly.
- Common signs of a failing clutch include warm air, strange noises, and visible damage.
- Safety first always disconnect the battery before working on any electrical component.
- Replacing a clutch is often cheaper than replacing the entire AC compressor assembly.
- Regular maintenance can extend the life of your AC compressor clutch significantly.
- DIY testing empowers you to make informed repair decisions and avoid unnecessary costs.
📑 Table of Contents
Understanding Your AC Compressor Clutch
What Does the Clutch Do?
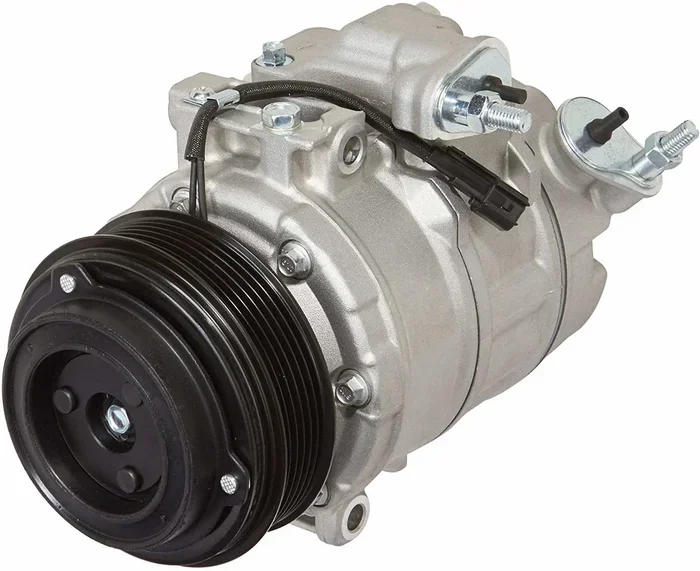
The AC compressor clutch is a small but vital part of your car’s air conditioning system. Its job is simple: it connects and disconnects the compressor from the engine. When you turn on the AC, the clutch engages and spins the compressor. When you turn it off, the clutch disengages and stops the compressor from running.
Think of it like a switch that controls power flow. When the clutch works properly, your AC kicks in the moment you press that button. When it fails, the compressor just sits there doing nothing. Understanding this basic function helps you see why testing the clutch matters so much.
The clutch has a few key parts you should know about. There is the clutch coil, which creates a magnetic field when electricity flows through it. There is the clutch plate, which physically connects to the compressor pulley. And there is the air gap, which is the tiny space between the coil and the plate. All of these parts work together to make your AC function.
Why Testing the Clutch Matters
Many car owners assume that when the AC stops working, the whole compressor is dead. That is not always true. Sometimes the problem is just the clutch, and replacing only the clutch costs a fraction of what replacing the entire compressor costs.
Testing the clutch first helps you avoid unnecessary expenses. It also tells you whether the issue is electrical or mechanical. An electrical problem might be a bad coil or a broken wire. A mechanical problem could be a worn clutch plate or a seized bearing. Each type of problem requires a different fix, so proper testing is essential.
When you test the clutch yourself, you also learn a lot about how your car’s electrical system works. The same principles you use to test a clutch apply to many other automotive electrical components. If you have ever checked how solar generators convert and regulate electrical current, you already understand some of the basics of voltage and resistance testing.
Tools You Need for Testing
Essential Tools
Before you start testing, gather the right tools. You do not need anything fancy, but having the correct equipment makes the job much easier and safer.
- Digital multimeter – This is your most important tool. It measures voltage, resistance, and continuity. A basic digital multimeter works perfectly for clutch testing.
- Basic hand tools – You will need wrenches and sockets to remove the serpentine belt and access the clutch.
- Safety glasses – Always protect your eyes when working around moving engine parts.
- Owner’s manual – Your manual has specific specifications for your vehicle, including clutch coil resistance values.
- OBD scanner (optional) – This can help you check for error codes related to the AC system.
Safety Precautions
Working on your car’s electrical system requires some basic safety habits. First, always disconnect the negative battery terminal before you start. This prevents electrical shocks and protects your car’s computer systems from damage.
Second, make sure the engine is off and the key is removed from the ignition before you touch any wires. Third, wear safety glasses and gloves. The AC system uses refrigerant under pressure, and you do not want to accidentally release it or get refrigerant on your skin.
Finally, work in a well-ventilated area. Even though you are not actively handling refrigerant during clutch testing, the AC system is nearby, and accidental releases can happen. If you have ever plugged a generator into your house for backup power, you already know how important proper electrical safety is. The same caution applies here.
Step-by-Step Testing Process
Step 1: Visual Inspection
Start with a simple visual inspection. Look at the compressor clutch and the area around it. You are checking for obvious damage that you can see without any tools.
First, look at the clutch plate. Is it cracked, warped, or showing signs of heavy wear? A damaged clutch plate will not engage properly, and you may see grooves or discoloration on the surface. Next, check the air gap between the clutch coil and the plate. This gap should be small and even. If it is too wide, the clutch may not engage at all.
Also inspect the wiring and electrical connector. Look for frayed wires, corroded connectors, or melted insulation. Any of these problems can prevent the clutch from receiving the electrical signal it needs to engage. Finally, check the serpentine belt. A worn or loose belt can cause the clutch to slip, which mimics clutch failure.
Step 2: Testing the Clutch Coil with a Multimeter
The clutch coil is the electromagnetic part that creates the magnetic force to engage the clutch. Testing it with a multimeter is the most important part of the entire process.
Start by locating the clutch coil connector. It is usually a small plug near the front of the compressor. Disconnect it carefully. Set your multimeter to the resistance or ohms setting. Place one probe on each of the coil terminals.
Now read the display. Most car AC compressor coils show a resistance between 2 and 5 ohms. Check your owner’s manual for the exact specification for your vehicle. If the reading shows infinite resistance (or OL on the display), the coil is open and has failed. If the reading shows zero or very low resistance, the coil is shorted and also needs replacement.
A healthy coil will show a steady resistance value within the manufacturer’s specified range. If your reading falls outside that range, the clutch coil is the problem, and you need to replace it. This is one of the most common causes of AC compressor clutch failure.
Step 3: Checking Electrical Connections
Even if the clutch coil tests fine, bad wiring can still prevent the clutch from working. After testing the coil, check the entire electrical path.
Set your multimeter to the continuity setting. Touch one probe to the battery positive terminal and the other to the clutch coil connector terminal. You should get a continuity reading, which means electricity can flow through the circuit. If you get no continuity, there is a break somewhere in the wiring.
Next, check the ground connection. Touch one probe to the clutch coil connector and the other to a known good ground on the engine block. You should see continuity here as well. A bad ground is a surprisingly common cause of clutch problems, and it is one of the first things to check.
Also test the clutch relay. The relay sends power to the clutch coil when you turn on the AC. If the relay is faulty, the coil never receives power, and the clutch will not engage. You can test the relay with your multimeter or swap it with a similar relay to see if that fixes the problem.
Step 4: Testing Clutch Engagement
The final step is testing whether the clutch actually engages when it should. This test requires the engine to be running, so be very careful around moving parts.
Start the engine and turn the AC to maximum cool. Look at the compressor clutch. You should see it engage and spin along with the serpentine belt. If the clutch does not spin at all, there is an electrical problem or the clutch is mechanically seized.
If the clutch engages but slips, you will hear a squealing or grinding noise. This usually means the clutch plate is worn and can no longer grip the compressor pulley properly. In this case, the clutch needs to be replaced even if the coil still works.
You can also test engagement by applying direct voltage to the clutch coil. Disconnect the coil connector and apply 12 volts directly to the coil terminals. The clutch should engage immediately and firmly. If it does not, the clutch is mechanically stuck and needs replacement. This simple test confirms whether the problem is electrical or mechanical.
Common Signs of a Failing AC Compressor Clutch
Warning Sounds
Your car often tells you when something is wrong, and the AC compressor clutch is no exception. Listen for unusual sounds when you turn on the AC. A clicking noise that comes and goes quickly usually means the clutch is trying to engage but cannot make full contact. A grinding or squealing noise typically indicates a worn clutch plate or a seized bearing.
Some car owners describe a rattling sound when the AC first turns on. This can be a sign that the clutch air gap is too wide, causing the plate to slam into the coil instead of engaging smoothly. Any of these sounds are worth investigating right away.
AC Blowing Warm Air
The most obvious sign of a failing clutch is warm air from the vents. If the clutch does not engage, the compressor does not run, and the refrigerant does not circulate. Your AC system will still blow air, but it will be the same temperature as the outside air.
Before you assume the clutch is the problem, check the refrigerant level first. Low refrigerant can also cause the AC to blow warm air, and it can trigger a safety switch that prevents the clutch from engaging. Always check refrigerant levels before replacing the clutch.
Visible Damage
Sometimes you can see the problem just by looking. A clutch plate that is heavily worn will have visible grooves or shiny spots where it has been slipping against the compressor pulley. A cracked or broken clutch plate will not engage at all. And a seized compressor will not spin freely when you try to turn it by hand.
If you notice any of these visual signs, do not keep driving with the AC on. A seized compressor can damage the serpentine belt and put extra strain on the engine. Have the vehicle towed to a shop if you cannot fix it yourself.
Expert Tips and Common Mistakes
Quick Tips for Accurate Testing
Here are some expert tips that will make your testing more accurate and your repairs more successful.
- Always compare your readings to the manufacturer’s specifications. Every vehicle is different, and generic numbers may not apply to your car.
- Test in a cool environment if possible. Extreme heat can affect multimeter readings and make it harder to see small components.
- Clean all connectors before testing. Corrosion on connectors can give you false readings and lead you to replace parts that are still good.
- Take photos before disconnecting anything. This makes reassembly much easier and helps you remember exactly where everything goes.
- Check the cycling switch before testing the clutch. The cycling switch controls when the compressor turns on and off, and a faulty switch can mimic clutch failure.
Common Mistakes to Avoid
Even experienced DIYers make mistakes when testing AC compressor clutches. Here are the most common ones to watch out for.
- Skipping the visual inspection. Many people jump straight to multimeter testing and miss obvious damage that was right in front of them.
- Not checking the refrigerant level. Low refrigerant is one of the most common reasons a clutch will not engage, and it has nothing to do with the clutch itself.
- Using the wrong multimeter setting. Always make sure your multimeter is set to the correct function before taking a reading. Using the wrong setting can damage the multimeter or give you inaccurate results.
- Forgetting to check the ground connection. A bad ground is one of the most overlooked causes of electrical problems, and it is very easy to check.
- Replacing parts without testing first. Testing saves money. You might find that a simple wiring repair fixes the problem, and you do not need to buy a new clutch at all.
When to Replace the Clutch
Repair vs Replace
Once you have tested the clutch and identified the problem, you need to decide whether to repair or replace. In most cases, a failed clutch coil or a worn clutch plate means replacement is the best option.
Replacing just the clutch is often possible without replacing the entire compressor. This is great news because a clutch replacement costs significantly less than a full compressor replacement. You save on parts and labor, and your car gets back to cooling properly much faster.
However, if the compressor itself is seized or damaged, you will need to replace the entire unit. Signs of compressor failure include metal shavings in the refrigerant, loud knocking noises, and complete loss of AC function even after clutch replacement. In these cases, clutch replacement alone will not solve the problem.
Cost Considerations
The cost of replacing an AC compressor clutch varies depending on your vehicle and where you live. On average, a clutch replacement costs between 200 and 500 dollars for parts and labor. A full compressor replacement can cost anywhere from 800 to 2000 dollars or more.
Doing the repair yourself can save you a significant amount on labor costs. If you are comfortable working on your car and have the right tools, a DIY clutch replacement is very achievable. Just make sure you follow all safety precautions and refer to your vehicle’s service manual for specific instructions.
Keep in mind that if your car is older and has high mileage, you might want to consider replacing the entire compressor at once. A new clutch on a compressor that is already wearing out may only buy you a little more time before the next failure.
Conclusion
Testing your car AC compressor clutch does not have to be scary or complicated. With the right tools, a little patience, and the steps outlined in this guide, you can diagnose clutch problems quickly and accurately. Start with a visual inspection, test the clutch coil with your multimeter, check the electrical connections, and verify clutch engagement. Each step builds on the last and brings you closer to finding the root cause.
Remember that proper testing saves you money. It prevents you from replacing parts that are still working and helps you make informed repair decisions. Whether the problem turns out to be a simple wiring issue or a worn clutch plate, you now have the knowledge to handle it with confidence.
Your car’s air conditioning system keeps you comfortable on hot days, and the compressor clutch is the key to making it all work. Take care of it, test it regularly, and do not ignore warning signs. A little attention now can prevent a big repair bill later.
Frequently Asked Questions
How do I know if my AC compressor clutch is bad?
The most common signs are warm air from the vents, strange clicking or grinding noises, and the clutch not spinning when you turn on the AC. You can also inspect the clutch visually for wear, cracks, or discoloration. Testing the clutch coil resistance with a multimeter gives you a definitive answer.
Can I drive my car with a bad AC compressor clutch?
Yes, you can drive your car, but your AC will not work. If the clutch is seized, it may put extra strain on the serpentine belt, which could cause the belt to break. In that case, you would lose power steering and other belt-driven accessories as well. It is best to get it fixed sooner rather than later.
What is the average cost to replace an AC compressor clutch?
A clutch replacement typically costs between 200 and 500 dollars for parts and labor. This is much cheaper than replacing the entire compressor, which can run 800 to 2000 dollars or more. The exact cost depends on your vehicle make and model and your local labor rates.
Do I need to evacuate the AC system to replace the clutch?
In most cases, no. Clutch replacement usually does not require opening the refrigerant system. However, if your compressor or refrigerant lines need to be disconnected during the repair, you will need to have the system evacuated and recharged by a certified technician.
Can low refrigerant cause the AC clutch not to engage?
Yes, low refrigerant is one of the most common reasons a clutch will not engage. Most AC systems have a low-pressure safety switch that prevents the compressor from running when refrigerant levels are too low. Always check and recharge the refrigerant before replacing the clutch.
What tools do I need to test the AC compressor clutch?
A digital multimeter is the most important tool for testing clutch coil resistance and electrical continuity. You will also need basic hand tools to access the clutch, safety glasses for protection, and your vehicle’s owner manual for specifications. An OBD scanner can help identify related error codes but is not strictly necessary.