How to Ohm Out a Compressor With These Simple Steps
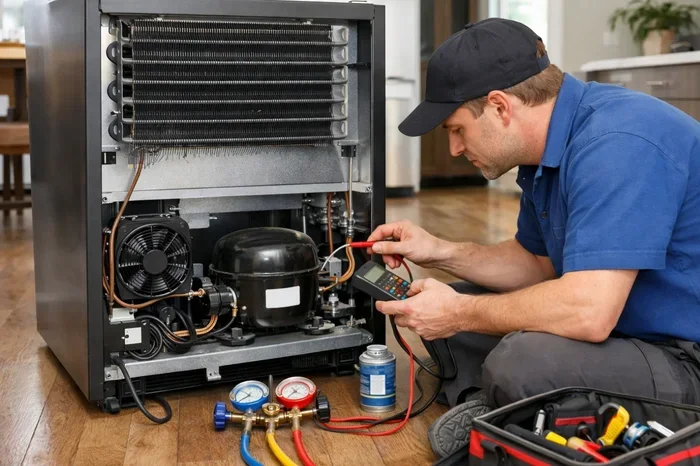
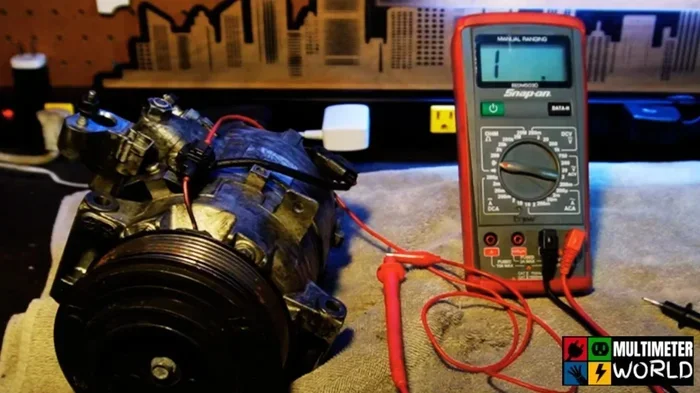
Ohming out a compressor means using a multimeter to test the electrical resistance in its windings. This simple test helps you spot short circuits, open windings, and grounding issues before they cause a total compressor failure. With just a few tools and basic safety steps, you can diagnose compressor problems fast and save money on repairs.
Compressors are the heart of so many systems we rely on every day. From air conditioning units to refrigerators and air tools, a compressor keeps things running smoothly. But when a compressor starts acting up, it can be frustrating and confusing. One of the first things a technician or handy homeowner should do is ohm out a compressor. This simple electrical test tells you a lot about the health of your compressor motor windings.
Ohming out a compressor might sound like a job for a professional electrician. But honestly, it is one of the most straightforward diagnostic tests you can do. All you need is a basic multimeter, a little patience, and the right safety precautions. In this guide, we will walk you through every step in plain language. You will learn what ohm readings mean, how to interpret them, and when it is time to call in a pro.
Whether you are troubleshooting an air conditioner compressor or checking a refrigerant compressor on a refrigerator, the process is very similar. By the end of this article, you will feel confident picking up that multimeter and getting real answers. Let us dive in and make sense of compressor testing together.
Key Takeaways
- Safety First: Always disconnect power and discharge capacitors before testing a compressor.
- Three-Terminal Test: You test resistance between the common, start, and run terminals to get accurate ohm readings.
- Normal Readings Vary: Different compressor types and sizes show different resistance values, so always compare to manufacturer specs.
- Ground Fault Detection: Testing windings against the compressor body reveals grounding problems that can be dangerous.
- Capacitor Check Matters: A bad capacitor can mimic compressor winding failures, so always test both.
- When to Call a Pro: If readings show zero or infinite resistance, it is usually time to replace the compressor.
📑 Table of Contents
- What Does It Mean to Ohm Out a Compressor?
- Tools and Safety Gear You Will Need
- Step-by-Step: How to Ohm Out a Compressor
- How to Read and Interpret Ohm Values
- Common Mistakes When Ohming Out a Compressor
- When to Replace vs. Repair a Compressor
- Quick Tips for Accurate Compressor Testing
- Final Thoughts
What Does It Mean to Ohm Out a Compressor?
When you ohm out a compressor, you are measuring the electrical resistance across its motor windings. Every compressor has three main terminals: common, start, and run. By placing your multimeter leads on different combinations of these terminals, you get resistance readings that tell you whether the windings are healthy.
Think of it like checking the electrical “pathways” inside the compressor. If a pathway is broken, that is an open winding. If the pathway has too little resistance, that is a short. And if the pathway touches the metal body of the compressor, that is a ground fault. Each of these problems shows up as a specific reading on your multimeter.
This test is one of the fastest ways to figure out if a compressor is bad or if the problem lies elsewhere, like a faulty capacitor or a wiring issue. It saves time and money because you do not have to guess. You get a clear answer right at the tool bench.
Tools and Safety Gear You Will Need
Before you touch any wires, make sure you have the right tools and safety equipment. Working with electrical components can be dangerous, so do not skip this step.
Essential Tools
- Digital multimeter: A standard digital multimeter that can measure resistance in ohms. Most basic models work perfectly fine for this task.
- Screwdriver set: You need a screwdriver to access the compressor terminals and remove covers.
- Safety glasses: Protect your eyes from any accidental sparks or debris.
- Insulated gloves: Rubber-insulated gloves add an extra layer of protection when working near electrical components.
- Notebook and pen: Write down your readings as you go so you do not forget or mix them up.
Safety Precautions
Safety is not optional when testing a compressor. Follow these rules every single time. First, always disconnect the power supply completely. Turn off the breaker and lock it out if possible. Second, discharge all capacitors before touching any wires. Capacitors can hold a dangerous charge even when the power is off. Third, never test a compressor while it is connected to a live circuit. And finally, make sure your work area is dry and well-lit.
If you are also working on a generator system and need to understand how it connects to your home electrical setup, check out our guide on how to hook a generator to a house for additional safety context.
Step-by-Step: How to Ohm Out a Compressor
Now for the part you have been waiting for. Here is the actual process, broken down into clear steps you can follow along with.
Step 1: Locate the Compressor Terminals
Open the access panel on your compressor and find the terminal box. You will see three main terminals labeled C (common), S (start), and R (run). Some compressors may use different labels, but the idea is the same. If the labels are faded or missing, consult the wiring diagram on the compressor nameplate or look it up online by model number.
Step 2: Set Your Multimeter to Ohms
Turn your multimeter on and set it to the ohm or resistance setting. If your multimeter has multiple ranges, start with the highest range and work your way down until you get a clear reading. Make sure your test leads are plugged into the correct ports on the multimeter.
Step 3: Test Between Common and Run
Place one multimeter lead on the common terminal and the other on the run terminal. Write down the reading you see. This measures the resistance of the run winding. Most compressors show a reading somewhere between 1 and 20 ohms, but the exact number depends on the size and type of compressor.
Step 4: Test Between Common and Start
Now move one lead to the start terminal while keeping the other on common. Write down this reading too. The start winding usually shows a higher resistance than the run winding, often between 5 and 30 ohms.
Step 5: Test Between Start and Run
Finally, place one lead on the start terminal and the other on the run terminal. This reading should equal the sum of the previous two readings. If it does not, that is a clue something is wrong inside the compressor.
Step 6: Test for Ground Faults
This is a critical step many people skip. Place one lead on any of the three terminals and the other lead on the compressor body or ground wire. You should get a reading of infinite resistance or OL (over limit) on your multimeter. If you get any reading at all, the compressor is grounded and needs to be replaced.
If you are doing this as part of a larger diagnostic on a generator system, understanding how generator sizing plays into compressor performance can help you connect the dots. Our article on how to size a generator covers how to match your power equipment to your electrical loads.
How to Read and Interpret Ohm Values
Getting numbers is only half the battle. The real skill is knowing what those numbers mean for your compressor.
Normal Readings
A healthy compressor will show balanced resistance between all winding pairs. The readings will typically be low but not zero. The sum of the common-to-start and common-to-run readings should closely match the start-to-run reading. This tells you all the windings are intact and connected properly.
Open Winding
If your multimeter shows OL or infinite resistance on any terminal pair, you have an open winding. This means the wire inside the winding is broken. An open winding usually means the compressor needs to be replaced. There is no practical way to repair a broken winding inside a sealed compressor.
Short Circuit
If you get a reading of zero ohms or very close to zero between any two terminals, that suggests a short circuit. The windings have too little resistance because the insulation has broken down and the wires are touching. A shorted compressor will overheat and eventually fail completely.
Ground Fault
As mentioned in Step 6, any reading between a terminal and the compressor body indicates a ground fault. This is one of the most dangerous compressor problems because it can cause electrical shock or fire. A grounded compressor must be replaced immediately.
Common Mistakes When Ohming Out a Compressor
Even experienced people make mistakes when testing a compressor. Here are some of the most common ones to avoid.
- Testing while the compressor is still powered: This can damage your multimeter and hurt you. Always disconnect all power first.
- Forgetting to discharge capacitors: Capacitors store energy and can deliver a painful or even dangerous shock if not discharged properly.
- Not cleaning the terminal connections: Dirt and corrosion on the terminals can give you false readings. Clean them with a wire brush or sandpaper before testing.
- Relying on only one test: Always test all terminal pairs and the ground. One reading alone does not tell the full story.
- Comparing readings to the wrong specs: Always check the manufacturer specifications for your specific compressor model. A reading that is normal for one compressor may be abnormal for another.
- Ignoring the capacitor: A bad start capacitor can cause symptoms that look exactly like a bad compressor. Always test the capacitor separately before condemning the compressor.
One mistake that catches people off guard is assuming a compressor is bad when the real problem is a wiring issue or a failed relay. If you are troubleshooting a compressor that is part of a Generac home generator system, it is worth checking the generator’s overall electrical health too. Our guide on how a Generac generator works explains the broader electrical system so you can rule out other causes.
When to Replace vs. Repair a Compressor
Once you have your ohm readings, the big question is: should you fix it or replace it?
If all your readings are within normal range and there is no ground fault, the compressor windings are healthy. In that case, the problem is likely elsewhere, such as a refrigerant leak, a faulty capacitor, or a thermostat issue. You do not need to replace the compressor.
If you find an open winding, a short circuit, or a ground fault, the compressor needs to be replaced. These are internal motor failures that cannot be repaired safely or economically. The cost of a new compressor often exceeds the cost of replacing the entire unit, especially for older systems.
Before you commit to a replacement, get a professional quote. Sometimes the repair cost is reasonable, and sometimes it makes more sense to invest in a new unit. If you are considering a new compressor or generator setup, understanding the whole home generator cost can help you plan your budget. Check out our guide on how much a whole home generator costs for pricing insights.
Quick Tips for Accurate Compressor Testing
- Always test at room temperature. Cold or hot compressors can give slightly different readings.
- Take multiple readings. Test each terminal pair at least twice to confirm consistency.
- Document everything. Write down your readings, the date, and the compressor model. This makes it easier to track problems over time.
- Use quality test leads. Damaged or cheap test leads can give inaccurate readings. Make sure your leads are in good condition.
- Know your compressor type. Scroll compressors, reciprocating compressors, and rotary compressors may have slightly different testing procedures. Always check the manufacturer’s manual.
One more thing that many people overlook: the health of your compressor affects the overall efficiency of the system it powers. If you are dealing with a compressor that is part of a larger electrical setup, understanding how much generator power you need can help you make better decisions about equipment sizing and replacement. Our article on how much generator you need walks you through the process step by step.
Final Thoughts
Ohming out a compressor is one of the most valuable skills you can have as a homeowner or technician. It gives you real, actionable data about the health of your compressor motor windings. With a simple multimeter and a few basic safety steps, you can diagnose compressor problems quickly and confidently.
Remember, the goal is not just to get numbers. The goal is to understand what those numbers mean and make a smart decision about what to do next. If the readings look normal, dig deeper into other possible causes. If the readings show a problem, you now know exactly what you are dealing with.
Do not let compressor uncertainty keep you up at night. Grab your multimeter, follow the steps in this guide, and take control of your troubleshooting. You will be amazed at how much you can figure out on your own. And if the results point to a replacement, you will know it is time to make that call with confidence. Ohming out a compressor is a small effort that pays off big time in saved money and peace of mind.
Frequently Asked Questions
What does it mean to ohm out a compressor?
Ohming out a compressor means using a multimeter to measure the electrical resistance across the compressor’s motor windings. This test helps you identify open windings, short circuits, and ground faults that indicate compressor failure or other electrical problems.
Do I need any special tools to ohm out a compressor?
No, you only need a basic digital multimeter, a screwdriver, and safety gear like insulated gloves and safety glasses. A standard multimeter from any hardware store works perfectly for this test.
What should the ohm readings be on a compressor?
Normal readings vary by compressor model and size, but most compressors show between 1 and 30 ohms across the windings. The common-to-run reading is usually the lowest, the common-to-start reading is higher, and the start-to-run reading should equal the sum of the other two.
Can I ohm out a compressor while it is still connected to power?
No, never. Always disconnect all power and discharge capacitors before testing. Testing a live compressor can damage your multimeter, give false readings, and create a serious safety hazard.
What should I do if I get a zero ohm reading on my compressor?
A zero or near-zero reading indicates a short circuit in the windings. This means the insulation has failed and the wires are touching. A shorted compressor needs to be replaced because it cannot be repaired safely.
Is it cheaper to repair or replace a compressor?
In most cases, replacing a compressor is not economical because the repair cost often exceeds the cost of a new unit or system. However, if the unit is relatively new and under warranty, repair may be worthwhile. Always get a professional quote before deciding.