How to Nudge in Pro Tools for Precise Audio Editing
Learning how to nudge in Pro Tools is one of the fastest ways to improve your audio editing precision. Nudging lets you move clips, regions, and edit points by tiny increments using simple keyboard shortcuts. Whether you are doing sample-level editing, tightening vocal comps, or aligning drum tracks, mastering the nudge function saves you hours of tedious work. This guide walks you through every nudge method, shortcut, and setting you need to edit like a pro.
Audio editing demands precision. Whether you are tightening up a vocal take, aligning drum hits, or comping the best parts of multiple recordings, the smallest movement can make a huge difference. In Pro Tools, the nudge function gives you exactly that level of control. It lets you move clips, regions, and edit selections by very small, precise amounts.
But if you are new to Pro Tools, the nudge feature can feel confusing at first. There are shortcuts to learn. There are settings to adjust. And there are different edit modes that change how nudging behaves. This guide breaks it all down in plain language. By the end, you will know exactly how to nudge in Pro Tools like a seasoned professional.
The beauty of learning this skill is that it speeds up your workflow dramatically. Instead of clicking and dragging clips with your mouse, you can use simple keystrokes to move things into place. It feels fast. It feels natural. And once you build the habit, you will wonder how you ever edited without it. Let us dive in.
Key Takeaways
- Nudge shortcuts let you move clips in tiny increments: Use the up, down, left, and right arrow keys to shift selections by your set nudge value.
- Nudge values are customizable: You can set nudge amounts from samples to bars, giving you control over how far each nudge moves your edit.
- Edit modes change how nudging works: Slip, Shuffle, Spot, and Grid modes all behave differently when you nudge clips around the timeline.
- The Grabber tool is your best friend for nudging: Switch to the Grabber tool before using nudge shortcuts for the most intuitive movement.
- Combining nudge with grid resolution boosts precision: Tighter grid settings paired with small nudge values give you sample-accurate editing results.
- Pro Tools offers both keyboard and mouse nudging: You can nudge with keys, with the mouse wheel, or by dragging with modifier keys held down.
📑 Table of Contents
- What Does It Mean to Nudge in Pro Tools?
- How to Nudge in Pro Tools Using Keyboard Shortcuts
- Understanding Nudge Values and Grid Settings
- Different Edit Modes That Affect Nudging
- Advanced Nudging Techniques for Precision Editing
- Common Mistakes When Nudging in Pro Tools
- Pro Tips for Faster Nudging Workflow
- Frequently Asked Questions
- Conclusion
What Does It Mean to Nudge in Pro Tools?
Nudging is the act of making a very small, controlled movement to an audio clip, region, or edit selection. Think of it like sliding a puzzle piece a tiny bit to the left or right. You are not moving things across the entire session. You are making micro-adjustments that tighten up your edit.
In Pro Tools, nudging works on the timeline. You can nudge a clip forward or backward by a set amount. That amount is called the nudge value. The nudge value determines how far the clip moves each time you press a shortcut key. Set it to one sample, and each nudge moves the clip by a single audio sample. Set it to one bar, and each nudge jumps the clip across a full musical bar.
This concept is central to sample-accurate editing. When you need your edits to land on exact zero-crossings or align perfectly with a beat, nudging gives you that level of detail. It is one of those features that separates a rough mix from a polished, professional-sounding track.
Why Nudging Matters for Audio Editors
Here is a quick look at why nudging is so important in day-to-day editing:
- Tightening vocal performances: Move syllables or words by fractions of a second for a tighter, more polished sound.
- Aligning drum tracks: Snap kick and snare hits to the exact grid position for a tight rhythm section.
- Comping takes: Seamlessly stitch together the best parts of multiple recordings without creating clicks or gaps.
- Fixing timing issues: Shift a single note or transient slightly earlier or later to fix a timing problem.
- Creating smooth fades and crossfades: Nudge edit points to find the perfect spot for a fade-in or fade-out.
As you can see, nudging touches almost every part of the editing process. It is not just a nice-to-have. It is an essential skill for anyone working with Pro Tools.
How to Nudge in Pro Tools Using Keyboard Shortcuts
The most common way to nudge in Pro Tools is with your keyboard. Pro Tools uses simple arrow keys to nudge selections and clips in four directions. Here is how it works:
- Nudge Left: Press the left arrow key to move your selection or clip backward by the current nudge value.
- Nudge Right: Press the right arrow key to move your selection or clip forward by the current nudge value.
- Nudge Up: Press the up arrow key to move your selection or clip upward on the timeline.
- Nudge Down: Press the down arrow key to move your selection or clip downward on the timeline.
Before you use these shortcuts, make sure you have the right tool selected. The Grabber tool (shortcut: F2) is the best tool for nudging. It lets you grab and move clips, regions, and selections around the timeline with ease. If you are using the Selector tool (shortcut: F1), nudging will still work, but it moves your edit selection rather than whole clips.
Modifier Keys for Fine-Tuned Nudging
Pro Tools gives you extra control when you combine nudge shortcuts with modifier keys. These small adjustments can make a big difference in your editing speed:
- Option + Nudge (Mac) or Alt + Nudge (Windows): This changes the nudge value temporarily. Hold the modifier key and press an arrow to nudge by a different amount than your current setting.
- Command + Nudge (Mac) or Ctrl + Nudge (Windows): This allows for even finer movement, especially useful when working at the sample level.
- Shift + Nudge: Some users remap this for larger nudge increments, depending on their workflow.
Experiment with these modifier combinations in a blank session. Get a feel for how far each nudge moves your clips. Once you build muscle memory, you will not even think about the shortcuts anymore. They will just become part of how you edit.
Understanding Nudge Values and Grid Settings
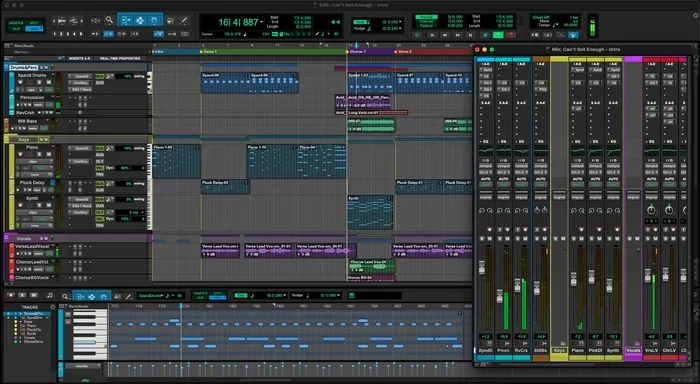
The nudge value is the heart of the nudging system. It defines the smallest distance your clips or selections can move with each nudge. Pro Tools lets you set this value to match your editing needs. You can find the nudge value display in the Edit Window toolbar, usually near the top of the screen.
Here are the common nudge value options you will use:
- Sample: Moves your edit by a single audio sample. This is the most precise setting and is perfect for sample-accurate editing.
- Millisecond: Moves your edit by a set number of milliseconds. Great for timing adjustments that do not need sample-level precision.
- Frame: Moves your edit by one video frame. Essential for editors working with video sessions.
- Beat: Moves your edit by one musical beat. Useful for aligning clips to the rhythm of a song.
- Bar: Moves your edit by one full bar. Best for larger repositioning tasks within a session.
How to Change the Nudge Value
Changing the nudge value is simple. Click on the nudge value display in the Edit Window toolbar. A dropdown menu appears with all available nudge options. Select the one that fits your current task. You can also type in a custom nudge value if you need something very specific.
Here is a quick tip: when you are doing detailed vocal comping, set your nudge value to sample or millisecond. When you are arranging full tracks or moving large sections, switch to beat or bar. Matching your nudge value to the task at hand keeps your editing fluid and efficient.
The Relationship Between Nudge and Grid
It helps to understand how the nudge value relates to the grid resolution. The grid determines where clips snap to on the timeline. The nudge value determines how far they move when you press a shortcut. When both are set to the same unit, your nudging becomes very predictable and precise.
For example, if your grid is set to beats and your nudge value is also set to beats, every nudge moves your clip exactly one beat forward or backward. If your grid is set to samples but your nudge value is set to beats, the behavior can feel inconsistent. Keeping both in sync is a simple habit that makes a big difference.
Different Edit Modes That Affect Nudging
Pro Tools offers several edit modes that change how clips behave on the timeline. Each mode affects nudging in its own way. Understanding these modes is key to getting the most out of the nudge function.
Slip Mode
Slip mode is the most flexible editing mode. When you nudge a clip in Slip mode, the clip moves freely along the timeline without changing its position relative to the session start. The clip stays in place on the timeline, but the audio inside it shifts. This mode is perfect for fine-tuning the start or end point of a clip without moving the clip itself.
To enter Slip mode, press the F3 key or click the Slip tool in the toolbar. In Slip mode, nudging with the arrow keys moves your selection point, allowing you to audition different parts of the clip without changing its timeline position.
Shuffle Mode
Shuffle mode is designed for quick comping and rearranging. When you nudge a clip in Shuffle mode, it slides along the timeline and automatically pushes other clips out of the way. If you nudge a clip to the right, the clips after it shift right as well. This mode is incredibly useful for building arrangements and testing different track orders.
Shuffle mode is activated by pressing F4 or clicking the Shuffle tool. Keep in mind that nudging in Shuffle mode can sometimes create unintended gaps or overlaps if you are not careful. Always zoom in and verify your edits after nudging in this mode.
Spot Mode
Spot mode is similar to Shuffle mode, but it works differently. When you nudge a clip in Spot mode, the clips after it do not move. Instead, the gap left by the moved clip stays open, or the gap closes depending on which direction you nudge. Spot mode is useful for inserting or removing small sections of audio without disturbing the rest of the timeline.
Spot mode is activated by pressing F5 or clicking the Spot tool. It takes a little practice to get comfortable with, but once you do, it becomes a powerful tool for precise audio clip movement and audio alignment tasks.
Grid Mode
Grid mode snaps clips to a fixed grid on the timeline. When you nudge a clip in Grid mode, it jumps from one grid point to the next. This mode is ideal for beat-aligned editing, especially in music production where timing precision matters.
Grid mode is toggled by pressing F6 or clicking the Grid button. You can choose from several grid types, including Absolute Grid, Relative Grid, and Smart Grid. Each type affects how nudging snaps your clips to the timeline.
Advanced Nudging Techniques for Precision Editing
Once you understand the basics, you can start exploring advanced nudging techniques that take your editing to the next level. These methods are used daily by professional audio editors and mix engineers around the world.
Nudging with the Mouse
You are not limited to keyboard nudging. Pro Tools also supports mouse-based nudging. Here is how it works:
- Option-drag (Mac) or Alt-drag (Windows): Click and drag a clip while holding the Option or Alt key. The clip moves in very small increments, allowing for pixel-level placement on the timeline.
- Command-drag (Mac) or Ctrl-drag (Windows): This provides an even finer level of mouse nudging. It is especially useful for moving edit points by just a few samples.
- Scroll wheel nudging: In some configurations, scrolling the mouse wheel while hovering over a clip can nudge it by small amounts. Check your Pro Tools preferences to enable or customize this behavior.
Using Nudge for Vocal Comping
Vocal comping is one of the most common tasks where nudging shines. Here is a step-by-step workflow:
- Record multiple takes of the same vocal part.
- Create a new playlist for the vocal track.
- Switch to Slip mode (F3) for maximum flexibility.
- Set your nudge value to sample or a small millisecond value.
- Use the Grabber tool to select the best phrase from each take.
- Nudge each phrase into place on the main playlist.
- Zoom in closely and use small nudge adjustments to align edit points perfectly.
- Listen back and make any final micro-adjustments.
This workflow gives you complete control over every syllable and breath. The nudge function makes it easy to find that perfect edit point where two takes blend seamlessly.
Nudging for Drum Alignment
Drum editing is another area where nudging is indispensable. Kick drums, snare hits, and hi-hats all need to land on the beat with tight precision. Here is a quick workflow:
- Set your grid to beat or half-beat resolution.
- Set your nudge value to beat or a subdivision of beat.
- Use the Selector tool to highlight transients that need adjustment.
- Nudge each hit into alignment with the grid.
- Zoom in and make sample-level nudges for the tightest possible sound.
Many engineers also use beat detective or strip silence tools alongside nudging for drum editing. The combination of automated processing and manual nudge adjustments gives you the best of both worlds.
Nudging in Playlist View
Pro Tools’ playlist view is a powerful feature for organizing multiple takes. When you are working in playlist view, nudging helps you audition and compare different takes quickly. You can nudge individual playlist regions up or down to align similar phrases across takes. This makes it easy to visually compare performances and identify the best take for each section.
To nudge in playlist view, make sure the Grabber tool is active and your nudge value is set appropriately. Use the up and down arrow keys to move regions between playlists. Use left and right arrows to shift regions within a playlist. This approach keeps your workflow fast and organized.
Common Mistakes When Nudging in Pro Tools
Even experienced editors make mistakes with nudging. Here are the most common ones and how to avoid them:
Forgetting to Check the Edit Mode
One of the biggest mistakes is nudging without realizing which edit mode you are in. Slip, Shuffle, Spot, and Grid modes all behave differently. If your clips are not moving the way you expect, check your edit mode first. Press the corresponding function key (F3, F4, F5, or F6) to switch modes and see if that fixes the issue.
Ignoring the Nudge Value
Another common mistake is leaving the nudge value at an unexpected setting. If you nudge and your clips jump across the entire timeline, you probably have a large nudge value active. Always verify your nudge value before starting detailed work. A quick glance at the nudge value display in the Edit Window toolbar can save you a lot of frustration.
Nudging Without Zooming In
Trying to make precise nudges without zooming in is like trying to thread a needle without good lighting. Zoom in to the waveform level before making sample-level adjustments. Use the zoom shortcuts (Ctrl+Plus and Ctrl+Minus on Windows, or Command+Plus and Command+Minus on Mac) to get a closer look at your edit points.
Not Using the Right Tool
Using the Selector tool when you mean to use the Grabber tool can lead to confusion. The Selector tool nudge moves edit selections, not whole clips. The Grabber tool nudge moves clips and regions. Make sure you have the correct tool active before you start nudging.
Over-Nudging
Sometimes less is more. It is easy to keep nudging a clip back and forth trying to find the perfect position. Instead, make small, deliberate nudges and listen after each one. Trust your ears. The goal is not just visual perfection but also musical feel and natural sound.
Pro Tips for Faster Nudging Workflow
Here are some expert tips that will help you nudge faster and more efficiently in Pro Tools:
- Customize your nudge value shortcuts: Go to Preferences > Operation > Nudge and set up custom shortcuts that match your editing style.
- Use the nudge value history: Pro Tools remembers your recent nudge values. You can cycle through them quickly to switch between common settings.
- Combine nudging with loop recording: When loop recording, use nudging to quickly position your punch-in points for tight, seamless takes.
- Save nudge presets: For sessions with specific editing requirements, save custom nudge presets so you do not have to reconfigure every time.
- Use nudge in conjunction with audio comping: Nudging and comping work hand in hand. Master both skills and your editing speed will increase dramatically.
- Learn the timeline ruler shortcuts: Understanding how the timeline ruler interacts with nudging gives you better control over your session layout.
The more you practice these techniques, the more natural they become. Set aside time to experiment with different nudge values and edit modes in a low-pressure session. Build your muscle memory. Before long, nudging will feel like second nature.
Frequently Asked Questions
What is the default nudge value in Pro Tools?
The default nudge value in Pro Tools is typically set to zero or the smallest available increment, which is usually one sample. However, this can vary depending on your session settings and preferences. You can check your current nudge value in the Edit Window toolbar. If you ever need to reset it, simply click the nudge value display and choose your preferred default setting from the dropdown menu.
Can I nudge multiple clips at the same time?
Yes, you can. Select multiple clips or regions using the Selector or Grabber tool, then use your nudge shortcuts. All selected clips will move together by the set nudge value. This is incredibly useful when you need to shift entire sections of a session or align multiple tracks simultaneously. Just make sure all the clips you want to move are properly selected before nudging.
How do I nudge in Shuffle mode without creating gaps?
In Shuffle mode, nudging a clip automatically pushes other clips out of the way to fill the gap. This is by design. If you want to nudge without affecting surrounding clips, switch to Slip mode instead. Slip mode moves the clip freely without disturbing the clips around it. Understanding when to use each mode is key to efficient editing.
What is the difference between nudging and sliding in Pro Tools?
Nudging moves clips or selections by a fixed, predefined amount called the nudge value. Sliding, on the other hand, lets you freely drag a clip along the timeline without snapping to any increments. Nudging gives you precise, repeatable movements. Sliding gives you free-form, visual placement. Both are valuable, and most editors use a combination of both depending on the task.
How can I nudge by a custom amount that is not in the preset list?
You can type a custom nudge value directly into the nudge value field in the Edit Window toolbar. Click on the current nudge value, delete it, and type in your desired amount along with the unit (such as 50 ms or 10 samples). Press Enter to confirm. This custom value will then be used for all subsequent nudging until you change it again.
Does nudging work in MIDI tracks the same way as audio tracks?
Yes, nudging works in MIDI tracks just as it does in audio tracks. You can nudge MIDI notes, regions, and edit selections using the same shortcuts and nudge values. The main difference is that MIDI regions contain note data rather than audio waveforms, but the movement mechanics are identical. This makes it easy to align MIDI parts with audio parts in the same session.
Conclusion
Learning how to nudge in Pro Tools is one of the most valuable skills you can build as an audio editor. It gives you the precision to make tiny, controlled adjustments that tighten up your mixes and polished your productions. From keyboard shortcuts to nudge values, from edit modes to advanced comping workflows, every aspect of nudging contributes to a faster, more efficient editing process.
Start by practicing the basic nudge shortcuts. Get comfortable with the Grabber tool and the different edit modes. Then explore the more advanced techniques like mouse nudging, playlist nudging, and custom nudge values. With consistent practice, these skills will become second nature. You will edit faster, make fewer mistakes, and produce higher-quality results. The nudge function is a small feature with a big impact. Master it, and you will notice the difference in every session you work on.