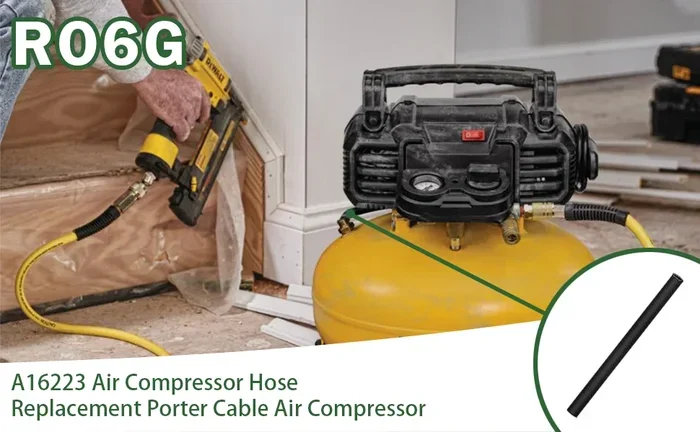
Air Compressor Hose Replacement Made Simple And Easy
Replacing your air compressor hose is simpler than you think and can save you hundreds of dollars. This guide walks you through every step from choosing the right hose to installing it safely. You will learn how to spot wear, pick the correct size, and avoid common mistakes.
Your air compressor hose works hard every day. It carries pressurized air from the tank to your tools. Over time, wear and tear can weaken the hose. Cracks, leaks, and kinks become common problems. When that happens, you need to know how to do an air compressor hose replacement the right way.
This guide makes the process easy to understand. Whether you are a beginner or a seasoned DIYer, you will find clear steps and helpful tips here. We cover everything from picking the right hose to installing it safely. By the end, you will feel confident tackling this job yourself.
A damaged hose can cause air leaks that waste energy and reduce tool performance. It can also become a safety hazard. Replacing it on time keeps your pneumatic tools running at their best. Let us walk you through the entire process in simple, friendly steps.
Key Takeaways
- Easy DIY Fix: Most homeowners can replace an air compressor hose in under 30 minutes with basic tools.
- Safety First: A worn or damaged hose can cause serious injuries or air leaks that waste energy.
- Right Size Matters: Matching the correct hose diameter and length ensures optimal air flow and tool performance.
- Rubber vs PVC: Each material has pros and cons depending on your usage environment and budget.
- Regular Maintenance: Simple care habits can double the lifespan of your new air supply line.
- Know When to Call a Pro: Some compressor systems need professional help for safe replacement.
📑 Table of Contents
- Why Replacing Your Air Compressor Hose Matters
- Signs Your Hose Needs Replacement
- Choosing the Right Hose for Your Compressor
- Tools and Materials You Will Need
- Step-by-Step Air Compressor Hose Replacement Guide
- Common Mistakes to Avoid During Replacement
- Maintaining Your New Hose for Longevity
- When to Call a Professional Instead
- Final Thoughts on Air Compressor Hose Replacement
Why Replacing Your Air Compressor Hose Matters
The hose is one of the most important parts of your compressed air system. It connects the compressor to your tools. Without a working hose, your pneumatic tools simply will not operate. A damaged hose can cause several serious problems that affect both safety and performance.
Safety Risks of a Damaged Hose
A cracked or frayed hose can burst under pressure. This can cause serious injuries to anyone nearby. Flying debris from a burst hose is a real danger. Air leaks also create unexpected pressure drops that can make tools behave unpredictably.
Old hoses may develop weak spots that cannot handle the rated pressure. If you use your compressor for heavy-duty tasks, a failing hose becomes an even bigger risk. Regular inspection and timely air compressor hose replacement help prevent these hazards.
Performance and Efficiency Issues
A leaking hose wastes compressed air. This means your compressor has to work harder to maintain pressure. The result is higher energy bills and reduced tool performance. Your pneumatic tools may not get the air supply they need to operate at full power.
Even a small leak can add up over time. You might notice your tools running slower or not reaching the right pressure. Replacing a worn hose restores proper air flow and keeps your system efficient.
Signs Your Hose Needs Replacement
Knowing the warning signs saves you from unexpected breakdowns. You do not have to wait for a hose to fail completely. Here are clear signals that it is time for a replacement.
- Visible cracks or cuts on the hose surface. These weak points can quickly turn into leaks or bursts.
- Air leaks at the fittings. If you hear hissing or feel air escaping, the hose or connector may be damaged.
- Kinks and bends that do not straighten out. A hose that stays kinked restricts air flow and damages the inner lining.
- Bulging or swelling in certain sections. This indicates internal pressure damage and a hose that is about to fail.
- Fittings that are loose or corroded. Rusted or worn couplers and connectors compromise the seal.
- The hose is older than five years. Even without visible damage, aging rubber and PVC lose flexibility and strength.
If you notice any of these signs, do not wait. An air compressor hose replacement is much cheaper than repairing damage from a hose failure.
Choosing the Right Hose for Your Compressor
Not all hoses are the same. Picking the right one makes a big difference in performance and durability. You need to consider material, size, length, and the type of tools you use.
Rubber vs PVC Air Hose
The two most common materials are rubber and PVC. Each has its strengths and weaknesses.
Rubber hoses are durable and flexible. They handle high pressure well and resist kinking. They work great for heavy-duty use and industrial applications. The downside is that rubber hoses are heavier and can cost more.
PVC hoses are lightweight and affordable. They are easy to move around the workshop. However, PVC hoses are more prone to cracking in cold weather. They also do not handle high pressure as well as rubber.
For most home workshops, a rubber air hose is the better choice. For occasional light use, a PVC hose can work fine.
Sizing and Length Considerations
The hose diameter affects air flow. Most standard compressors use a 1/4-inch or 3/8-inch hose. Check your compressor manual to find the correct size. Using the wrong diameter reduces tool performance.
Length matters too. A longer hose gives you more reach, but it can reduce air pressure over distance. For most garage and workshop setups, a 25 to 50 foot hose works well. If you need more reach, consider using a hose reel to keep things tidy.
| Hose Material | Best For | Durability | Price Range |
|---|---|---|---|
| Rubber | Heavy-duty, industrial use | High | $$$ |
| PVC | Light-duty, home use | Medium | $ |
| Hybrid (Rubber/PVC) | General workshop use | Medium-High | $$ |
When you are ready to buy, make sure the hose matches your compressor’s PSI rating. A mismatch can lead to dangerous failures or poor performance.
Tools and Materials You Will Need
Before you start, gather everything you need. Having the right tools makes the job faster and safer. Here is a simple checklist.
- New air compressor hose matched to your compressor’s specifications
- Adjustable wrench or pliers for removing fittings
- Teflon tape (also called thread seal tape) for sealing threads
- Hose clamp if your setup requires one
- Clean rag for wiping down connections
- Safety glasses to protect your eyes during the process
- Gloves to protect your hands from sharp edges
You do not need any special tools for most replacements. The process is designed to be straightforward. Having everything ready before you start keeps the job smooth and stress-free.
Step-by-Step Air Compressor Hose Replacement Guide
Now let us get into the actual replacement process. Follow these steps carefully and you will have a new hose installed in no time.
Step 1: Turn Off and Unplug the Compressor
Safety always comes first. Turn off the compressor and unplug it from the power source. This prevents the motor from starting accidentally while you are working. Wait a few minutes for any remaining pressure in the tank to release through the drain valve.
Never attempt to disconnect a hose while the compressor is still pressurized. That is a serious safety risk. Always let the system depressurize completely before you begin.
Step 2: Remove the Old Hose
Locate the fitting where the old hose connects to the compressor outlet. Use your adjustable wrench to loosen the fitting. Turn it counterclockwise until it comes free.
If the fitting is stuck or corroded, do not force it. Spray a little penetrating oil and wait a few minutes. Then try again gently. Forcing a stuck fitting can damage the compressor outlet, which makes the job much harder.
Once the fitting is loose, pull the hose free from the compressor. If your hose uses a quick connect fitting, simply pull the collar and slide the hose off. Repeat the process on the other end if the hose connects to a pneumatic tool or air gun.
Step 3: Clean the Fittings
Take a clean rag and wipe down the compressor outlet and any remaining fittings. Remove dirt, old Teflon tape, and any debris. A clean connection ensures a proper seal with the new hose.
Inspect the compressor outlet for any damage. If you see cracks or corrosion, address those issues before installing the new hose. A damaged outlet can cause leaks even with a brand new hose.
Step 4: Prepare the New Hose
Uncoil the new hose fully before installation. This removes any kinks from shipping and storage. Check both ends of the hose to make sure the fittings match your compressor and tools.
If the hose uses threaded fittings, wrap Teflon tape around the male threads. Wrap it clockwise about three to five times. This creates a tight seal and prevents air leaks. The tape is cheap but it makes a big difference in keeping your compressed air system airtight.
Step 5: Install the New Hose
Connect one end of the new hose to the compressor outlet. Hand-tighten the fitting first, then use your wrench to snug it up. Do not overtighten. This can strip the threads or damage the fitting.
Repeat the process on the other end. Connect the hose to your pneumatic tool or air gun. Make sure the quick connect or threaded fitting is secure.
Once both ends are connected, turn on the compressor. Let it pressurize and then check every connection for leaks. Listen for hissing sounds and feel around the fittings with your hand. If you find a leak, turn off the compressor and tighten the fitting or add more Teflon tape.
Step 6: Test the System
After installation, run your compressor for a few minutes. Check the pressure gauge to make sure it holds steady. Use a pneumatic tool to test the air flow. The tool should operate smoothly and at the correct pressure.
If everything looks and sounds good, your replacement is complete. You have just done an air compressor hose replacement like a pro!
Common Mistakes to Avoid During Replacement
Even simple jobs come with pitfalls. Avoiding these common mistakes saves you time, money, and frustration.
- Buying the wrong hose size. Always double-check the diameter and thread type before purchasing. A mismatch means leaks and poor performance.
- Skipping Teflon tape. This small step prevents most air leaks at threaded connections. Do not skip it.
- Overtightening fittings. Tightening too much can crack fittings or strip threads. Hand-tighten first, then give it a quarter turn with a wrench.
- Ignoring pressure ratings. Your hose must match or exceed the compressor’s maximum PSI. Using an under-rated hose is dangerous.
- Not checking for leaks after installation. Always test the system before starting work. A small leak today becomes a big problem tomorrow.
- Reusing old fittings. If the old fittings are damaged or corroded, replace them with new ones. Reusing old hardware leads to unreliable connections.
Taking your time and following the steps carefully makes all the difference. A rushed air compressor hose replacement often leads to more problems down the road.
Maintaining Your New Hose for Longevity
A new hose is an investment. Proper care helps it last for years. Here are simple habits that keep your air supply line in great shape.
- Store the hose properly. Coil it loosely after each use. Avoid tight loops that create permanent kinks. A hose reel is a great investment for this.
- Keep it away from heat and chemicals. Extreme heat degrades rubber and PVC. Store the hose in a cool, dry place.
- Inspect it regularly. Look for cracks, bulges, or wear every few weeks. Catching damage early prevents failures.
- Clean the fittings. Wipe down connections after use to remove dust and debris. Clean fittings last longer.
- Do not drag the hose across rough surfaces. This causes abrasion and weakens the material over time.
These simple maintenance steps extend the life of your hose and keep your pneumatic tools running at peak performance. Think of it as part of your regular air compressor maintenance routine.
When to Call a Professional Instead
Most hose replacements are easy DIY jobs. But some situations call for professional help. If your compressor has a built-in regulator or special fittings, the replacement might be more complex.
Also, if you notice damage to the compressor tank or motor, do not attempt repairs yourself. Those issues require trained technicians. And if you are uncomfortable working with pressurized systems, it is perfectly okay to call a professional.
A qualified technician can handle the air compressor hose replacement safely and correctly. They can also inspect the rest of your compressed air system for any other issues you might have missed.
Final Thoughts on Air Compressor Hose Replacement
Replacing your air compressor hose does not have to be intimidating. With the right hose, the right tools, and the steps in this guide, you can do it quickly and safely. A new hose improves safety, boosts tool performance, and saves you money on energy costs.
Remember to choose the right material and size. Follow each step carefully. Avoid the common mistakes we highlighted. And take care of your new hose with regular maintenance.
An air compressor hose replacement is one of the simplest and most rewarding DIY jobs you can do. Once you complete it, you will feel more confident in maintaining your entire compressed air system. So grab your tools, pick up that new hose, and get started today.
Your tools will thank you. Your wallet will thank you. And most importantly, you will have peace of mind knowing your system is safe and running at its best.
Frequently Asked Questions
How often should I replace my air compressor hose?
Most hoses last between three and five years with regular use. However, inspect your hose every few months for cracks, leaks, or wear. If you use your compressor heavily, you may need to replace it more often. Catching damage early prevents sudden failures.
Can I use a longer hose without losing pressure?
A longer hose does reduce air pressure slightly over distance. For most home and workshop setups, a hose up to 50 feet works well. If you need more length, consider using a larger diameter hose to minimize pressure loss. This keeps your pneumatic tools performing at their best.
What is the difference between a quick connect and a threaded fitting?
A quick connect fitting allows you to attach and detach the hose quickly without tools. A threaded fitting requires you to screw the hose onto the connection. Quick connect fittings are more convenient, while threaded fittings often provide a tighter seal. Check what your compressor uses before buying a replacement hose.
Do I need to drain my compressor before replacing the hose?
Yes, always drain the tank before starting any work. Open the drain valve and let all the pressure release. Working on a pressurized system is extremely dangerous. Wait until the pressure gauge reads zero before you begin the air compressor hose replacement.
Can I repair a damaged hose instead of replacing it?
Small punctures can sometimes be repaired with a hose patch kit. However, cracks, bulges, and cuts in the hose body mean the entire hose needs replacement. A repair on a damaged hose can fail under pressure and cause injury. When in doubt, choose a full replacement for safety.
What size hose do I need for my air compressor?
The most common sizes are 1/4-inch and 3/8-inch in diameter. Check your compressor manual for the recommended size. Using the correct diameter ensures proper air flow to your pneumatic tools. An undersized hose restricts performance, while an oversized one can reduce portability.
=== CONCLUSION ===
A reliable air compressor hose is essential for any pneumatic tool setup. Regular inspection and timely replacement keep your system safe and efficient. This guide has shown you how to choose the right hose, avoid common mistakes, and install it with confidence. Follow the maintenance tips to get the most life out of your new hose. With the right care, your compressor will keep running smoothly for years to come.