Air Compressor Noise Reduction Box Quiet Solutions
An air compressor noise reduction box is a simple yet effective way to dramatically lower the sound your compressor makes. Whether you work in a garage, shop, or home workshop, a noise reduction enclosure can cut compressor decibel levels by up to 50%. This guide covers everything from DIY builds to ready-made options, helping you find the quietest compressor setup for your space.
Nothing kills a good work session faster than a roaring air compressor noise reduction box situation. You are trying to focus, maybe listening to music or talking on the phone, and then that compressor kicks on. The sound is loud, harsh, and impossible to ignore. If you have ever wished you could tame that noise, you are in the right place.
A noise reduction box for air compressor is one of the smartest upgrades you can make to any workshop. It does not matter if you are a hobbyist working in a garage or a professional running a full shop. Too much noise causes fatigue, hearing damage, and frustration. The good news is that solving this problem is easier than most people think. You can buy a ready-made compressor sound enclosure or build one yourself for a fraction of the cost.
In this guide, we will walk you through everything you need to know. We will cover how noise reduction enclosures work, what materials you need, step-by-step building instructions, and tips for getting the quietest results. By the end, you will have a clear plan to make your air compressor quiet and your workspace far more pleasant.
Key Takeaways
- Noise reduction boxes work: A well-built air compressor noise reduction box can lower sound levels by 30 to 50 percent.
- DIY options save money: You can build a soundproof compressor enclosure using affordable materials like MDF, foam, and rubber mounts.
- Proper ventilation matters: Any noise reduction enclosure must allow airflow to prevent the compressor from overheating.
- Ready-made boxes exist: Brands offer pre-built compressor sound enclosures if you don’t want to build one yourself.
- Placement is key: Where you put your compressor affects how much noise you actually hear in your workspace.
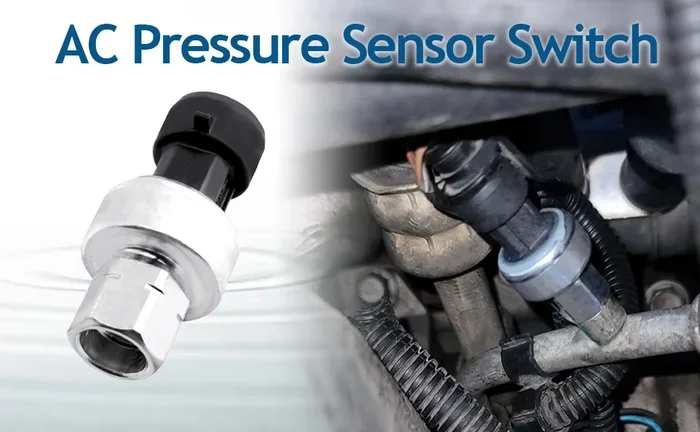
- Maintenance helps too: A noisy air compressor may also need parts replaced, such as the air compressor pressure switch or mounts, to truly quiet it down.
📑 Table of Contents
- What Is an Air Compressor Noise Reduction Box?
- Why Reducing Compressor Noise Matters
- How to Build Your Own Air Compressor Noise Reduction Box
- Best Materials for Soundproofing Your Compressor
- Common Mistakes to Avoid When Building a Compressor Enclosure
- Ready-Made Noise Reduction Boxes vs. DIY
- Maintenance Tips to Keep Your Noise Reduction Box Working
- Final Thoughts
What Is an Air Compressor Noise Reduction Box?
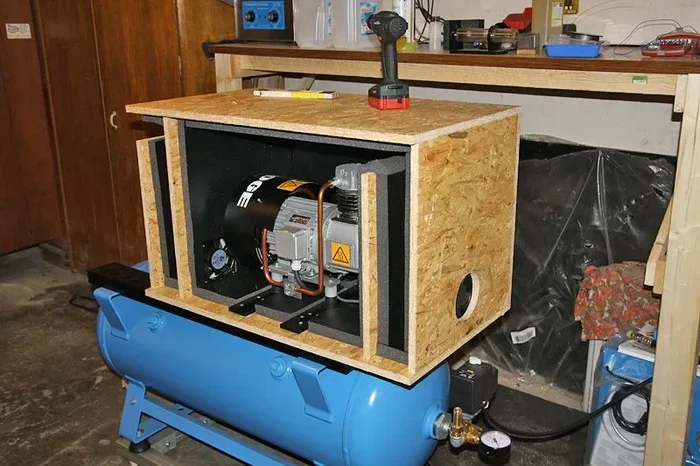
A noise reduction box for air compressor is essentially a housing or enclosure designed to absorb and block sound. Think of it like a soundproof cabinet that wraps around your compressor. The walls are made of dense materials that absorb vibrations and prevent noise from bouncing out into your workspace.
Most compressor sound enclosures are built from wood, MDF, or plywood on the outside. Inside, they line the walls with acoustic foam, mass-loaded vinyl, or rubber damping sheets. Some designs also include rubber mounts or isolation pads that prevent vibrations from transferring into the floor or bench.
How Does a Compressor Noise Reduction Box Work?
The science behind a noise reduction enclosure is straightforward. Sound travels through vibrations in the air and through solid surfaces. A soundproof compressor box tackles both paths. The thick walls block airborne noise. The internal damping materials absorb sound waves so they do not echo around inside the box. Rubber mounts or neoprene pads stop structure-borne vibrations from reaching your floor or table.
Here is what happens inside a typical air compressor noise reduction box:
- The compressor sits on a rubber or neoprene mount inside the box.
- Sound waves hit the inner walls and get absorbed by foam or damping material.
- The outer shell reflects remaining sound outward at a much lower volume.
- Ventilation holes or ducts allow air to flow without creating a direct noise path.
The result? A quiet air compressor that still delivers full power and performance. You get all the pressure you need without the headache.
Why Reducing Compressor Noise Matters
Some people shrug off a loud compressor as just part of the job. But the truth is that excessive noise causes real problems. Let us look at why compressor noise control deserves your attention.
Hearing Protection
Prolonged exposure to loud noise damages your hearing over time. A typical unshielded compressor can produce 80 to 90 decibels or more. That is as loud as a lawnmower or a motorcycle. Over hours of work, this level of noise can cause permanent hearing loss. A noise reducing enclosure brings those levels down to a much safer range.
Better Focus and Productivity
Loud noise is distracting. It raises your stress levels and makes it harder to concentrate. When your compressor is quiet, you can think clearly, hear instructions on a call, or simply enjoy your work more. A quiet compressor cabinet makes a surprising difference in how productive you feel throughout the day.
Neighbor and Family Considerations
If you work from home or have a garage shop near living spaces, noise travels. Your family members or neighbors will appreciate a soundproof compressor box that keeps the noise contained. This is especially important if you run your compressor early in the morning or late in the evening.
How to Build Your Own Air Compressor Noise Reduction Box
Building a DIY compressor quiet box is one of the most rewarding projects you can tackle. It does not require advanced woodworking skills, and the materials are affordable. Let us walk through the process step by step.
Materials You Will Need
Before you start, gather these supplies:
- 3/4-inch MDF or plywood for the outer shell
- Acoustic foam panels or mass-loaded vinyl for inner lining
- Rubber isolation pads or neoprene sheets for mounting
- Screws, wood glue, and hinges
- Ventilation fans with sound baffles (small inline duct fans work great)
- Weather stripping for sealing gaps
- A drill, saw, and measuring tape
Step-by-Step Build Process
Step 1: Measure your compressor. Measure the length, width, and height of your unit. Add at least 4 to 6 inches on each side for airflow clearance. This gives you the interior dimensions of your noise reduction box.
Step 2: Cut the panels. Using your measurements, cut the MDF or plywood into six panels: top, bottom, left side, right side, front, and back. The front panel should include a door or removable panel for easy access.
Step 3: Assemble the box. Glue and screw the panels together. Leave the front panel removable so you can access the compressor for maintenance. Make sure all joints are tight and sealed with wood glue. Any gap will let noise escape.
Step 4: Add internal damping. Line the inside walls with acoustic foam or mass-loaded vinyl. Cover the floor of the box with rubber isolation pads. These absorb vibrations and prevent them from passing through the box structure.
Step 5: Install ventilation. Cut holes on opposite sides of the box for intake and exhaust. Mount small fans with sound baffles. This allows hot air to escape while keeping noise contained. Without proper ventilation, your compressor will overheat, which leads to the compressor shutting off prematurely or even long-term damage.
Step 6: Seal and test. Apply weather stripping around the door edge. Close the box and run the compressor. Listen for any escaping noise and seal any gaps with additional foam or caulk.
Once your air compressor noise reduction box is built, you will notice an immediate difference. The compressor still runs at full capacity, but the noise drops significantly.
Quick Tips for a Better Build
- Use double-layered walls with a gap filled with insulation for even better sound blocking.
- Add a removable top panel for easier maintenance access.
- Place the box on a rubber mat to further isolate vibrations.
- If your compressor has an air compressor pressure switch that clicks loudly, consider wrapping it in a small foam pad inside the box.
Best Materials for Soundproofing Your Compressor
Choosing the right materials makes or breaks a noise reduction enclosure. Not all materials are equal when it comes to blocking or absorbing sound. Here is a breakdown of the best options.
| Material | Best For | Effectiveness | Cost |
|---|---|---|---|
| MDF (Medium Density Fiberboard) | Outer shell structure | High – blocks airborne noise well | Low to medium |
| Mass-Loaded Vinyl | Inner wall lining | Very high – excellent sound barrier | Medium |
| Acoustic Foam | Sound absorption inside the box | Medium – reduces echo and resonance | Low |
| Rubber Isolation Pads | Mounting and vibration dampening | High – stops structure-borne noise | Low |
| Weather Stripping | Sealing gaps and edges | Medium – prevents noise leaks | Low |
| Rockwool Insulation | Filling wall cavities | Very high – absorbs sound waves | Low to medium |
The most effective compressor sound enclosure uses a combination of these materials. A thick MDF outer shell blocks sound from escaping. Mass-loaded vinyl on the inside adds an extra layer of sound barrier. Acoustic foam or Rockwool absorbs internal reflections. And rubber mounts stop vibrations from transferring through the structure.
If you are not building from scratch, you can also line a pre-made wooden box with these materials. Even repurposing an old bookshelf or storage cabinet works surprisingly well as a DIY noise reduction box.
Common Mistakes to Avoid When Building a Compressor Enclosure
Even with the best intentions, people make mistakes that reduce the effectiveness of their air compressor noise reduction box. Here are the most common ones and how to avoid them.
Skipping Ventilation
This is the number one mistake. People build a sealed box and forget that compressors need airflow to cool down. Without ventilation, the compressor overheats and starts keeping running when it should shut off, or worse, it shuts off too early and fails to build pressure. Always include intake and exhaust vents with sound baffles.
Using Thin Materials
A single layer of thin plywood does very little to block sound. If you want real noise reduction, use at least 3/4-inch MDF or double up thinner panels with a gap between them. The extra mass makes a huge difference in sound blocking.
Forgetting to Isolate Vibrations
Even with a great outer shell, vibrations can travel through the floor and bench, creating noise that no amount of wall thickness can stop. Always use rubber mounts or neoprene pads between the compressor and the box floor. This alone can reduce perceived noise by several decibels.
Building the Box Too Tight
You need enough clearance inside the box for air to circulate around the compressor. If the box is too snug, the compressor will heat up faster and may trigger safety shutoffs. Leave at least 4 to 6 inches of clearance on all sides.
Ready-Made Noise Reduction Boxes vs. DIY
Not everyone wants to build a noise reduction box from scratch. That is perfectly fine. There are excellent ready-made options available. Let us compare the two approaches.
Pros and Cons of DIY
- Pros: Cheaper, fully customizable, you control the materials and design, fun to build.
- Cons: Takes time and effort, requires some tools, may not look as polished.
Pros and Cons of Ready-Made Enclosures
- Pros: Instant setup, professionally designed for airflow and soundproofing, often includes fans and filters.
- Cons: More expensive, limited size options, may not fit unusual compressor shapes.
If you are handy and enjoy building things, a DIY compressor quiet box gives you the best value. But if you want a plug-and-play solution, a pre-made compressor sound enclosure is worth the investment. Either way, you will enjoy a much quieter workspace.
When shopping for a ready-made option, make sure the enclosure fits your specific compressor model. Some designs work better for pancake compressors, while others are built for larger tank-style units. You can also check your compressor manufacturer or visit an air compressor parts store for compatible accessories and enclosure kits.
Maintenance Tips to Keep Your Noise Reduction Box Working
Once you have your air compressor noise reduction box set up, a little maintenance goes a long way. Here is how to keep it performing at its best.
- Check ventilation regularly. Dust and debris can clog intake and exhaust vents. Clean them monthly to prevent overheating.
- Inspect the seals. Over time, weather stripping can wear out. Replace it when you notice gaps or cracks.
- Monitor your compressor’s health. A noisy air compressor that suddenly gets louder may have a failing part. If you notice unusual sounds, check the air compressor pressure switch and other components. Sometimes the issue is not the enclosure but the machine itself.
- Keep the interior clean. Remove dust buildup inside the box. Accumulated dust reduces airflow and can cause the compressor to work harder, which increases noise.
- Tighten loose panels. Vibrations can loosen screws over time. Check and re-tighten every few months.
With proper care, your noise reduction enclosure will deliver quiet operation for years. It is a simple investment that pays off every single time you turn on your compressor.
Final Thoughts
An air compressor noise reduction box is one of the most practical upgrades you can make to any workshop or garage. Whether you build one yourself or buy a ready-made compressor sound enclosure, the results speak for themselves. You get a quieter workspace, better hearing protection, and a more enjoyable environment for getting your work done.
The build process is straightforward, the materials are affordable, and the payoff is immediate. You do not need to be a professional carpenter or engineer to create an effective soundproof compressor box. With the right materials, a little time, and attention to ventilation, you can transform your noisy compressor into a quiet air compressor that you will actually enjoy using.
Start with one of the methods in this guide and experience the difference for yourself. Your ears and your workspace will thank you. Once you go quiet, you will never want to go back to a screaming compressor again.
Frequently Asked Questions
Can I use a plastic storage bin as an air compressor noise reduction box?
Yes, a thick plastic storage bin can work in a pinch for a DIY compressor quiet box. However, plastic is less effective at blocking low-frequency noise compared to MDF or plywood. For better results, use wood for the outer shell and line the inside with acoustic foam or mass-loaded vinyl.
How much noise reduction can I expect from a compressor enclosure?
A well-built noise reduction enclosure can reduce compressor noise by 30 to 50 percent, depending on the materials used and the design. This typically brings noise levels from 85-90 decibels down to a much more comfortable 55-65 decibels, which is similar to a normal conversation.
Will a noise reduction box cause my compressor to overheat?
Only if you do not include proper ventilation. The key to a successful air compressor noise reduction box is balancing soundproofing with airflow. Always install intake and exhaust vents with baffles, and consider adding small fans to promote air circulation inside the enclosure.
Can I build a noise reduction box for any size compressor?
Yes, the design scales to any compressor size. For larger compressors, you simply build a bigger box with more ventilation. Make sure to maintain at least 4 to 6 inches of clearance around the unit for proper airflow and cooling.
What is the cheapest way to reduce air compressor noise?
The most affordable approach is to build a simple DIY noise reduction box using plywood, rubber isolation pads, and basic acoustic foam. You can often complete this project for under $50 in materials. Adding a rubber mat underneath the compressor and tightening all loose bolts also helps reduce vibration noise at no extra cost.
How do I know if my compressor is too loud and needs a noise reduction box?
If you have to raise your voice to talk over the compressor, or if the noise causes discomfort after prolonged exposure, it is time for a compressor noise control solution. A simple smartphone sound meter app can measure your compressor’s decibel level. Anything consistently above 80 dB warrants noise reduction measures.