How to Replace the AC Compressor on a 2017 Ford Explorer
The 2017 Ford Explorer AC compressor replacement is a manageable DIY job if you have the right tools and guidance. This guide walks you through everything from diagnosing a failing compressor to recharging the system. You’ll save hundreds of dollars by doing it yourself. We cover the process, costs, and common mistakes to avoid. Replacing your AC compressor on a 2017 Ford Explorer can restore cold air in just a few hours.
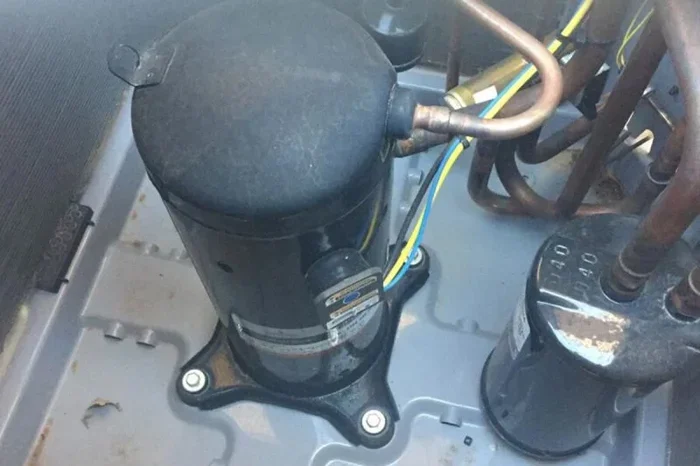
Your 2017 Ford Explorer’s air conditioning system relies on a sturdy AC compressor to circulate refrigerant and keep the cabin cool. When that compressor starts to fail, the entire system suffers. You might notice warm air blowing from the vents, strange noises from the engine bay, or a clutch that won’t engage. If you’ve been searching for a reliable 2017 Ford Explorer AC compressor replacement guide, you’ve come to the right place.
This article gives you a complete walkthrough of the replacement process. We’ll cover the warning signs, the tools you need, the step-by-step procedure, and the cost differences between doing it yourself and visiting a shop. I’ll also share a few expert tips that help you avoid common pitfalls. Before you dive into the repair, you can learn more about confirming the diagnosis in our guide on How To Diagnose A Bad Ac Compressor. That article helps you understand exactly what to look for before you start tearing things apart.
If you want a broader look at fixing compressor issues on any vehicle, check out our general resource on How To Fix Ac Compressor On Car. It covers foundational principles that apply to the Explorer as well. Ignoring a failing compressor can lead to bigger problems down the road. To understand what happens when the compressor fails completely, read our explainer on What Happens When The Ac Compressor Goes Out. It highlights the risks of procrastination.
Key Takeaways
- Know the signs: Recognizing early symptoms of compressor failure saves you from a complete AC system breakdown.
- Gather the right tools: A refrigerant recovery machine, torque wrench, and proper safety gear are essential.
- Follow the steps carefully: Removing the old compressor, installing the new one, and recharging the system requires attention to detail.
- Consider the cost: DIY parts and refrigerant cost less than professional labor, but factor in your time and skill level.
- Post-replacement checks: Leak testing and regular maintenance keep your AC system running smoothly for years.
📑 Table of Contents
Why Your 2017 Ford Explorer AC Compressor Fails
Signs Your AC Compressor Is Going Bad
Spotting the early warning signs of a failing compressor can save you from a sweltering summer. Listen for unusual noises when you turn the AC on. A loud clicking, grinding, or squealing sound often points to internal wear. You might also notice that the compressor clutch cycles erratically or stays locked in the engaged position. Another clear sign is warm air blowing from the vents even when the system is set to maximum cold.
Watch for refrigerant leaks around the compressor body. A greasy residue on the fittings or shaft seal indicates oil escaping from the system. Low refrigerant levels cause the compressor to work harder, accelerating its decline. If your 2017 Ford Explorer AC compressor shows any of these symptoms, it’s time to investigate further.
Common Causes of Compressor Failure
Several factors can shorten the life of an AC compressor. Lack of regular maintenance is a big one. When you skip car AC service, refrigerant levels drop and the compressor runs dry. This causes overheating and internal damage. Contamination is another culprit. Metal particles from a worn clutch or bearing can circulate through the system and clog the orifice tube or expansion valve.
Electrical issues can also trigger premature failure. A faulty pressure switch, a corroded connector, or a damaged serpentine belt can prevent the compressor from receiving proper power. In some cases, the AC compressor simply wears out over time. The average lifespan of a compressor is around 8 to 12 years, so a 2017 model with higher mileage may be reaching the end of its service life.
Tools and Materials You’ll Need
Essential Tools for the Job
Gathering the right tools before you start makes the AC compressor replacement much smoother. Here’s what you’ll need:
- Refrigerant recovery machine (or access to a shop that can recover refrigerant)
- Set of metric sockets and wrenches
- Torque wrench
- Serpentine belt tool
- AC manifold gauge set
- Vacuum pump
- New AC compressor (OEM or quality aftermarket)
- Replacement compressor clutch (if needed)
- New refrigerant (R-134a for the 2017 Explorer)
- AC system oil (PAG oil, type and amount per Ford specs)
- Safety glasses and gloves
- Jack and jack stands or ramps
Safety Precautions
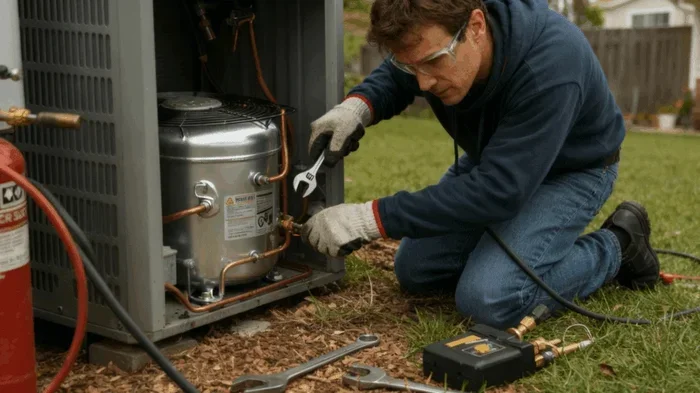
Working on an air conditioning system requires caution. Always wear safety glasses and chemical-resistant gloves. Refrigerant can cause frostbite if it contacts skin. Never open the system while the engine is running. Make sure the vehicle is on a level surface and the parking brake is engaged. If you’re not comfortable recovering refrigerant yourself, take the car to a shop that can do it for you before you begin the 2017 Ford Explorer AC compressor replacement.
Step-by-Step 2017 Ford Explorer AC Compressor Replacement
Quick Tips Before You Start
Here are a few tips that make the job easier. Take photos of every connection before you disconnect anything. This helps during reassembly. Label all hoses and electrical connectors with tape. Work in a well-ventilated area and keep pets and children away from refrigerant vapors. Also, make sure you have a clean workspace with enough room to maneuver around the engine bay.
Preparing the Vehicle
Start by letting the engine cool completely. Locate the AC compressor in the engine bay. On the 2017 Ford Explorer, it sits on the front of the engine, driven by the serpentine belt. Disconnect the negative battery terminal to prevent any electrical shorts. Use the serpentine belt tool to release tension and remove the belt. Set it aside carefully so you don’t damage the ribs.
Removing the Old Compressor
Disconnect the electrical connector from the compressor clutch. Label it if needed. Use your AC manifold gauge set to verify the system is fully discharged. Connect the refrigerant recovery machine and extract all refrigerant according to local regulations. Once the system is empty, remove the high-pressure and low-pressure lines from the compressor. Plug the lines immediately to prevent moisture and dirt from entering the system.
Unbolt the compressor mounting bracket. You may need to support the compressor with a strap or helper while removing the last bolt. Carefully pull the old compressor out of the engine bay. Inspect the mounting bracket for any damage and clean the mating surfaces.
Installing the New Compressor
Before installing the new compressor, compare it to the old one. Make sure the clutch plate and pulley match. Pre-fill the new compressor with the correct amount of PAG oil as specified in the Ford service manual. This is a crucial step that many DIYers skip. Without proper oil, the new compressor can seize within minutes of running.
Position the new compressor and hand-tighten the mounting bolts. Reconnect the high-pressure and low-pressure lines. Torque the fittings to the factory specification, usually around 15 to 20 ft-lbs. Reinstall the electrical connector. Make sure the serpentine belt is routed correctly and tensioned to the proper spec. Reconnect the battery negative terminal.
Recharging the AC System
Now it’s time to recharge the car AC system. Connect your AC manifold gauges to the service ports. Start the engine and turn the AC to maximum cold with the fan on high. Attach the refrigerant can to the low-pressure service port and add the correct amount of R-134a. The 2017 Ford Explorer typically requires around 2.5 to 3 pounds of refrigerant, but always check the label under the hood for the exact capacity.
Monitor the pressure gauges as the system charges. The low-side pressure should stabilize around 25 to 35 psi, and the high-side pressure around 200 to 250 psi, depending on ambient temperature. Once the pressures are stable and the cabin is blowing cold air, you’re good to go. Run the system for at least 15 minutes and watch for any unusual noises or pressure drops.
Cost Breakdown: DIY vs. Professional
Average Replacement Cost
The cost of a 2017 Ford Explorer AC compressor replacement varies based on whether you do it yourself or hire a professional. The compressor part itself ranges from about $200 to $500 for an aftermarket unit. OEM compressors can run $500 to $800. Add the cost of refrigerant, PAG oil, and any minor parts like a new clutch, and your total DIY parts cost typically falls between $300 and $600.
A repair shop will charge for labor, which can range from $500 to $1,000 depending on your location. That brings the total professional cost to roughly $800 to $1,400. The table below compares the two options.
| Item | DIY Cost | Professional Cost |
|---|---|---|
| Compressor Part | $200 – $800 | $200 – $800 (parts markup) |
| Refrigerant & Oil | $30 – $60 | Included in labor |
| Labor | Your time | $500 – $1,000 |
| Total | $300 – $600 | $800 – $1,400 |
When to Call a Mechanic
DIY AC compressor replacement is a great option if you’re comfortable with basic hand tools and have access to a refrigerant recovery machine. However, if you don’t have the equipment to properly recover and recharge refrigerant, it’s best to leave the job to a licensed professional. Refrigerant handling requires EPA certification in many areas. Also, if you notice internal damage to the compressor that has contaminated the entire AC system, a professional shop can perform a full system flush and replace all affected components.
Post-Replacement Care and Maintenance
Checking for Leaks
After the replacement, inspect all fittings and connections for leaks. You can use a UV leak detection dye or an electronic leak detector. Run the system for 30 minutes and check the pressure gauges again. If the low-side pressure drops steadily, you likely have a leak at one of the connections. Tighten the fitting or replace the O-ring as needed. A small leak can quickly drain the system and cause the compressor to cycle on and off excessively.
Regular Maintenance Tips
Keeping your car AC system in top shape is simple. Have the refrigerant levels checked every two years. Replace the cabin air filter regularly, as a clogged filter reduces airflow and puts extra strain on the evaporator. Inspect the serpentine belt for cracks and replace it at the first sign of wear. If you notice any warm air or unusual noises, address the issue promptly. Early intervention prevents a minor problem from turning into a full AC compressor replacement.
Final Thoughts
Replacing the AC compressor on your 2017 Ford Explorer is a rewarding project that saves money and teaches you valuable car maintenance skills. By following the steps in this guide, you can complete the job with confidence. Remember to take your time, use the correct tools, and never skip the pre-fill oil step. A successful 2017 Ford Explorer AC compressor replacement means you’ll enjoy cold air for many more miles to come.
Don’t forget to dispose of the old refrigerant properly at a certified recycling center. If you run into any unexpected issues during the process, refer back to the diagnostic tips in our article on How To Diagnose A Bad Ac Compressor. That resource can help you troubleshoot anything you might have missed. With the right preparation and a little patience, you’ll have your 2017 Ford Explorer cooling like new again.
Frequently Asked Questions
How long does a 2017 Ford Explorer AC compressor replacement take?
Most DIYers can complete the job in 3 to 5 hours, depending on their experience level. The main time sinks are recovering the old refrigerant, removing the old compressor, and properly recharging the system. If you’re doing it for the first time, give yourself extra time and don’t rush the leak-checking step.
Can I drive my 2017 Ford Explorer with a bad AC compressor?
Yes, you can still drive the vehicle, but the air conditioning will not work. In some cases, a seized compressor can damage the serpentine belt or cause the engine to overheat if the belt breaks. It’s best to address the issue promptly to avoid further damage to the belt or other accessories.
What happens if I don’t add enough PAG oil to the new compressor?
Underfilling the compressor with PAG oil can cause premature wear and eventual seizure. The compressor relies on oil for lubrication and cooling. Always measure the oil carefully and add the exact amount specified by Ford. Overfilling can also cause problems, so stick to the manual’s recommendation.
Do I need to replace the serpentine belt during the compressor swap?
It’s a good idea to inspect the belt closely. If it shows any cracks, glazing, or fraying, replace it at the same time. A new compressor with a fresh belt ensures smooth operation and prevents the old belt from snapping shortly after the repair. The cost of a new belt is minimal compared to the labor of doing the job twice.
Is it worth replacing the AC compressor yourself on a 2017 Ford Explorer?
If you’re comfortable with basic mechanical tasks and have access to a refrigerant recovery machine, the DIY route is absolutely worth it. You’ll save several hundred dollars in labor costs. However, if you don’t have the tools or experience, paying a professional is the safer choice. A botched repair can lead to expensive AC system damage.
What is the average lifespan of an AC compressor on a Ford Explorer?
With proper maintenance, an AC compressor can last 100,000 miles or more. However, factors like refrigerant leaks, electrical issues, and lack of regular service can shorten that lifespan. If your Explorer has over 100,000 miles and the AC is blowing warm air, the compressor might be reaching the end of its useful life.