Everything You Need to Know About Makita Compressor Parts
Makita compressor parts are essential for keeping your pneumatic tools running smoothly and efficiently. Whether you need a replacement motor, pressure switch, or simple fittings, understanding each component helps you maintain peak performance. This guide covers every major Makita compressor part, from common wear items to advanced components, so you can troubleshoot, repair, and extend the life of your machine with confidence.
If you own a Makita compressor, you already know how reliable these machines are. But even the best compressor needs parts replaced over time. Whether it is a worn seal, a failing pressure switch, or a damaged hose, knowing your Makita compressor parts is the first step toward keeping your equipment in top shape.
This guide breaks down every major component of a Makita compressor. You will learn what each part does, how to spot when it needs replacing, and tips for finding the right replacement. No guesswork. No jargon. Just clear, practical information you can use right away.
So whether you are a weekend warrior in the garage or a professional contractor who depends on Makita tools daily, this article has something valuable for you. Let us dive into the world of Makita compressor parts and make sure your machine keeps running strong.
Key Takeaways
- Know your parts: Understanding the key components of a Makita compressor helps you troubleshoot faster and make smarter buying decisions.
- Regular maintenance saves money: Replacing filters, oil, and gaskets on schedule prevents costly breakdowns and extends compressor life.
- Use genuine Makita parts: OEM components ensure compatibility, safety, and optimal performance compared to generic alternatives.
- Common wear items include seals, hoses, and pressure switches: These parts fail most often and should be checked regularly.
- Proper installation matters: Following manufacturer guidelines when replacing parts prevents damage and maintains warranty coverage.
- Diagnose before you replace: Testing compressor windings and checking for leaks can save you from unnecessary part purchases.
📑 Table of Contents
- Why Makita Compressor Parts Matter
- Key Makita Compressor Parts Explained
- How to Find the Right Makita Compressor Parts
- Common Makita Compressor Parts That Need Replacing
- Maintenance Tips for Makita Compressor Parts
- How to Diagnose Compressor Problems Before Replacing Parts
- Replacing Makita Compressor Parts: A Step-by-Step Guide
- Extending the Life of Your Makita Compressor Parts
- Conclusion
Why Makita Compressor Parts Matter
Every compressor is made up of many smaller parts working together. When one component fails, the whole machine suffers. Understanding why each part matters helps you take better care of your equipment.
Makita designs their compressors with durability in mind. But wear and tear is inevitable. Air compressors deal with constant pressure changes, heat buildup, and moisture. Over time, these factors degrade key components. Replacing worn parts promptly keeps your compressor efficient and safe.
Ignoring a small problem can lead to bigger issues. For example, a failing pressure switch can cause the compressor to run continuously. This strains the motor and leads to overheating. Catching these issues early saves you time and money.
The Cost of Ignoring Maintenance
Skipping routine maintenance might seem harmless at first. But neglected parts wear out faster and fail unexpectedly. A clogged air filter forces the motor to work harder. Old compressor oil loses its lubricating properties. Seals dry out and crack, causing air leaks.
All of these small failures add up. Your compressor uses more electricity. It takes longer to build pressure. And eventually, a major component like the motor or pump may fail completely. Replacing a Makita compressor part early is always cheaper than replacing the entire machine.
Key Makita Compressor Parts Explained
Let us walk through the most important components of a Makita compressor. Each section explains what the part does, how long it typically lasts, and signs that it needs replacement.
1. Pressure Switch
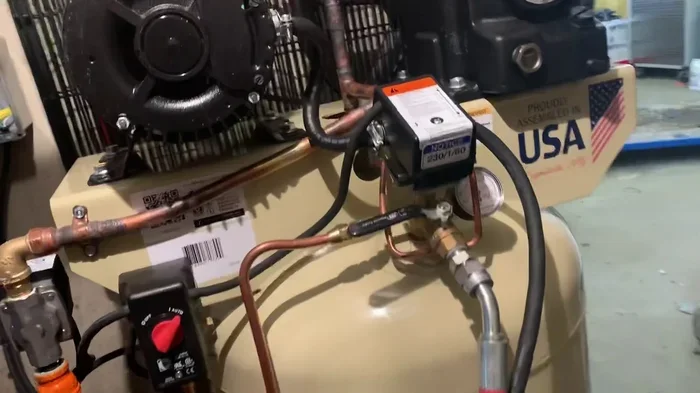
The pressure switch is the brain of your compressor. It monitors air pressure inside the tank and tells the motor when to start and stop. When pressure drops to a set level, the switch activates the motor. When the tank reaches the desired pressure, the switch shuts the motor off.
Makita compressors use reliable pressure switches, but they do wear out over time. Common signs of a failing switch include the compressor not turning on, not shutting off, or cycling on and off too frequently.
If you suspect your pressure switch is bad, you can test it with a multimeter. For detailed guidance on testing compressor components, check out our article on how to test compressor windings. Replacing a pressure switch is one of the simpler DIY repairs you can do at home.
2. Motor and Windings
The motor is the heart of your Makita compressor. It converts electrical energy into mechanical energy to compress air. Inside the motor, copper windings carry electrical current and create the magnetic field that drives the motor.
Motor failures can happen for several reasons. Overheating is the most common cause. This occurs when the compressor runs too long, lacks proper ventilation, or has dirty components. Moisture inside the motor can also cause short circuits in the windings.
When a motor fails, it is often more cost-effective to replace the entire compressor. However, if the damage is limited to the windings, a repair might be possible. Testing the windings with a multimeter helps you determine whether the motor can be saved.
3. Air Tank
The air tank stores compressed air and provides a reservoir for your pneumatic tools. Makita tanks are built from high-quality steel or aluminum, depending on the model. They are designed to handle constant pressure changes and resist corrosion.
Over time, tanks can develop rust, especially if moisture is not drained regularly. A damaged tank is a safety hazard and must be replaced immediately. Never attempt to repair a corroded tank yourself. The risk of explosion is real and dangerous.
Always drain your tank after each use. This simple habit extends tank life significantly. For more on compressor maintenance routines, our guide on how often to drain your air compressor offers practical advice.
4. Compressor Pump
The pump is where the actual compression happens. It draws in ambient air and compresses it before sending it into the tank. Makita pumps are designed for heavy-duty use and feature low-friction components for efficiency.
Pump failures usually result from worn seals, lack of lubrication, or contamination. If you notice the compressor is not building pressure or is losing pressure quickly, the pump may be the culprit. Replacing pump seals is a common maintenance task that many users can handle themselves.
5. Unloader Valve
The unloader valve releases pressure from the pump when the compressor shuts off. This reduces the starting load on the motor and prevents damage. Without a functioning unloader valve, the motor struggles to start under full pressure.
Signs of a bad unloader valve include difficulty starting the compressor or loud banging noises when the motor stops. The valve is a small, inexpensive part, so replacing it is always worth trying before assuming a bigger problem.
6. Air Filter and Intake Filter
The air filter prevents dust, debris, and contaminants from entering the compressor pump. Clean air is essential for pump longevity. A clogged filter restricts airflow and forces the motor to work harder than it should.
Makita air filters are easy to clean and replace. You should inspect the filter after every few uses and clean it regularly. In dusty environments, check the filter more frequently. A clean filter is one of the simplest ways to protect your compressor.
7. Oil and Lubrication System
Many Makita compressors use oil lubrication to reduce friction and keep the pump running smoothly. The oil circulates through the pump, coating moving parts and carrying away heat.
Over time, compressor oil breaks down and loses its effectiveness. It becomes contaminated with moisture and metal particles. Regular oil changes are essential for pump health. Always use the oil type recommended by Makita for your specific model.
How to Find the Right Makita Compressor Parts
Finding the correct replacement parts for your Makita compressor does not have to be difficult. With the right approach, you can quickly identify and order the parts you need.
Check Your Model Number
Every Makita compressor has a model number printed on a label, usually near the motor housing or on the tank. Write this number down and keep it handy. When searching for replacement parts, the model number ensures you get components that fit and function correctly.
Using the wrong part can damage your compressor or void the warranty. Always double-check compatibility before ordering. If you are unsure, contact Makita customer support with your model number and they can confirm the right part for your machine.
OEM vs. Aftermarket Parts
When shopping for Makita compressor parts, you will encounter two main options: OEM (Original Equipment Manufacturer) parts and aftermarket parts.
OEM parts are made by Makita or authorized suppliers. They meet the same quality standards as the original components. Aftermarket parts are produced by third-party manufacturers and are often more affordable.
For critical components like the motor, pump, and pressure switch, OEM parts are the safer choice. For simpler items like filters and hoses, quality aftermarket parts can work well. The key is to buy from reputable suppliers regardless of the brand.
Where to Buy Makita Compressor Parts
You can find Makita compressor parts through several channels. The Makita official website and authorized dealers offer the widest selection of genuine parts. Online marketplaces like Amazon and eBay also carry Makita parts, but be cautious of counterfeit products.
Local tool supply stores are another good option. Staff at these stores often have hands-on experience with Makita compressors and can help you identify the right part. When in doubt, always go with the official Makita parts source.
Common Makita Compressor Parts That Need Replacing
Some parts wear out faster than others. Knowing which components fail most often helps you stay ahead of problems and keep your compressor running reliably.
Most Frequently Replaced Parts
- Air filters: These clog with dust and debris over time. Replace or clean them every 100 to 200 operating hours.
- Compressor oil: Oil should be changed every 500 to 1,000 hours of operation, or at least once per season.
- Hoses and fittings: Rubber hoses can crack and leak. Check connections regularly and replace damaged hoses immediately.
- Pressure switch: Electrical contacts wear out over time, causing inconsistent cycling. Replacement is straightforward and affordable.
- Seals and gaskets: These small rubber or silicone components prevent air leaks. They degrade with age and exposure to heat.
- Unloader valve: This valve experiences constant pressure changes and can wear out faster than other components.
Signs Your Makita Compressor Needs New Parts
Your compressor usually gives you warning signs before a part fails completely. Watch for these common indicators:
- The compressor takes longer than usual to build pressure.
- You hear unusual noises like grinding, squealing, or banging.
- Air leaks are visible at fittings or hoses.
- The compressor trips the circuit breaker frequently.
- The motor runs but the tank does not pressurize.
- Oil leaks appear around the pump housing.
If you notice any of these symptoms, inspect your compressor right away. Addressing problems early prevents more expensive repairs down the road.
Maintenance Tips for Makita Compressor Parts
Regular maintenance is the best way to extend the life of your Makita compressor parts. A little prevention goes a long way toward avoiding unexpected breakdowns.
Daily and Weekly Maintenance
- Drain the tank: Open the drain valve after every use to remove moisture. This prevents rust and keeps the tank in good condition.
- Check for leaks: Listen for hissing sounds and inspect all fittings and hoses for air leaks. Use soapy water to identify leaks if needed.
- Inspect the air filter: Remove and check the filter for dust buildup. Clean or replace it as needed.
Monthly and Seasonal Maintenance
- Check the oil level: If your compressor is oil-lubricated, inspect the oil level before each use. Change the oil according to the manufacturer schedule.
- Inspect the pressure switch: Test the switch to make sure it activates and shuts off at the correct pressure levels.
- Tighten connections: Vibrations can loosen fittings over time. Check all bolts, nuts, and connections and tighten them as needed.
- Clean the exterior: Wipe down the compressor to remove dust and debris. This improves ventilation and prevents overheating.
Expert Insight: The Power of Preventive Maintenance
Experienced technicians agree that preventive maintenance is the single most effective way to reduce compressor downtime. A five-minute daily check can save hours of repair time and hundreds of dollars in parts replacement. Make it a habit, and your Makita compressor will reward you with years of reliable service.
How to Diagnose Compressor Problems Before Replacing Parts
Before you order a replacement part, take time to diagnose the actual problem. Many compressor issues have simple causes that do not require new parts at all.
Step-by-Step Diagnostic Process
- Check the power supply: Make sure the compressor is properly plugged in and the outlet is delivering power. A tripped breaker or faulty outlet can mimic part failure.
- Inspect the air filter: A clogged filter can cause the compressor to underperform. Clean or replace it and see if the problem resolves.
- Test the pressure switch: Use a multimeter to check if the switch is sending power to the motor. A failed switch is a common cause of compressor not starting.
- Check for air leaks: Spray soapy water on all connections and look for bubbles. Leaks reduce pressure and make the compressor work harder.
- Inspect the pump and motor: If the compressor builds pressure slowly or not at all, the pump seals or motor windings may be the issue.
For a more detailed approach to identifying compressor problems, our article on how to diagnose a bad AC compressor provides excellent troubleshooting techniques that apply to many compressor types.
Replacing Makita Compressor Parts: A Step-by-Step Guide
Replacing a compressor part does not have to be intimidating. With the right tools and a little patience, most users can handle common replacements themselves.
Tools You Will Need
- Socket wrench set
- Screwdrivers (Phillips and flathead)
- Multimeter for electrical testing
- Pliers and adjustable wrenches
- Replacement part (OEM recommended)
- Safety glasses and gloves
General Replacement Steps
- Disconnect power: Always unplug the compressor or disconnect the battery before starting any work. Safety comes first.
- Release tank pressure: Open the drain valve and let all pressure escape from the tank before removing any parts.
- Remove the old part: Follow the specific steps for your part. Pressure switches, for example, usually require removing a cover plate and disconnecting wiring.
- Install the new part: Secure the new component in place, reconnect any wiring or fittings, and double-check everything is tight.
- Test the compressor: Plug the compressor back in and run it. Listen for unusual noises and check that the new part is functioning correctly.
If you are replacing a pressure switch, you may want to review our guide on how to replace the high pressure switch on an AC compressor for detailed wiring and installation steps.
Extending the Life of Your Makita Compressor Parts
Proper care goes beyond just replacing parts when they fail. Taking proactive steps can significantly extend the life of every component in your Makita compressor.
Use Your Compressor Correctly
Follow the manufacturer guidelines for operation. Do not exceed the recommended duty cycle. Allow the compressor to cool down between extended use sessions. Overworking the machine accelerates wear on every part.
Store Your Compressor Properly
When not in use, store your Makita compressor in a clean, dry environment. Moisture and extreme temperatures damage components over time. Cover the compressor to protect it from dust and debris. Before long-term storage, drain the tank completely and change the oil.
Keep Records of Maintenance
Maintain a simple log of all maintenance and part replacements. Note the date, the part replaced, and the operating hours at the time. This record helps you track patterns and anticipate future needs. It also proves valuable if you ever need warranty service.
Conclusion
Understanding your Makita compressor parts empowers you to take control of your equipment maintenance. From the pressure switch to the air filter, each component plays a vital role in delivering reliable compressed air. Regular maintenance, prompt replacements, and proper diagnosis keep your compressor performing at its best.
Remember that prevention is always better than repair. A little routine care today saves you from major headaches tomorrow. Whether you are a DIY enthusiast or a professional, investing time in understanding your Makita compressor pays off in years of dependable service.
Now that you have a complete overview of Makita compressor parts, you are well equipped to handle maintenance, troubleshooting, and replacements with confidence. Keep this guide handy, and your compressor will keep working hard for you.