How to Export Tracks in Pro Tools Quickly and Easily
Exporting tracks in Pro Tools is a core skill every audio editor needs. This guide walks you through the entire process from basic mixdown to advanced batch export. You will learn the best file formats, settings, and shortcuts to save time. Whether you are a beginner or a seasoned producer, these tips will streamline your workflow and improve your audio output quality.
Exporting tracks in Pro Tools can feel overwhelming at first. The software has so many options that it is easy to get lost. But once you understand the basics, the process becomes simple and fast.
Think of exporting like finishing a song. You have recorded and mixed everything. Now you need to save it in a format the world can hear. That is exactly what exporting does. It takes your session and turns it into an audio file you can share, upload, or archive.
This guide will show you every step. You will learn how to export a single track, multiple tracks, and even entire sessions. We will cover file formats, settings, and shortcuts that will make your workflow much smoother. By the end, you will export tracks in Pro Tools like a pro.
Key Takeaways
- Quick Export: Use the Export Selection or Export Session commands for fast track exports.
- File Formats Matter: Choose WAV for quality and MP3 for sharing compressed files.
- Batch Export Saves Time: Automate exporting multiple tracks at once with the Batch Export feature.
- Settings Are Key: Set the correct sample rate, bit depth, and format before exporting.
- Organize Your Files: Use clear file naming and folder structures to stay organized.
- Shortcuts Speed Things Up: Keyboard shortcuts make the export process much faster.
📑 Table of Contents
- Understanding the Export Process in Pro Tools
- Setting Up Your Export Settings
- How to Export a Single Track
- How to Export Multiple Tracks
- Best Practices for Exporting Tracks
- Common Export Mistakes and How to Avoid Them
- Expert Tips for Faster Exports
- Exporting for Different Platforms and Purposes
- Key Takeaways
- Conclusion
Understanding the Export Process in Pro Tools
Before you click any buttons, it helps to understand what exporting actually does. When you export a track, Pro Tools renders your session into a standalone audio file. This file contains all the effects, automation, and edits you have made.
Pro Tools offers several export methods. Each one serves a different purpose. Let us look at the main options you will use most often.
Export Selection vs. Export Session
The Export Selection command exports only the audio you have highlighted. This is great when you want just one part of a song. Maybe you need a specific chorus or a guitar solo.
The Export Session command exports the entire session from start to finish. This is what you use when you are ready to deliver a finished mix. You can also use it to export stems, which are groups of tracks bundled together.
What Happens During Export
When you start an export, Pro Tools reads your session data. It applies all the processing you have added. Then it writes the result to a new audio file. The quality of that file depends on the settings you choose.
Much like how you would maintain your equipment for best performance — for instance, understanding the labor cost to replace AC compressor in car helps you plan for proper maintenance — understanding your export settings helps you plan for high-quality audio output.
Setting Up Your Export Settings
The export settings determine the quality and format of your final file. Getting these right is essential. Wrong settings can lead to poor audio quality or files that do not work in your target player.
Choosing the Right File Format
Pro Tools supports many audio file formats. Here are the most common ones:
- WAV (Waveform): This is the standard for professional audio. WAV files are uncompressed and lossless. They preserve every detail of your mix. Use WAV when quality matters most.
- AIFF: Similar to WAV but developed by Apple. AIFF files also offer uncompressed, high-quality audio. Many Mac users prefer this format.
- MP3: A compressed format that reduces file size significantly. MP3 is great for sharing online or uploading to streaming platforms. However, it loses some audio quality.
- FLAC: A compressed format that keeps all the original quality. FLAC files are smaller than WAV but lossless. They are a good middle ground.
Sample Rate and Bit Depth
These two settings control the audio resolution of your export.
- Sample Rate: This is how many times per second the audio is sampled. The standard is 44.1 kHz for CD quality. 48 kHz is common for video. Higher rates like 96 kHz capture more detail but create larger files.
- Bit Depth: This controls the dynamic range. 16-bit is standard for CD. 24-bit gives you more headroom and is preferred for mastering and archiving.
For most exports, 44.1 kHz and 24-bit is a safe and high-quality choice. If you are exporting for video, use 48 kHz instead.
How to Export a Single Track
Exporting one track is the most basic export task. Here is how to do it step by step.
- Select the Track: Click on the track you want to export. Make sure it is armed for export.
- Highlight the Region: Use the selector tool to highlight the portion you want to export. If you want the whole track, press Ctrl+A (Windows) or Cmd+A (Mac).
- Go to File Menu: Click File, then Export, then Export Selection.
- Choose Settings: A dialog box will appear. Pick your format, sample rate, and bit depth.
- Name Your File: Give the file a clear, descriptive name.
- Click Save: Pro Tools will render the track and save it to your chosen location.
This method works well when you need a single track for a demo or review. It is fast and straightforward.
Quick Tip for Single Track Export
Use the Save In dropdown in the export dialog to choose your destination folder. Always create a dedicated export folder so your files stay organized. This saves you time searching later.
How to Export Multiple Tracks
Sometimes you need to export more than one track at a time. Maybe you are preparing stems for a mixer or sending files to a collaborator. Pro Tools makes this possible with the Export Session command.
Exporting Stems
Stems are grouped tracks exported together. For example, you might group all drums into one stem, all vocals into another, and so on. Here is how to do it.
- Group Your Tracks: In the Edit window, select the tracks you want to group together.
- Go to File Menu: Click File, then Export, then Export Session.
- Choose Stems Format: In the export dialog, select the stems option.
- Set Your Preferences: Choose format, sample rate, and bit depth.
- Click Export: Pro Tools will create separate files for each group.
Much like how adding oil to your AC compressor keeps it running smoothly, organizing your export workflow keeps your sessions clean and efficient.
Using the Batch Export Feature
Batch export is a powerful tool for exporting many tracks at once. Instead of exporting each track individually, you can queue them all up and let Pro Tools do the work.
Here is how to set up a batch export:
- Step 1: Select all the tracks you want to export in the Edit window.
- Step 2: Right-click and choose the export option.
- Step 3: Set your format and naming conventions.
- Step 4: Click export and let Pro Tools process all tracks at once.
This method saves a lot of time, especially for projects with many tracks. It is ideal for mixing engineers and producers who work on multiple sessions daily.
Best Practices for Exporting Tracks
Following best practices ensures your exported files are clean, organized, and ready for any purpose. Here are the habits every Pro Tools user should adopt.
Name Your Files Clearly
Use a consistent naming convention. Include the project name, track name, and version number. For example, “ProjectName_Vocal_V1.wav” tells you exactly what the file is and which version it is.
Create a Dedicated Export Folder
Never export files to your desktop or downloads folder. Create a specific folder for each project. Inside that folder, make subfolders for exports, stems, and masters. This keeps everything tidy.
Always Check Your Export Settings
Before you click export, double-check your settings. A wrong sample rate or bit depth can ruin an otherwise perfect mix. Make sure the format matches what the client or platform requires.
Listen Before You Deliver
After exporting, always play back the file. Check for any issues like clicks, pops, or unexpected silence. This final check can save you from embarrassing mistakes.
Keep Your Session Organized
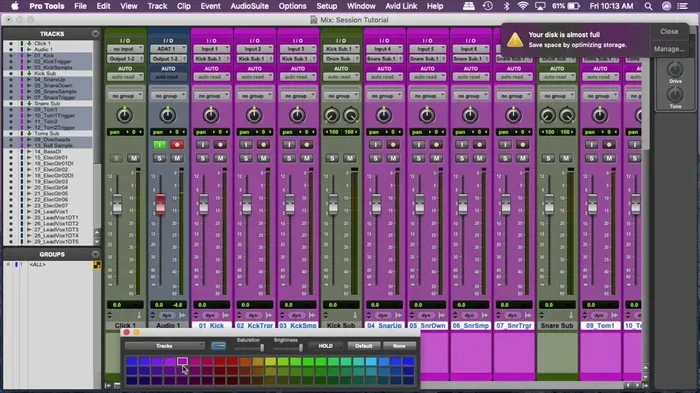
A clean session makes exporting faster and easier. Color-code your tracks, label them clearly, and group related tracks together. This reduces errors during the export process.
Just as the cost to replace compressor in AC unit varies depending on the system, your export settings should be chosen based on the specific needs of your project and delivery requirements.
Common Export Mistakes and How to Avoid Them
Even experienced users make export mistakes. Here are the most common ones and how to fix them.
Exporting with the Wrong Sample Rate
This is the number one export mistake. If your session is at 48 kHz but you export at 44.1 kHz, the audio will sound slightly different. Always match your export sample rate to your session rate.
Forgetting to Bounce Effects
If you have real-time effects on your tracks, they will not be included in the export unless you bounce them first. Use the Consolidate or Render function to freeze your effects into the audio.
Using Low Bit Depth for Master Exports
Never export your final master at 16-bit if you plan to do further processing. Always use 24-bit for mastering exports. You can dither down to 16-bit at the final delivery stage.
Not Checking File Names
Exporting over an existing file by accident is easy to do. Always check the file name and location before you click save. Pro Tools will overwrite without warning.
Ignoring Dithering
When you reduce bit depth from 24-bit to 16-bit, you need to apply dithering. This reduces quantization noise. Pro Tools has built-in dithering options. Always use them for final 16-bit exports.
Expert Tips for Faster Exports
Once you understand the basics, these expert tips will speed up your workflow significantly.
Use Keyboard Shortcuts
Memorize the export shortcuts. In Pro Tools, the default shortcut for Export Selection is Ctrl+Shift+E (Windows) or Cmd+Shift+E (Mac). Using shortcuts saves seconds on every export, and those seconds add up over a long session.
Set Default Export Settings
Pro Tools lets you save export presets. Create a preset with your most-used settings. This way, you do not have to reconfigure the dialog every time you export.
Use Offline Bounce for Faster Rendering
Offline bounce renders your tracks without using real-time processing. This means Pro Tools can export much faster than it would during playback. Use offline bounce for long sessions or when you are in a hurry.
Export in Phases
For complex sessions, export in phases. First, export individual tracks. Then, export groups and stems. Finally, export the full mix. This organized approach reduces errors and makes troubleshooting easier.
Much like understanding the what size hose to use with air compressor ensures proper airflow, choosing the right export settings ensures your audio maintains its full quality from session to final file.
Exporting for Different Platforms and Purposes
The way you export depends on where the file will be used. Different platforms have different requirements. Here is a quick guide.
Exporting for Streaming Services
Platforms like Spotify, Apple Music, and YouTube accept WAV files. They prefer 44.1 kHz or 48 kHz sample rates. Use 16-bit or 24-bit depending on the platform. Most streaming services handle 24-bit files perfectly fine.
Exporting for Video
Video projects typically use 48 kHz sample rate. Export in WAV or AIFF format. Make sure your audio matches the video frame rate and duration exactly.
Exporting for CD or Vinyl
CD requires 44.1 kHz and 16-bit. Vinyl mastering often uses 24-bit WAV files with specific level adjustments. Always check the delivery specs before exporting.
Exporting for Archiving
For archiving, use the highest quality settings available. Export at 96 kHz and 24-bit in WAV format. This preserves every detail of your session for future use.
Key Takeaways
- Understand Your Export Options: Pro Tools offers multiple export methods for different needs.
- Choose the Right Format: WAV and AIFF for quality, MP3 for sharing, FLAC for compressed lossless.
- Match Sample Rate and Bit Depth: Always match your export settings to your session settings.
- Use Batch Export for Efficiency: Export multiple tracks at once to save time.
- Follow Best Practices: Name files clearly, create export folders, and always listen back.
- Avoid Common Mistakes: Check sample rate, apply dithering, and never overwrite files.
- Use Expert Shortcuts: Keyboard shortcuts and presets make the process faster and more efficient.
Conclusion
Exporting tracks in Pro Tools does not have to be complicated. Once you understand the basic steps and settings, the process becomes second nature. Start with simple single-track exports and gradually work your way up to batch exports and stems.
Pay attention to your file formats, sample rates, and bit depths. These small details make a big difference in your final audio quality. Organize your files with clear names and consistent folder structures.
Use the tips and shortcuts in this guide to speed up your workflow. The more you export, the faster and more confident you will become. Remember, every great mix needs a clean export to shine.
Now that you know how to export tracks in Pro Tools quickly and easily, it is time to put these skills into practice. Open your session, choose your settings, and hit export. You will be amazed at how simple and satisfying the process can be.
Keep experimenting with different settings and formats. The more you practice, the more natural it will feel. Happy exporting!
Frequently Asked Questions
What is the best file format for exporting tracks in Pro Tools?
WAV is the best format for most purposes. It is uncompressed and lossless, which means it preserves the full quality of your mix. Use AIFF if you work primarily on Mac systems. Use MP3 only when you need smaller file sizes for sharing online.
Can I export multiple tracks at once in Pro Tools?
Yes, you can use the Batch Export feature or the Export Session command to export multiple tracks at once. Select all the tracks you want to export, set your preferences, and Pro Tools will process them together. This saves a lot of time compared to exporting each track individually.
What sample rate should I use when exporting tracks?
Use 44.1 kHz for audio-only projects like music. Use 48 kHz for video projects. Match your export sample rate to your session rate to avoid any pitch or quality issues. For archiving, you can go higher to 96 kHz.
Do I need to dither when exporting from Pro Tools?
Yes, you should dither when reducing bit depth from 24-bit to 16-bit. Dithering reduces quantization noise that can occur during the bit depth reduction. Pro Tools has built-in dithering options in the export dialog. Always apply it for final 16-bit delivery.
How do I export stems in Pro Tools?
To export stems, group your related tracks together. Then go to File, Export, and choose Export Session. Select the stems format in the export dialog. Pro Tools will create separate audio files for each group of tracks you have organized.
What is the difference between Export Selection and Export Session?
Export Selection exports only the highlighted portion of a track or tracks. Export Session exports the entire session from start to finish. Use Export Selection for specific clips or sections. Use Export Session for full mixes, stems, or complete session exports.
=== INTERNAL LINKS ===