Your Guide to the Install Kit for RV Combo Shower Pan
An install kit for RV combo shower pan gives you everything you need to build a watertight shower in your RV without the headache. These kits include pans, faucets, drains, and seals that work together perfectly. Whether you are remodeling an older rig or building a new one, the right kit saves time and money. We will walk you through every step from choosing the kit to finishing the install. Let us get your RV shower looking and working like new.
Key Takeaways
- Complete Kits Save Time: An install kit bundles all the parts you need so you do not have to hunt for individual components.
- Material Choice Matters: Fiberglass and acrylic pans each have pros and cons for durability and weight.
- Proper Sealing Is Critical: A good seal prevents leaks that can damage your RV’s floor and frame.
- DIY Is Doable: Most homeowners can complete the install with basic tools and patience.
- Match Your RV Model: Always verify dimensions and compatibility before purchasing a kit.
- Winter Care Extends Life: Proper maintenance keeps your combo shower pan performing for years.
📑 Table of Contents
- What Is an Install Kit for RV Combo Shower Pan?
- Why You Need a Dedicated Install Kit
- What Comes in a Typical Install Kit?
- How to Choose the Right Kit for Your RV
- Step-by-Step Installation Guide
- Common Mistakes to Avoid
- Expert Tips for a Professional-Quality Finish
- How to Maintain Your RV Combo Shower Pan
- Comparing Popular RV Combo Shower Pan Install Kits
- Final Thoughts
What Is an Install Kit for RV Combo Shower Pan?
An install kit for RV combo shower pan is a pre-packaged set of parts designed to make building a shower in your recreational vehicle fast and straightforward. Instead of buying every piece separately, you get a matching collection of components that work together as a system.
Most kits include a shower pan, faucet or showerhead assembly, drain assembly, mounting hardware, and sealing materials. Some kits also come with hoses, connectors, and trim pieces. The goal is to give you one box that covers the entire shower installation.
These kits are popular among RV owners for a few key reasons. First, they eliminate guesswork. Second, they save money compared to buying premium parts individually. Third, they reduce the number of trips to the hardware store or online retailer. If you have ever tried to piece together a shower setup from scratch, you know how frustrating it can be when parts do not match.
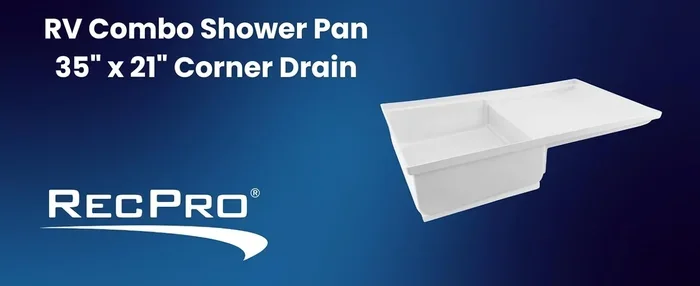
A combo shower pan combines the shower base and drain into one unit. This design simplifies installation and reduces the number of separate pieces you need to manage. The result is a cleaner look and fewer potential leak points.
Whether you own a travel trailer, a fifth wheel, or a Class C motorhome, there is likely a combo shower pan kit that fits your setup. The key is finding the right size and style for your specific RV model.
Why You Need a Dedicated Install Kit
You might wonder why you cannot just buy a shower pan and faucet separately. The answer comes down to compatibility and convenience. Here is why a dedicated kit makes a real difference.
Everything Matches
When you buy a combo shower pan install kit, every part is designed to work with every other part. The drain fits the pan. The faucet connects to the plumbing that matches the pan’s configuration. The seals and gaskets are sized correctly. This matching process is already done for you.
Mixing and matching parts from different manufacturers can lead to gaps, leaks, and frustration. A kit removes that risk entirely.
Saves Money
Buying a bundle is almost always cheaper than purchasing each item separately. Manufacturers pass those savings on to you. A typical RV combo shower pan install kit costs less than buying a pan, drain, faucet, and seals individually.
Faster Installation
With all parts on hand and designed to work together, you spend less time figuring out what goes where. The instructions in a kit are written specifically for that set of parts. You do not need to adapt or improvise.
Fewer Return Trips
One of the biggest time sinks in any DIY project is discovering you are missing a part halfway through. A complete kit means everything arrives together. You open the box and get to work.
What Comes in a Typical Install Kit?
Not every kit is identical, but most include a core set of components. Here is what you can generally expect to find inside the box.
Shower Pan
The pan is the foundation of your shower. It holds the water and directs it toward the drain. Most RV combo shower pans are made from fiberglass or acrylic. Fiberglass pans tend to be lighter and more affordable. Acrylic pans offer a smoother finish and often feel more premium underfoot.
Pan sizes vary to fit different RV floor plans. Common dimensions include 30-by-30 inches, 32-by-32 inches, and 34-by-34 inches. Always measure your available space before ordering.
Drain Assembly
The drain is one of the most important parts of the kit. It removes water from the shower floor and directs it into your RV’s grey water tank. A good drain assembly includes a strainer, a P-trap, and a connection point for the drain hose.
Look for kits with brass or stainless-steel drains. These materials resist corrosion better than plastic alternatives. A tight-sealing drain prevents water from leaking underneath your RV.
Faucet and Showerhead
Most combo shower kits include a shower faucet with a handheld or fixed showerhead. The faucet controls water flow and temperature. Some kits include a single-handle design for easy operation, while others use two separate handles for hot and cold.
Showerheads in RV kits are typically low-flow models designed to conserve water. This is important when you are boondocking or using a limited water supply.
Hoses and Connectors
Flexible hoses connect the faucet to the water supply. Connectors attach the drain to the grey water outlet. These parts are usually included in the kit and sized correctly for RV plumbing systems.
Sealing and Mounting Materials
Sealant tape, silicone, mounting brackets, and screws round out the kit. These small but essential pieces ensure a watertight and secure installation. Do not skip these components or substitute with lower-quality alternatives.
How to Choose the Right Kit for Your RV
Selecting the correct install kit for RV combo shower pan requires a bit of planning. Here is what to consider before you buy.
Measure Your Space
Start by measuring the area where the shower will be installed. Measure the length, width, and depth of the available space. Note any obstructions like support beams or access panels.
Write down these measurements and bring them when you shop. A kit that is too large will not fit. A kit that is too small will leave gaps and look awkward.
Check Your RV Model
Different RV manufacturers use different floor plans. Some brands have standardized shower dimensions, while others use custom sizes. Look up your specific RV model to find the recommended shower pan size.
You can also measure your existing shower pan if you are replacing one. Note the shape (rectangular, square, or curved) and the drain location.
Choose Your Material
Fiberglass and acrylic are the two most common materials for RV shower pans. Here is a quick comparison to help you decide.
- Fiberglass: Lightweight, affordable, and easy to cut if modifications are needed. However, fiberglass can crack under heavy impact over time.
- Acrylic: Durable, smooth, and resistant to cracks. Acrylic pans hold up better to temperature changes. They cost a bit more but last longer.
For most RV owners, acrylic is the better long-term choice. If budget is a major concern, fiberglass works well for light-duty use.
Consider Your Water System
Think about how your RV’s water system is set up. Do you have a 12V electric pump or a city water connection? Does your RV use a tankless water heater or a traditional tank-style heater?
Some shower kits are designed specifically for certain water systems. Make sure the kit you choose matches your existing setup or plan for any necessary adapters.
Think About Future Maintenance
Choose a kit that is easy to service. Look for drains that are simple to remove and clean. Select faucets with replaceable cartridges. A well-designed kit makes future maintenance much less of a chore.
Step-by-Step Installation Guide
Installing a combo shower pan is a manageable DIY project. Here is a detailed walkthrough of the process.
Step 1: Gather Your Tools
Before you start, make sure you have the right tools on hand. You will need a screwdriver, adjustable wrench, drill with appropriate bits, silicone sealant, measuring tape, and a level. Having everything ready prevents delays and frustration.
Step 2: Remove the Old Shower Unit
If you are replacing an existing shower, start by turning off the water supply. Disconnect the hoses and remove the old pan and faucet. Carefully pull out any old sealant or adhesive from the floor area. Clean the surface thoroughly before proceeding.
Step 3: Prepare the Floor Opening
Check the floor opening for any damage or rot. Repair any soft spots before installing the new pan. A stable subfloor is essential for a long-lasting shower installation.
Make sure the opening is clean and dry. Any moisture trapped under the pan can lead to mold and mildew problems.
Step 4: Install the Drain
Start by threading the drain assembly through the floor opening from below. Secure it with the provided nut and washer. Apply plumber’s tape to the threads for a tighter seal.
Make sure the drain is level and centered in the opening. A misaligned drain will cause water to pool in the wrong spots.
Step 5: Set the Shower Pan
Place the shower pan into the opening. Slide it gently over the drain assembly. Adjust the pan so it sits flat and level on the floor.
Use a level to check the pan’s surface. Even a small tilt can cause water to drain toward one side or leak past the edges.
Step 6: Connect the Faucet and Showerhead
Attach the faucet body to the mounting point on the shower wall or pan. Connect the water supply hoses. Attach the showerhead to the faucet outlet.
Tighten all connections firmly but do not overtighten. Over-tightening can crack fittings and create new leak points.
Step 7: Seal the Edges
Apply silicone sealant around the edges of the shower pan where it meets the floor and walls. Smooth the sealant with a wet finger or tool to create an even bead.
Let the sealant cure according to the manufacturer’s instructions before using the shower. This usually takes 24 to 48 hours.
Step 8: Test the Installation
Once everything is dry, turn on the water supply and let the shower run for several minutes. Check for leaks at every connection point. Inspect the drain for proper water flow.
If you spot any leaks, tighten the connections or add more sealant as needed. A thorough test now prevents water damage later.
Common Mistakes to Avoid
Even experienced DIYers can make errors during a shower pan installation. Here are the most common mistakes and how to avoid them.
- Skipping measurements: Guessing the size almost always leads to a poor fit. Always measure twice and order once.
- Using the wrong sealant: Not all sealants are safe for RV use. Choose a product specifically designed for RV bathrooms and wet areas.
- Ignoring the subfloor: Installing a new pan over a damaged subfloor will lead to rot and structural problems. Fix the floor first.
- Overtightening connections: Tightening too much cracks fittings and creates leaks. snug is good, but forced is bad.
- Forgetting to check the drain slope: Water needs to flow toward the drain. If the pan is not positioned correctly, standing water will develop.
Expert Tips for a Professional-Quality Finish
Want your RV shower to look and perform like a professional job? Here are some tips from experienced RV renovators.
Use a Backer Board
If your shower wall area has any flex or movement, consider installing a cement backer board behind the pan. This adds rigidity and prevents cracks from forming over time.
Apply Double Sealing
For extra peace of mind, apply sealant both under the pan and around the edges. Double sealing adds a layer of protection against moisture intrusion.
Keep a Maintenance Schedule
Inspect your shower pan and seals every few months. Look for cracks, loose connections, or discoloration. Catching small problems early prevents expensive repairs later.
Winterize Properly
If you store your RV in freezing temperatures, make sure to winterize the shower plumbing. Water left in the lines and pan can freeze and crack the unit. A proper winterization routine protects all your RV’s water systems, including the shower.
Upgrade When Needed
Technology improves every year. If your current shower setup is old and inefficient, consider upgrading to a newer combo kit. Modern kits offer better water flow, easier cleaning, and improved durability.
How to Maintain Your RV Combo Shower Pan
Once your install kit is in place, regular maintenance keeps it performing well for years. Here is what to do.
- Clean regularly: Use a gentle cleaner and soft cloth to wipe down the pan and faucet. Avoid abrasive scrubbers that can scratch the surface.
- Check seals: Inspect the silicone seals around the pan edges every few months. Reapply sealant if you notice any gaps or cracks.
- Clear the drain: Remove hair and debris from the drain strainer regularly. A clogged drain causes water to back up and overflow.
- Inspect hoses: Look for cracks or leaks in the water supply hoses. Replace any damaged hoses immediately.
- Flush the system: Periodically flush the shower system with clean water to remove buildup and sediment.
For more information on maintaining your RV’s water systems, check out our guide on air compressor use for home and RV applications.
Comparing Popular RV Combo Shower Pan Install Kits
The market offers several options for RV combo shower pan install kits. Here is a quick comparison of what to look for across different brands and models.
When comparing kits, focus on three things: material quality, included components, and compatibility. A kit that checks all three boxes gives you the best value and the most reliable installation. Do not just look at price. A slightly more expensive kit with better materials will often outlast a cheaper alternative by several years.
Read reviews from other RV owners before making a final decision. Real-world feedback helps you understand how a kit performs over time, not just on day one.
Final Thoughts
An install kit for RV combo shower pan is one of the smartest purchases you can make for your RV bathroom project. It gives you a complete, compatible set of parts that work together flawlessly. The installation process is straightforward enough for most DIYers, and the results are professional-quality.
Take your time choosing the right kit. Measure carefully. Follow the installation steps closely. Maintain your shower regularly. These simple steps pay off in a leak-free, great-looking shower that lasts for years.
Your RV is your home on the road. A comfortable, functioning shower makes every trip more enjoyable. Invest in the right kit and enjoy the difference it makes.
Frequently Asked Questions
What size install kit do I need for my RV combo shower pan?
Measure the length and width of your shower floor opening and compare it to the kit’s dimensions. Most RV combo shower pans come in standard sizes like 30-by-30 or 34-by-34 inches. Always verify your specific RV model’s requirements before ordering.
Can I install an RV combo shower pan kit myself?
Yes, most kits are designed for DIY installation with basic tools. If you can handle simple plumbing and sealing tasks, you should be able to complete the job. Allow a few hours for the full process including drying time.
What material is best for an RV shower pan?
Acrylic is the most popular choice because it is durable, lightweight, and resistant to cracks. Fiberglass is a more affordable option but can be more prone to damage over time. Choose based on your budget and how heavily you use the shower.
How long does it take to install a combo shower pan kit?
A typical installation takes between two and four hours, not including curing time for the sealant. The actual work is straightforward, but taking your time to ensure proper alignment and sealing is important for a leak-free result.
Do I need special tools to install an RV shower pan kit?
No special tools are required. A screwdriver, adjustable wrench, drill, measuring tape, and a level are all you need. The kit includes all the hardware and connectors necessary for the job.
How do I prevent leaks in my RV shower pan installation?
Use the sealant provided in the kit and apply it generously around all edges. Make sure the drain is properly seated and tightened. Test the installation thoroughly with water before regular use, and inspect seals periodically to catch any issues early.